HP Armada 1100 Armada 1100 Family of Personal Computers Maintenance and Servic - Page 133
up the inverter board and disconnecting it from the display cable
 |
View all HP Armada 1100 manuals
Add to My Manuals
Save this manual to your list of manuals |
Page 133 highlights
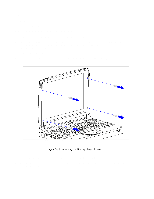
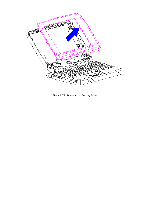
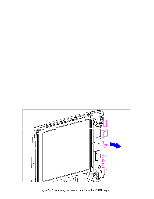
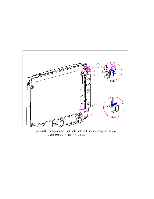
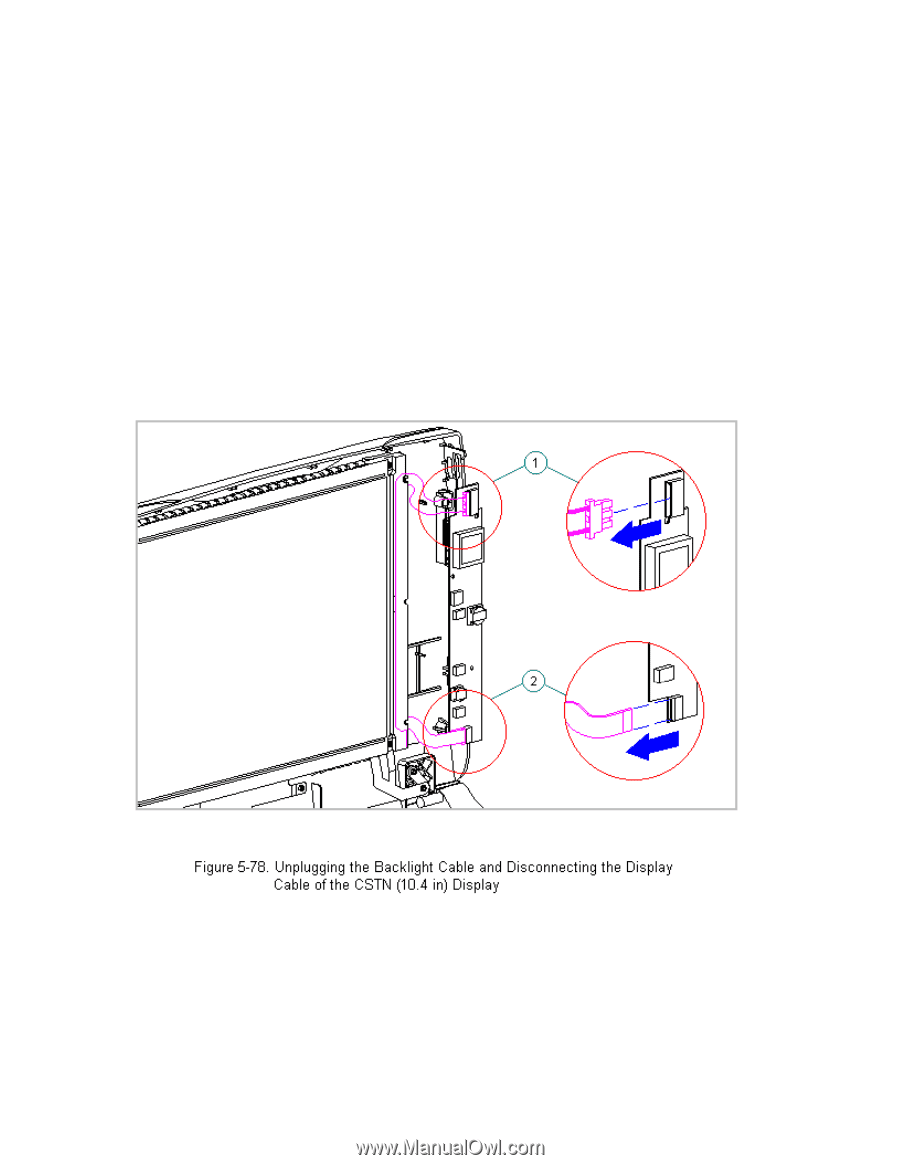
WARNING Ensure that the power cord is disconnected from the electrical outlet and that the battery pack is removed from the computer before beginning replacement procedures. Failure to disconnect power could result in serious injury or damage to the equipment. 5. Unplug the backlight cable [1] from the display inverter board to free the inverter board from the display enclosure (Figure 5-78). 6. Remove the display cable [2] from the inverter board by gently lifting up the inverter board and disconnecting it from the display cable and the display enclosure (Figure 5-78). 7. Remove the screw in the lower-right corner of the display to release the ground wire which is attached to the inverter board.
-
 1
1 -
2
-
3
-
4
-
5
-
6
-
7
-
8
-
9
-
10
-
11
-
12
-
13
-
14
-
15
-
16
-
17
-
18
-
19
-
20
-
21
-
22
-
23
-
24
-
25
-
26
-
27
-
28
-
29
-
30
-
31
-
32
-
33
-
34
-
35
-
36
-
37
-
38
-
39
-
40
-
41
-
42
-
43
-
44
-
45
-
46
-
47
-
48
-
49
-
50
-
51
-
52
-
53
-
54
-
55
-
56
-
57
-
58
-
59
-
60
-
61
-
62
-
63
-
64
-
65
-
66
-
67
-
68
-
69
-
70
-
71
-
72
-
73
-
74
-
75
-
76
-
77
-
78
-
79
-
80
-
81
-
82
-
83
-
84
-
85
-
86
-
87
-
88
-
89
-
90
-
91
-
92
-
93
-
94
-
95
-
96
-
97
-
98
-
99
-
100
-
101
-
102
-
103
-
104
-
105
-
106
-
107
-
108
-
109
-
110
-
111
-
112
-
113
-
114
-
115
-
116
-
117
-
118
-
119
-
120
-
121
-
122
-
123
-
124
-
125
-
126
-
127
-
 128
128 -
 129
129 -
 130
130 -
 131
131 -
 132
132 -
 133
133 -
 134
134 -
 135
135 -
 136
136 -
 137
137 -
 138
138 -
139
-
140
-
141
-
142
-
143
-
144
-
145
-
146
-
147
-
148
-
149
-
150
-
151
-
152
-
153
-
154
-
155
-
156
-
157
-
158
-
159
-
160
-
161
-
162
-
163
-
164
-
165
-
166
-
167
-
168
-
169
-
170
-
171
-
172
-
173
-
174
-
175
-
176
-
177
-
178
-
179
-
180
-
181
-
182
-
183
-
184
-
185
-
186
-
187
-
188
-
189
-
190
-
191
-
192
-
193
-
194
-
195
-
196
-
197
-
198
 |
 |
>>>>>>>>>>>>>>>>>>>>>>>>>>>>>>>>> WARNING <<<<<<<<<<<<<<<<<<<<<<<<<<<<<<<<<
Ensure that the power cord is disconnected from the electrical outlet and
that the battery pack is removed from the computer before beginning
replacement procedures. Failure to disconnect power could result in serious
injury or damage to the equipment.
>>>>>>>>>>>>>>>>>>>>>>>>>>>>>>>>>>>>><<<<<<<<<<<<<<<<<<<<<<<<<<<<<<<<<<<<<<
5. Unplug the backlight cable [1] from the display inverter board to free
the inverter board from the display enclosure (Figure 5-78).
6. Remove the display cable [2] from the inverter board by gently lifting
up the inverter board and disconnecting it from the display cable and
the display enclosure (Figure 5-78).
7. Remove the screw in the lower-right corner of the display to release the
ground wire which is attached to the inverter board.