HP Armada 1100 Armada 1100 Family of Personal Computers Maintenance and Servic - Page 95
Hard Drive, Removing the Hard Drive
 |
View all HP Armada 1100 manuals
Add to My Manuals
Save this manual to your list of manuals |
Page 95 highlights
4. Rotate the battery release button counterclockwise, until it bows slightly, and lift it up to clear the hook on the computer base (Figure 5-28). 5. To replace the battery release button and spring, reverse the previous steps. Hard Drive This section contains removal procedures for the following hard drive components: o Hard drive o Hard drive bracket Removing the Hard Drive To remove the hard drive, follow these steps: 1. Turn the computer off and remove all external devices, including the battery pack and the AC Adapter. Remove the diskette and PC Card, if installed (Section 5.3). 2. Remove the keyboard assembly (Section 5.7). 3. Remove the screw that secures the hard drive bracket to the system chassis (Figure 5-29).
-
 1
1 -
2
-
3
-
4
-
5
-
6
-
7
-
8
-
9
-
10
-
11
-
12
-
13
-
14
-
15
-
16
-
17
-
18
-
19
-
20
-
21
-
22
-
23
-
24
-
25
-
26
-
27
-
28
-
29
-
30
-
31
-
32
-
33
-
34
-
35
-
36
-
37
-
38
-
39
-
40
-
41
-
42
-
43
-
44
-
45
-
46
-
47
-
48
-
49
-
50
-
51
-
52
-
53
-
54
-
55
-
56
-
57
-
58
-
59
-
60
-
61
-
62
-
63
-
64
-
65
-
66
-
67
-
68
-
69
-
70
-
71
-
72
-
73
-
74
-
75
-
76
-
77
-
78
-
79
-
80
-
81
-
82
-
83
-
84
-
85
-
86
-
87
-
88
-
89
-
 90
90 -
 91
91 -
 92
92 -
 93
93 -
 94
94 -
 95
95 -
 96
96 -
 97
97 -
 98
98 -
 99
99 -
 100
100 -
101
-
102
-
103
-
104
-
105
-
106
-
107
-
108
-
109
-
110
-
111
-
112
-
113
-
114
-
115
-
116
-
117
-
118
-
119
-
120
-
121
-
122
-
123
-
124
-
125
-
126
-
127
-
128
-
129
-
130
-
131
-
132
-
133
-
134
-
135
-
136
-
137
-
138
-
139
-
140
-
141
-
142
-
143
-
144
-
145
-
146
-
147
-
148
-
149
-
150
-
151
-
152
-
153
-
154
-
155
-
156
-
157
-
158
-
159
-
160
-
161
-
162
-
163
-
164
-
165
-
166
-
167
-
168
-
169
-
170
-
171
-
172
-
173
-
174
-
175
-
176
-
177
-
178
-
179
-
180
-
181
-
182
-
183
-
184
-
185
-
186
-
187
-
188
-
189
-
190
-
191
-
192
-
193
-
194
-
195
-
196
-
197
-
198
 |
 |
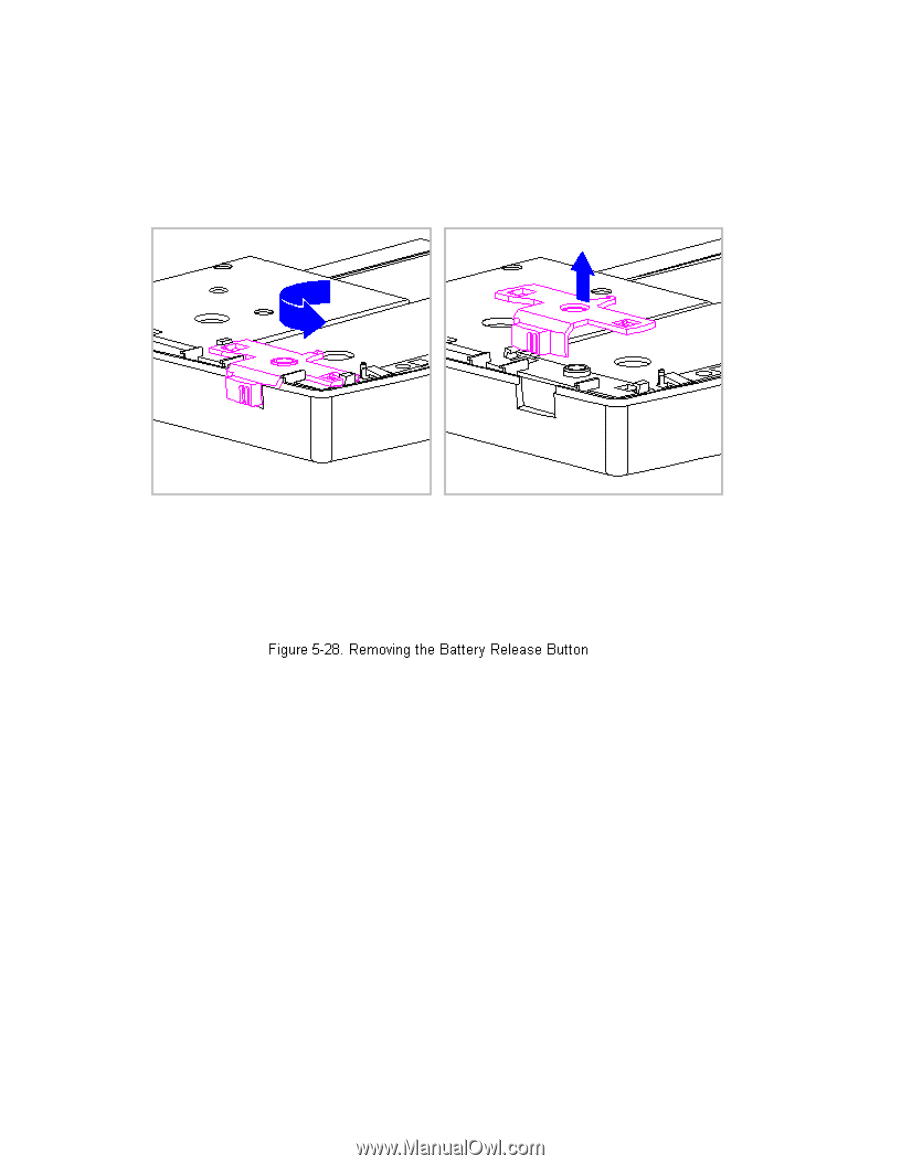
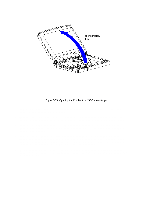
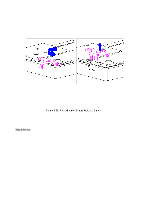
4. Rotate the battery release button counterclockwise, until it bows
slightly, and lift it up to clear the hook on the computer base (Figure
5-28).
5. To replace the battery release button and spring, reverse the previous
steps.
Hard Drive
This section contains removal procedures for the following hard drive
components:
o Hard drive
o Hard drive bracket
Removing the Hard Drive
To remove the hard drive, follow these steps:
1. Turn the computer off and remove all external devices, including the
battery pack and the AC Adapter. Remove the diskette and PC Card, if
installed (Section 5.3).
2. Remove the keyboard assembly (Section 5.7).
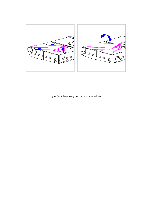
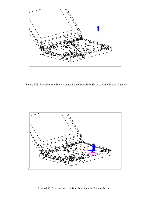
3. Remove the screw that secures the hard drive bracket to the system
chassis (Figure 5-29).
chassis (Figure 5 29)