HP Armada 1100 Armada 1100 Family of Personal Computers Maintenance and Servic - Page 97
Removing the Hard Drive Bracket, Replacing the Hard Drive
 |
View all HP Armada 1100 manuals
Add to My Manuals
Save this manual to your list of manuals |
Page 97 highlights
Removing the Hard Drive Bracket 1. Remove the keyboard assembly (Section 5.7). 2. Remove the hard drive and bracket. Refer to "Removing the Hard Drive" in this section. 3. Remove the four screws from the sides of the hard drive bracket and separate the bracket from the hard drive (Figure 5-31). 4. To replace the hard drive bracket, reverse the previous steps. For proper alignment, replace the rear screws first. Replacing the Hard Drive To replace the hard drive, follow these steps: 1. Set the hard drive and bracket in place and slide it back to connector (Figure 5-32).
-
 1
1 -
2
-
3
-
4
-
5
-
6
-
7
-
8
-
9
-
10
-
11
-
12
-
13
-
14
-
15
-
16
-
17
-
18
-
19
-
20
-
21
-
22
-
23
-
24
-
25
-
26
-
27
-
28
-
29
-
30
-
31
-
32
-
33
-
34
-
35
-
36
-
37
-
38
-
39
-
40
-
41
-
42
-
43
-
44
-
45
-
46
-
47
-
48
-
49
-
50
-
51
-
52
-
53
-
54
-
55
-
56
-
57
-
58
-
59
-
60
-
61
-
62
-
63
-
64
-
65
-
66
-
67
-
68
-
69
-
70
-
71
-
72
-
73
-
74
-
75
-
76
-
77
-
78
-
79
-
80
-
81
-
82
-
83
-
84
-
85
-
86
-
87
-
88
-
89
-
90
-
91
-
 92
92 -
 93
93 -
 94
94 -
 95
95 -
 96
96 -
 97
97 -
 98
98 -
 99
99 -
 100
100 -
 101
101 -
 102
102 -
103
-
104
-
105
-
106
-
107
-
108
-
109
-
110
-
111
-
112
-
113
-
114
-
115
-
116
-
117
-
118
-
119
-
120
-
121
-
122
-
123
-
124
-
125
-
126
-
127
-
128
-
129
-
130
-
131
-
132
-
133
-
134
-
135
-
136
-
137
-
138
-
139
-
140
-
141
-
142
-
143
-
144
-
145
-
146
-
147
-
148
-
149
-
150
-
151
-
152
-
153
-
154
-
155
-
156
-
157
-
158
-
159
-
160
-
161
-
162
-
163
-
164
-
165
-
166
-
167
-
168
-
169
-
170
-
171
-
172
-
173
-
174
-
175
-
176
-
177
-
178
-
179
-
180
-
181
-
182
-
183
-
184
-
185
-
186
-
187
-
188
-
189
-
190
-
191
-
192
-
193
-
194
-
195
-
196
-
197
-
198
 |
 |
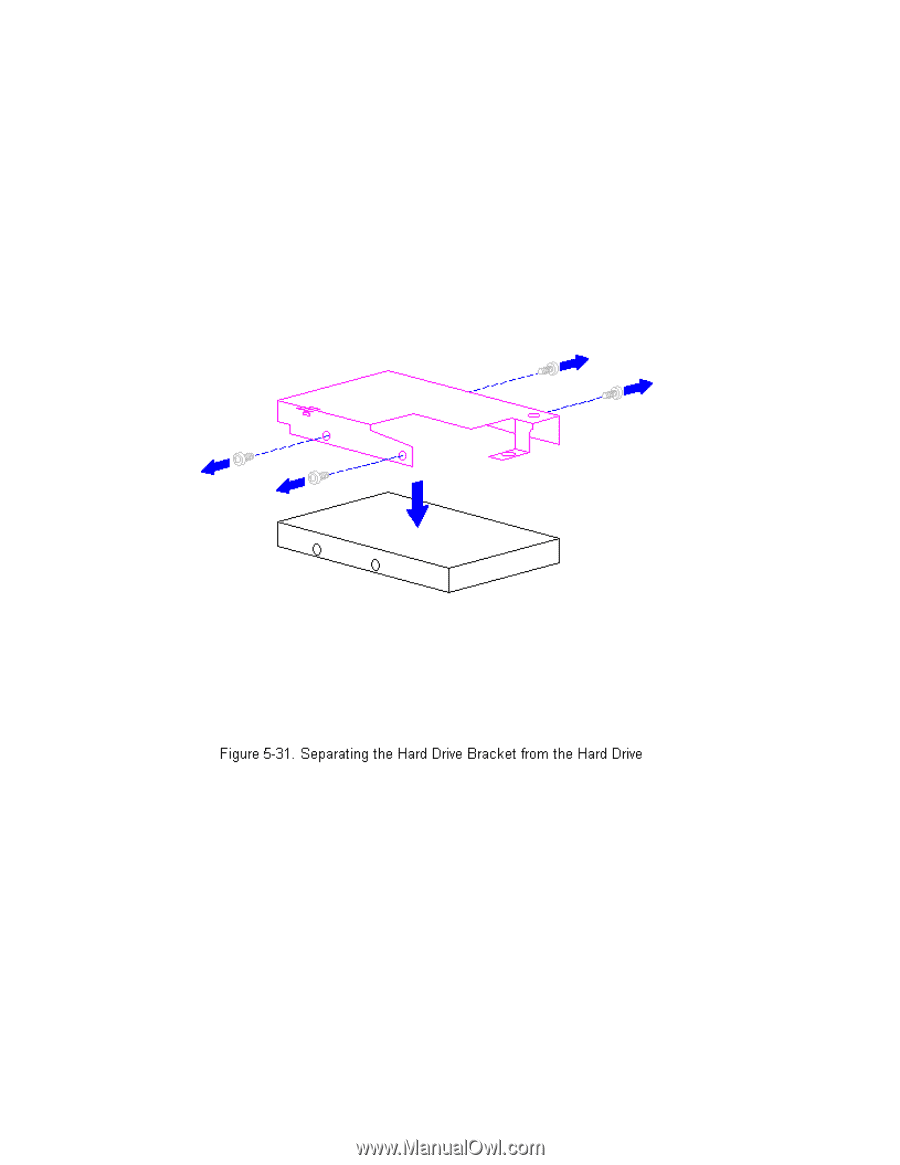
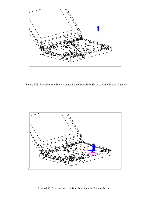
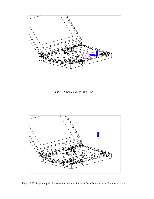
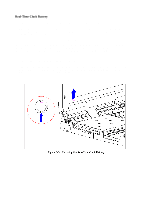
Removing the Hard Drive Bracket
1. Remove the keyboard assembly (Section 5.7).
2. Remove the hard drive and bracket. Refer to "Removing the Hard Drive" in
this section.
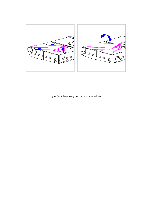
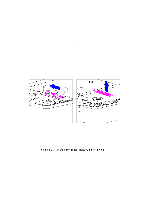
3. Remove the four screws from the sides of the hard drive bracket and
separate the bracket from the hard drive (Figure 5-31).
4. To replace the hard drive bracket, reverse the previous steps. For
proper alignment, replace the rear screws first.
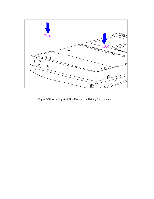
Replacing the Hard Drive
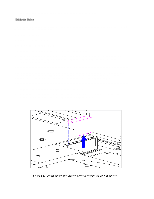
To replace the hard drive, follow these steps:
1. Set the hard drive and bracket in place and slide it back to connector
(Figure 5-32).