HP Armada 1100 Armada 1100 Family of Personal Computers Maintenance and Servic - Page 89
Replacing the Keyboard Assembly
 |
View all HP Armada 1100 manuals
Add to My Manuals
Save this manual to your list of manuals |
Page 89 highlights
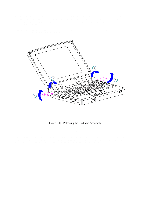
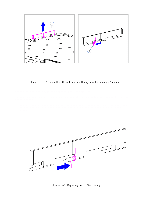
2. Install the PC Card door, ensuring that the spring is placed between the post [1] and the rib [2] (Figure 5-22). Replacing the Keyboard Assembly To install a new keyboard assembly or replace the existing keyboard assembly in the computer, follow these steps: 1. Open the display to its fully opened position of 135-degrees (Figure 5-23 CAUTION The computer becomes top-heavy when the keyboard assembly is removed and the display is opened. Supporting the computer with the hands when it is in the fully opened position prevents damage to the display and the computer. Whenever hand support is removed, open the display assembly to a 90-degree angle
-
 1
1 -
2
-
3
-
4
-
5
-
6
-
7
-
8
-
9
-
10
-
11
-
12
-
13
-
14
-
15
-
16
-
17
-
18
-
19
-
20
-
21
-
22
-
23
-
24
-
25
-
26
-
27
-
28
-
29
-
30
-
31
-
32
-
33
-
34
-
35
-
36
-
37
-
38
-
39
-
40
-
41
-
42
-
43
-
44
-
45
-
46
-
47
-
48
-
49
-
50
-
51
-
52
-
53
-
54
-
55
-
56
-
57
-
58
-
59
-
60
-
61
-
62
-
63
-
64
-
65
-
66
-
67
-
68
-
69
-
70
-
71
-
72
-
73
-
74
-
75
-
76
-
77
-
78
-
79
-
80
-
81
-
82
-
83
-
 84
84 -
 85
85 -
 86
86 -
 87
87 -
 88
88 -
 89
89 -
 90
90 -
 91
91 -
 92
92 -
 93
93 -
 94
94 -
95
-
96
-
97
-
98
-
99
-
100
-
101
-
102
-
103
-
104
-
105
-
106
-
107
-
108
-
109
-
110
-
111
-
112
-
113
-
114
-
115
-
116
-
117
-
118
-
119
-
120
-
121
-
122
-
123
-
124
-
125
-
126
-
127
-
128
-
129
-
130
-
131
-
132
-
133
-
134
-
135
-
136
-
137
-
138
-
139
-
140
-
141
-
142
-
143
-
144
-
145
-
146
-
147
-
148
-
149
-
150
-
151
-
152
-
153
-
154
-
155
-
156
-
157
-
158
-
159
-
160
-
161
-
162
-
163
-
164
-
165
-
166
-
167
-
168
-
169
-
170
-
171
-
172
-
173
-
174
-
175
-
176
-
177
-
178
-
179
-
180
-
181
-
182
-
183
-
184
-
185
-
186
-
187
-
188
-
189
-
190
-
191
-
192
-
193
-
194
-
195
-
196
-
197
-
198
 |
 |
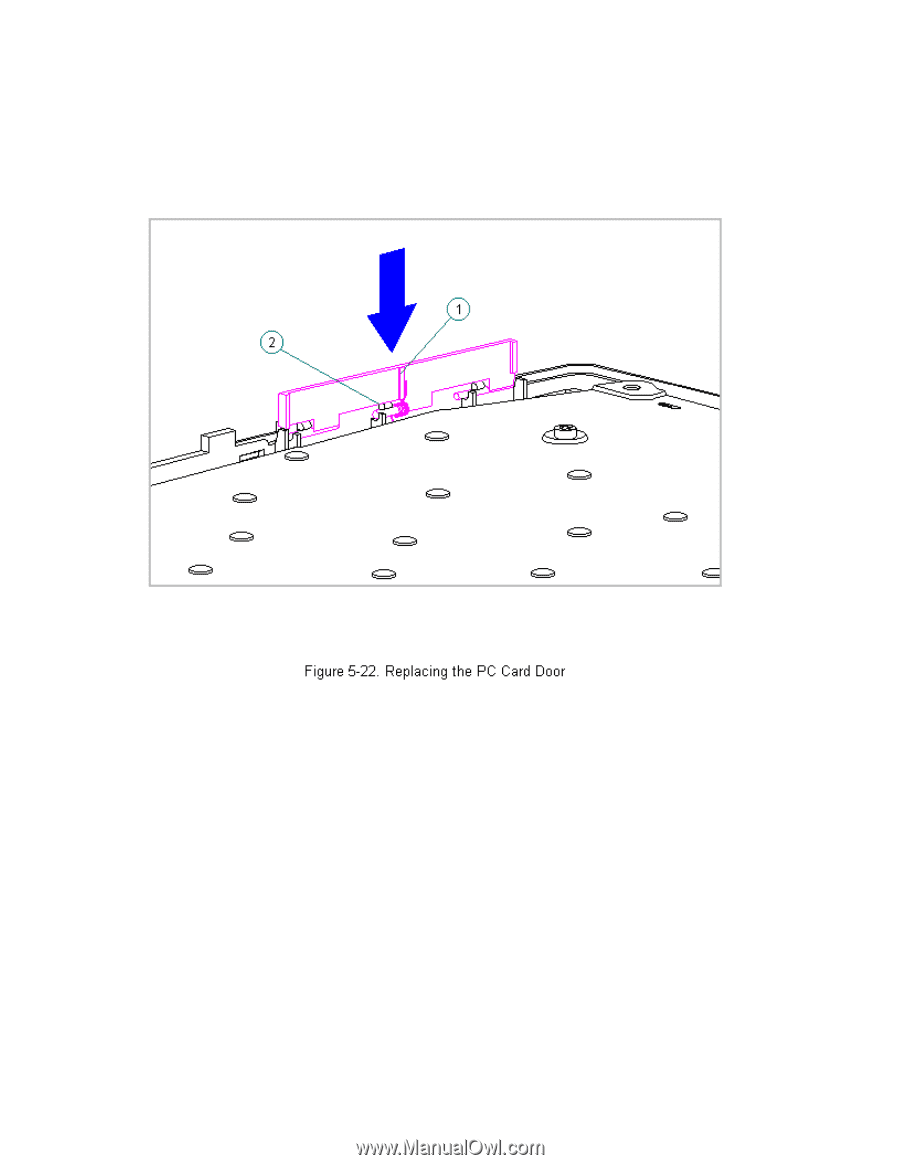
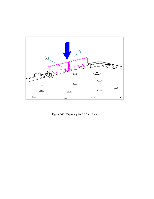
2. Install the PC Card door, ensuring that the spring is placed between
the post [1] and the rib [2] (Figure 5-22).
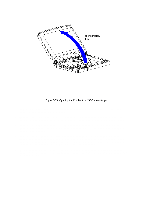
Replacing the Keyboard Assembly
To install a new keyboard assembly or replace the existing keyboard
assembly in the computer, follow these steps:
1. Open the display to its fully opened position of 135-degrees (Figure
5-23).
>>>>>>>>>>>>>>>>>>>>>>>>>>>>>>>>> CAUTION <<<<<<<<<<<<<<<<<<<<<<<<<<<<<<<<<
The computer becomes top-heavy when the keyboard assembly is removed and
the display is opened. Supporting the computer with the hands when it is in
the fully opened position prevents damage to the display and the computer.
Whenever hand support is removed, open the display assembly to a 90-degree
angle.
>>>>>>>>>>>>>>>>>>>>>>>>>>>>>>>>>>>>><<<<<<<<<<<<<<<<<<<<<<<<<<<<<<<<<<<<<<