HP Photosmart C7100 Basics Guide - Page 20
Prepare a Windows XP computer, To turn off the Windows firewall with Windows XP Service Pack 1 - software windows 7
 |
View all HP Photosmart C7100 manuals
Add to My Manuals
Save this manual to your list of manuals |
Page 20 highlights
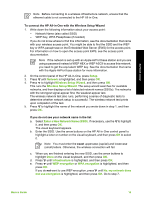
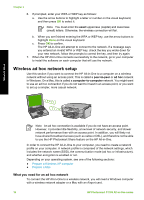
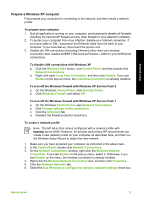
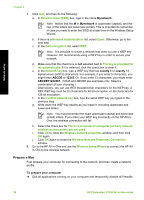
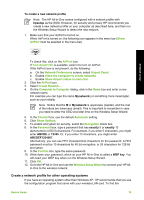
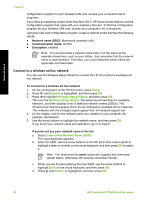
Network setup Prepare a Windows XP computer First prepare your computer for connecting to the network, and then create a network profile. To prepare your computer 1. Quit all applications running on your computer, and temporarily disable all firewalls including the internal XP firewall and any other firewall or virus detection software. 2. To protect your computer from virus infection, disable your Internet connection. If you have cable or DSL, disconnect the Ethernet cable from the back of your computer. If you have dial-up, disconnect the phone cord. 3. Disable all LAN connections (including Ethernet) other than your wireless connection. Also, disable all IEEE 1394 (such as Firewire, i.LINK or Lynx) to Ethernet connections. To disable LAN connections with Windows XP a. Click the Windows Start button, click Control Panel, and then double-click Network Connections. b. Right-click each Local Area Connection, and then click Disable. If you see Enable on the pop-up menu, the Local Area Connection is already disabled. To turn off the Windows firewall with Windows XP Service Pack 2 a. On the Windows Control Panel, click Security Center. b. Click Windows Firewall, and select Off. To turn off the Windows firewall with Windows XP Service Pack 1 a. On the Windows Control Panel, open Network Connections. b. Click Change settings of this connection. c. Click the Advanced tab. d. Deselect the firewall protection check box. To create a network profile Note The HP All-in-One comes configured with a network profile with hpsetup as the SSID. However, for security and privacy HP recommends you create a new network profile on your computer as described here, and then run the Wireless Setup Wizard to detect the new network. 1. Make sure you have prepared your computer as instructed in the above task. 2. In the Control Panel, double-click Network Connections. 3. On the Network Connections window, right-click the Wireless Network Connection. If you see Enable on the pop-up menu, select it. Otherwise, if you see Disable on the menu, the wireless connection is already enabled. 4. Right-click the Wireless Network Connection icon, and then click Properties. 5. Click the Wireless Networks tab. 6. Select the Use Windows to configure my wireless network settings check box. Basics Guide 17
-
 1
1 -
2
-
3
-
4
-
5
-
6
-
7
-
8
-
9
-
10
-
11
-
12
-
13
-
14
-
 15
15 -
 16
16 -
 17
17 -
 18
18 -
 19
19 -
 20
20 -
 21
21 -
 22
22 -
 23
23 -
 24
24 -
 25
25 -
26
-
27
-
28
-
29
-
30
-
31
-
32
-
33
-
34
-
35
-
36
-
37
-
38
-
39
-
40
-
41
-
42
-
43
-
44
-
45
-
46
-
47
-
48
-
49
-
50
-
51
-
52
-
53
-
54
-
55
-
56
-
57
-
58
-
59
-
60
-
61
-
62
-
63
-
64
-
65
-
66
-
67
-
68
-
69
-
70
-
71
-
72
-
73
-
74
-
75
-
76
-
77
-
78
-
79
-
80
-
81
-
82
-
83
-
84
-
85
-
86
-
87
-
88
-
89
-
90
-
91
-
92
-
93
-
94
-
95
-
96
-
97
-
98
-
99
-
100
-
101
-
102
-
103
-
104
-
105
-
106
-
107
-
108
-
109
-
110
-
111
-
112
-
113
-
114
-
115
-
116
 |
 |
