Lenovo ThinkStation P700 (English) User Guide - ThinkStation P500 (type 30A6, - Page 105
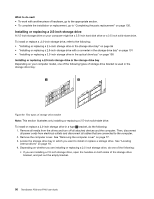
Installing or replacing a 3.5-inch storage drive in the optical drive bay,
 |
View all Lenovo ThinkStation P700 manuals
Add to My Manuals
Save this manual to your list of manuals |
Page 105 highlights
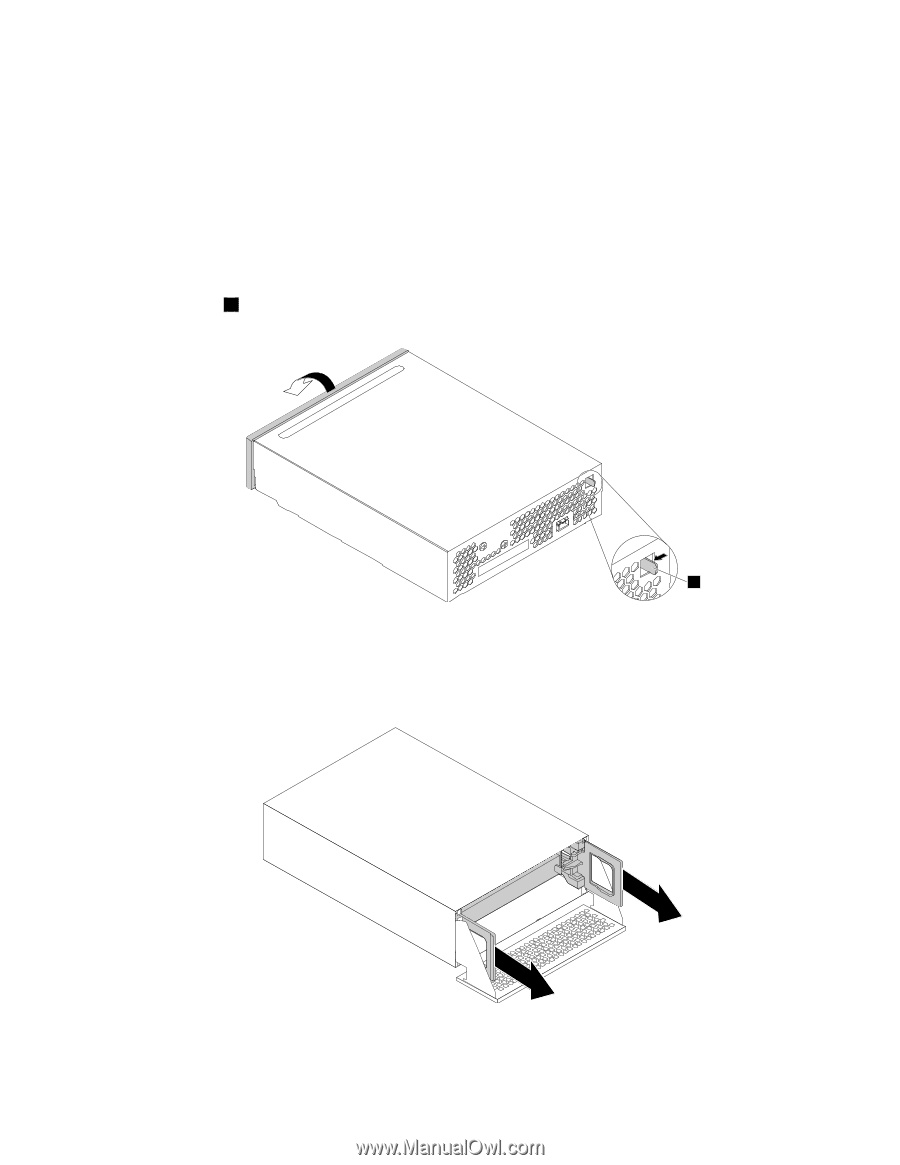
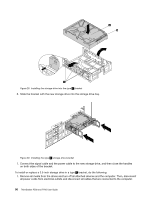
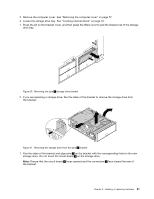
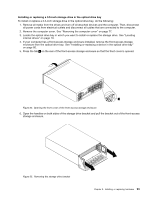
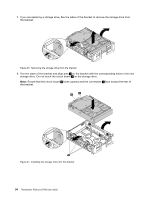
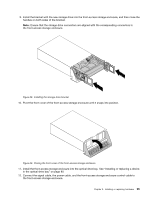
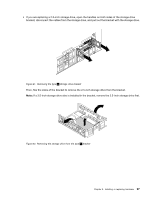
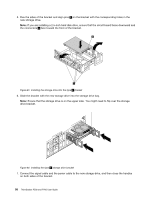
Installing or replacing a 3.5-inch storage drive in the optical drive bay To install or replace a 3.5-inch storage drive in the optical drive bay, do the following: 1. Remove all media from the drives and turn off all attached devices and the computer. Then, disconnect all power cords from electrical outlets and disconnect all cables that are connected to the computer. 2. Remove the computer cover. See "Removing the computer cover" on page 77. 3. Locate the optical drive bay in which you want to install or replace the storage drive. See "Locating internal drives" on page 10. 4. If your computer has a front-access storage enclosure installed, remove the front-access storage enclosure from the optical drive bay. See "Installing or replacing a device in the optical drive bay" on page 80. 5. Press the tab 1 on the rear of the front-access storage enclosure so that the front cover is opened. 1 Figure 34. Opening the front cover of the front-access storage enclosure 6. Open the handles on both sides of the storage drive bracket and pull the bracket out of the front-access storage enclosure. Figure 35. Removing the storage drive bracket Chapter 9. Installing or replacing hardware 93
-
 1
1 -
2
-
3
-
4
-
5
-
6
-
7
-
8
-
9
-
10
-
11
-
12
-
13
-
14
-
15
-
16
-
17
-
18
-
19
-
20
-
21
-
22
-
23
-
24
-
25
-
26
-
27
-
28
-
29
-
30
-
31
-
32
-
33
-
34
-
35
-
36
-
37
-
38
-
39
-
40
-
41
-
42
-
43
-
44
-
45
-
46
-
47
-
48
-
49
-
50
-
51
-
52
-
53
-
54
-
55
-
56
-
57
-
58
-
59
-
60
-
61
-
62
-
63
-
64
-
65
-
66
-
67
-
68
-
69
-
70
-
71
-
72
-
73
-
74
-
75
-
76
-
77
-
78
-
79
-
80
-
81
-
82
-
83
-
84
-
85
-
86
-
87
-
88
-
89
-
90
-
91
-
92
-
93
-
94
-
95
-
96
-
97
-
98
-
99
-
 100
100 -
 101
101 -
 102
102 -
 103
103 -
 104
104 -
 105
105 -
 106
106 -
 107
107 -
 108
108 -
 109
109 -
 110
110 -
111
-
112
-
113
-
114
-
115
-
116
-
117
-
118
-
119
-
120
-
121
-
122
-
123
-
124
-
125
-
126
-
127
-
128
-
129
-
130
-
131
-
132
-
133
-
134
-
135
-
136
-
137
-
138
-
139
-
140
-
141
-
142
-
143
-
144
-
145
-
146
-
147
-
148
-
149
-
150
-
151
-
152
-
153
-
154
-
155
-
156
-
157
-
158
-
159
-
160
-
161
-
162
-
163
-
164
-
165
-
166
-
167
-
168
-
169
-
170
 |
 |