Lenovo ThinkStation P700 (English) User Guide - ThinkStation P500 (type 30A6, - Page 93
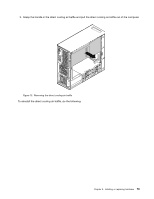
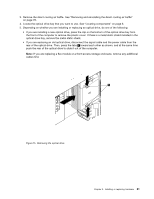
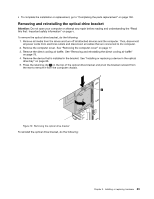
Remove the direct cooling air baffle. See Removing and reinstalling the direct cooling air baffle
 |
View all Lenovo ThinkStation P700 manuals
Add to My Manuals
Save this manual to your list of manuals |
Page 93 highlights
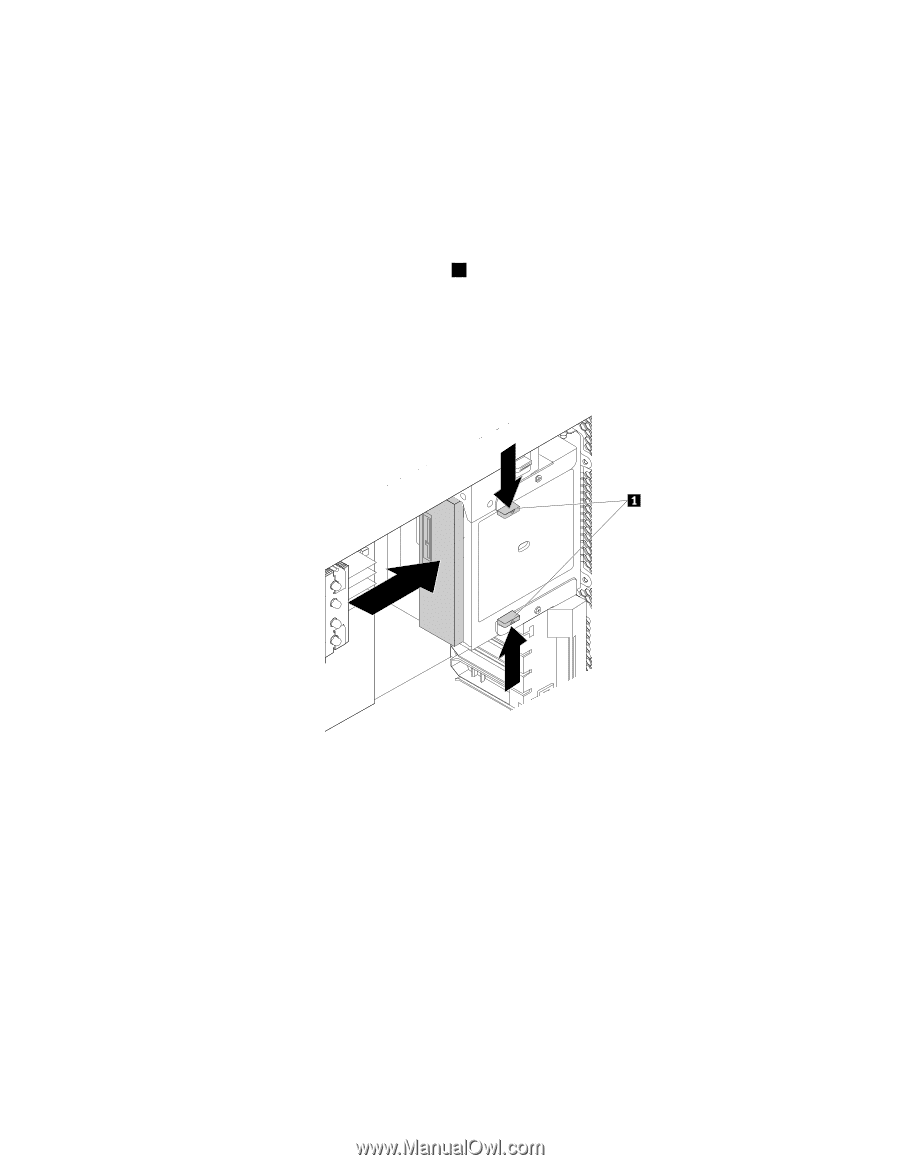
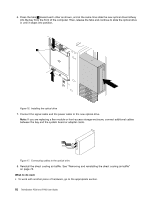
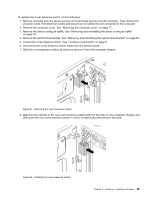
3. Remove the direct cooling air baffle. See "Removing and reinstalling the direct cooling air baffle" on page 78. 4. Locate the optical drive bay that you want to use. See "Locating components" on page 6. 5. Depending on whether you are installing or replacing an optical drive, do one of the following: • If you are installing a new optical drive, press the clip on the bottom of the optical drive bay from the front of the computer to remove the plastic cover. If there is a metal static shield installed in the optical drive bay, remove the metal static shield. • If you are replacing an old optical drive, disconnect the signal cable and the power cable from the rear of the optical drive. Then, press the tabs 1 toward each other as shown, and at the same time push the rear of the optical drive to slide it out of the computer. Note: If you are replacing a flex module or a front-access storage enclosure, remove any additional cables first. Figure 15. Removing the optical drive Chapter 9. Installing or replacing hardware 81
-
 1
1 -
2
-
3
-
4
-
5
-
6
-
7
-
8
-
9
-
10
-
11
-
12
-
13
-
14
-
15
-
16
-
17
-
18
-
19
-
20
-
21
-
22
-
23
-
24
-
25
-
26
-
27
-
28
-
29
-
30
-
31
-
32
-
33
-
34
-
35
-
36
-
37
-
38
-
39
-
40
-
41
-
42
-
43
-
44
-
45
-
46
-
47
-
48
-
49
-
50
-
51
-
52
-
53
-
54
-
55
-
56
-
57
-
58
-
59
-
60
-
61
-
62
-
63
-
64
-
65
-
66
-
67
-
68
-
69
-
70
-
71
-
72
-
73
-
74
-
75
-
76
-
77
-
78
-
79
-
80
-
81
-
82
-
83
-
84
-
85
-
86
-
87
-
 88
88 -
 89
89 -
 90
90 -
 91
91 -
 92
92 -
 93
93 -
 94
94 -
 95
95 -
 96
96 -
 97
97 -
 98
98 -
99
-
100
-
101
-
102
-
103
-
104
-
105
-
106
-
107
-
108
-
109
-
110
-
111
-
112
-
113
-
114
-
115
-
116
-
117
-
118
-
119
-
120
-
121
-
122
-
123
-
124
-
125
-
126
-
127
-
128
-
129
-
130
-
131
-
132
-
133
-
134
-
135
-
136
-
137
-
138
-
139
-
140
-
141
-
142
-
143
-
144
-
145
-
146
-
147
-
148
-
149
-
150
-
151
-
152
-
153
-
154
-
155
-
156
-
157
-
158
-
159
-
160
-
161
-
162
-
163
-
164
-
165
-
166
-
167
-
168
-
169
-
170
 |
 |