Lenovo ThinkStation P700 (English) User Guide - ThinkStation P500 (type 30A6, - Page 119
on the bracket with the corresponding holes in
 |
View all Lenovo ThinkStation P700 manuals
Add to My Manuals
Save this manual to your list of manuals |
Page 119 highlights
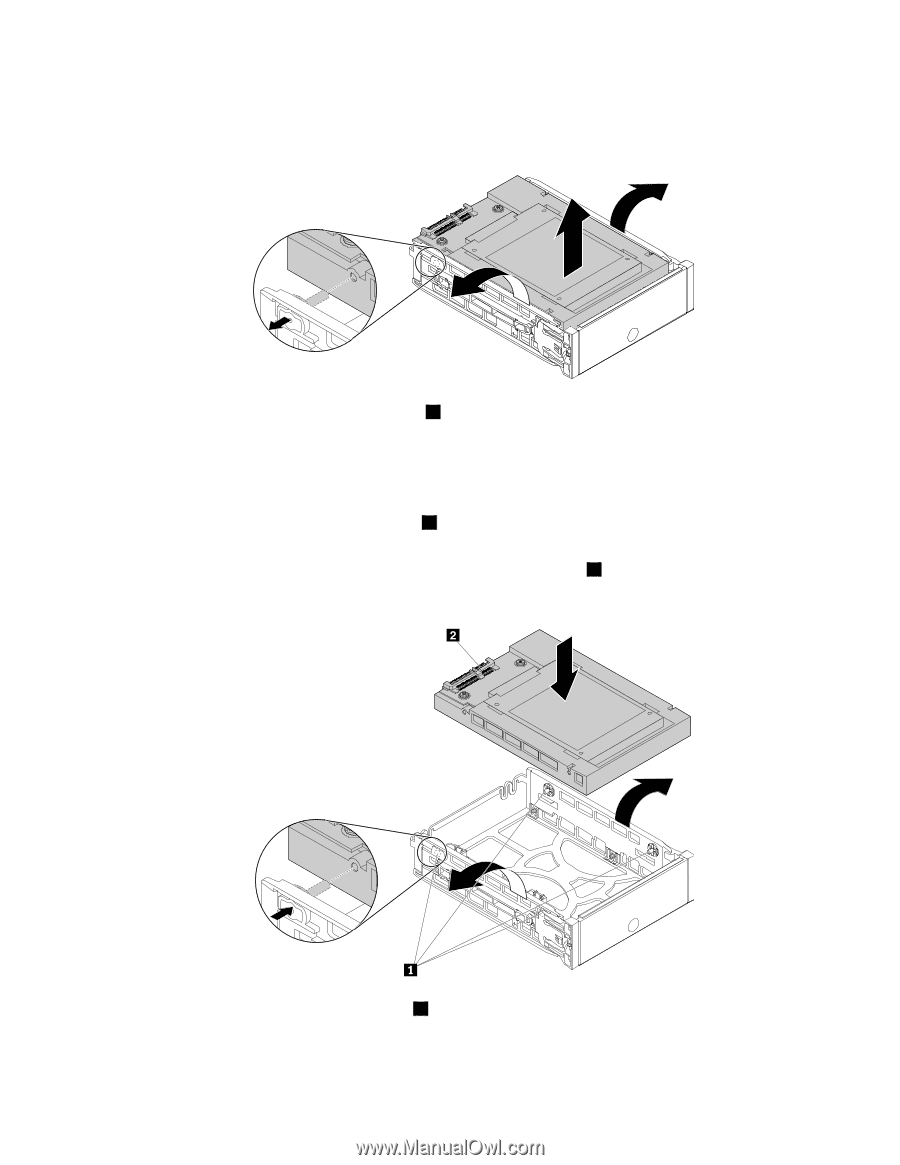
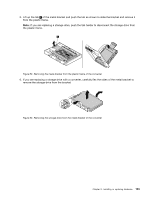
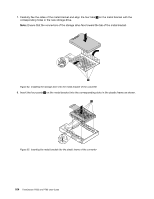
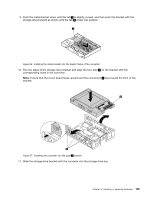
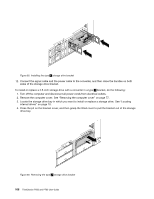
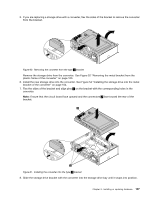
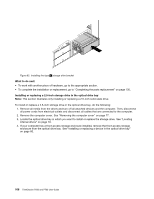
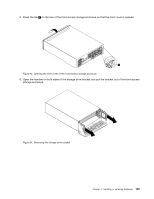
5. If you are replacing a storage drive with a converter, flex the sides of the bracket to remove the converter from the bracket. Figure 60. Removing the converter from the type 2 bracket Remove the storage drive from the converter. See Figure 52 "Removing the metal bracket from the plastic frame of the converter" on page 103. 6. Install the new storage drive into the converter. See Figure 54 "Installing the storage drive into the metal bracket of the converter" on page 104. 7. Flex the sides of the bracket and align pins 1 on the bracket with the corresponding holes in the converter. Note: Ensure that the circuit board face upward and the connectors 2 face toward the rear of the bracket. Figure 61. Installing the converter into the type 2 bracket 8. Slide the storage drive bracket with the converter into the storage drive bay until it snaps into position. Chapter 9. Installing or replacing hardware 107
-
 1
1 -
2
-
3
-
4
-
5
-
6
-
7
-
8
-
9
-
10
-
11
-
12
-
13
-
14
-
15
-
16
-
17
-
18
-
19
-
20
-
21
-
22
-
23
-
24
-
25
-
26
-
27
-
28
-
29
-
30
-
31
-
32
-
33
-
34
-
35
-
36
-
37
-
38
-
39
-
40
-
41
-
42
-
43
-
44
-
45
-
46
-
47
-
48
-
49
-
50
-
51
-
52
-
53
-
54
-
55
-
56
-
57
-
58
-
59
-
60
-
61
-
62
-
63
-
64
-
65
-
66
-
67
-
68
-
69
-
70
-
71
-
72
-
73
-
74
-
75
-
76
-
77
-
78
-
79
-
80
-
81
-
82
-
83
-
84
-
85
-
86
-
87
-
88
-
89
-
90
-
91
-
92
-
93
-
94
-
95
-
96
-
97
-
98
-
99
-
100
-
101
-
102
-
103
-
104
-
105
-
106
-
107
-
108
-
109
-
110
-
111
-
112
-
113
-
 114
114 -
 115
115 -
 116
116 -
 117
117 -
 118
118 -
 119
119 -
 120
120 -
 121
121 -
 122
122 -
 123
123 -
 124
124 -
125
-
126
-
127
-
128
-
129
-
130
-
131
-
132
-
133
-
134
-
135
-
136
-
137
-
138
-
139
-
140
-
141
-
142
-
143
-
144
-
145
-
146
-
147
-
148
-
149
-
150
-
151
-
152
-
153
-
154
-
155
-
156
-
157
-
158
-
159
-
160
-
161
-
162
-
163
-
164
-
165
-
166
-
167
-
168
-
169
-
170
 |
 |