Lenovo ThinkStation P700 (English) User Guide - ThinkStation P500 (type 30A6, - Page 108
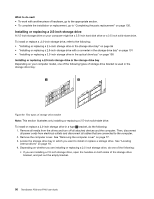
Installing or replacing a 2.5-inch storage drive
 |
View all Lenovo ThinkStation P700 manuals
Add to My Manuals
Save this manual to your list of manuals |
Page 108 highlights
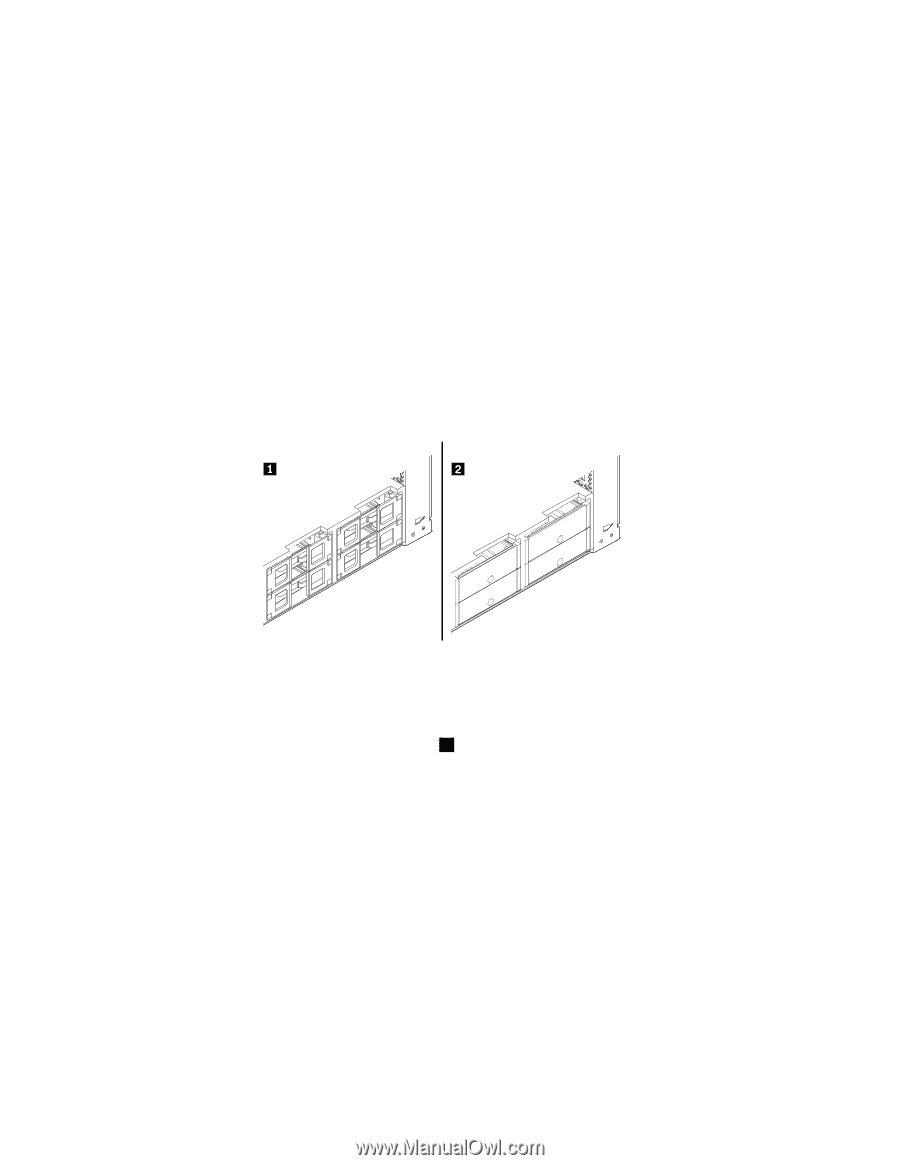
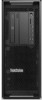
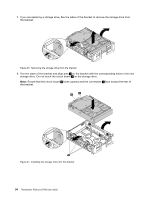
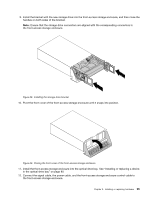
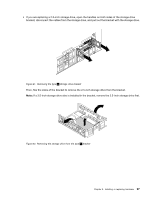
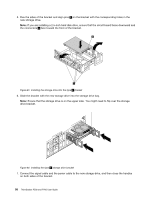
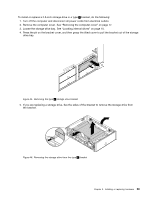
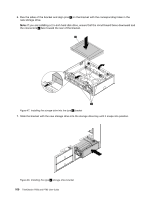
What to do next: • To work with another piece of hardware, go to the appropriate section. • To complete the installation or replacement, go to "Completing the parts replacement" on page 130. Installing or replacing a 2.5-inch storage drive A 2.5-inch storage drive on your computer might be a 2.5-inch hard disk drive or a 2.5-inch solid-state drive. To install or replace a .2.5-inch storage drive, refer to the following: • "Installing or replacing a 2.5-inch storage drive in the storage drive bay" on page 96 • "Installing or replacing a 2.5-inch storage drive with a converter in the storage drive bay" on page 101 • "Installing or replacing a 2.5-inch storage drive in the optical drive bay" on page 108 Installing or replacing a 2.5-inch storage drive in the storage drive bay Depending on your computer model, one of the following types of storage drive bracket is used in the storage drive bay: Figure 40. Two types of storage drive bracket Note: This section illustrates only installing or replacing a 2.5-inch solid-state drive. To install or replace a 2.5-inch storage drive in a type 1 bracket, do the following: 1. Remove all media from the drives and turn off all attached devices and the computer. Then, disconnect all power cords from electrical outlets and disconnect all cables that are connected to the computer. 2. Remove the computer cover. See "Removing the computer cover" on page 77. 3. Locate the storage drive bay in which you want to install or replace a storage drive. See "Locating internal drives" on page 10. 4. Depending on whether you are installing or replacing a 2.5-inch storage drive, do one of the following: • If you are installing a 2.5-inch storage drive, open the handles on both sides of the storage drive bracket, and pull out the empty bracket. 96 ThinkStation P500 and P700 User Guide
-
 1
1 -
2
-
3
-
4
-
5
-
6
-
7
-
8
-
9
-
10
-
11
-
12
-
13
-
14
-
15
-
16
-
17
-
18
-
19
-
20
-
21
-
22
-
23
-
24
-
25
-
26
-
27
-
28
-
29
-
30
-
31
-
32
-
33
-
34
-
35
-
36
-
37
-
38
-
39
-
40
-
41
-
42
-
43
-
44
-
45
-
46
-
47
-
48
-
49
-
50
-
51
-
52
-
53
-
54
-
55
-
56
-
57
-
58
-
59
-
60
-
61
-
62
-
63
-
64
-
65
-
66
-
67
-
68
-
69
-
70
-
71
-
72
-
73
-
74
-
75
-
76
-
77
-
78
-
79
-
80
-
81
-
82
-
83
-
84
-
85
-
86
-
87
-
88
-
89
-
90
-
91
-
92
-
93
-
94
-
95
-
96
-
97
-
98
-
99
-
100
-
101
-
102
-
 103
103 -
 104
104 -
 105
105 -
 106
106 -
 107
107 -
 108
108 -
 109
109 -
 110
110 -
 111
111 -
 112
112 -
 113
113 -
114
-
115
-
116
-
117
-
118
-
119
-
120
-
121
-
122
-
123
-
124
-
125
-
126
-
127
-
128
-
129
-
130
-
131
-
132
-
133
-
134
-
135
-
136
-
137
-
138
-
139
-
140
-
141
-
142
-
143
-
144
-
145
-
146
-
147
-
148
-
149
-
150
-
151
-
152
-
153
-
154
-
155
-
156
-
157
-
158
-
159
-
160
-
161
-
162
-
163
-
164
-
165
-
166
-
167
-
168
-
169
-
170
 |
 |