Lenovo ThinkStation P700 (English) User Guide - ThinkStation P500 (type 30A6, - Page 92
Installing or replacing a device in the optical drive bay
 |
View all Lenovo ThinkStation P700 manuals
Add to My Manuals
Save this manual to your list of manuals |
Page 92 highlights
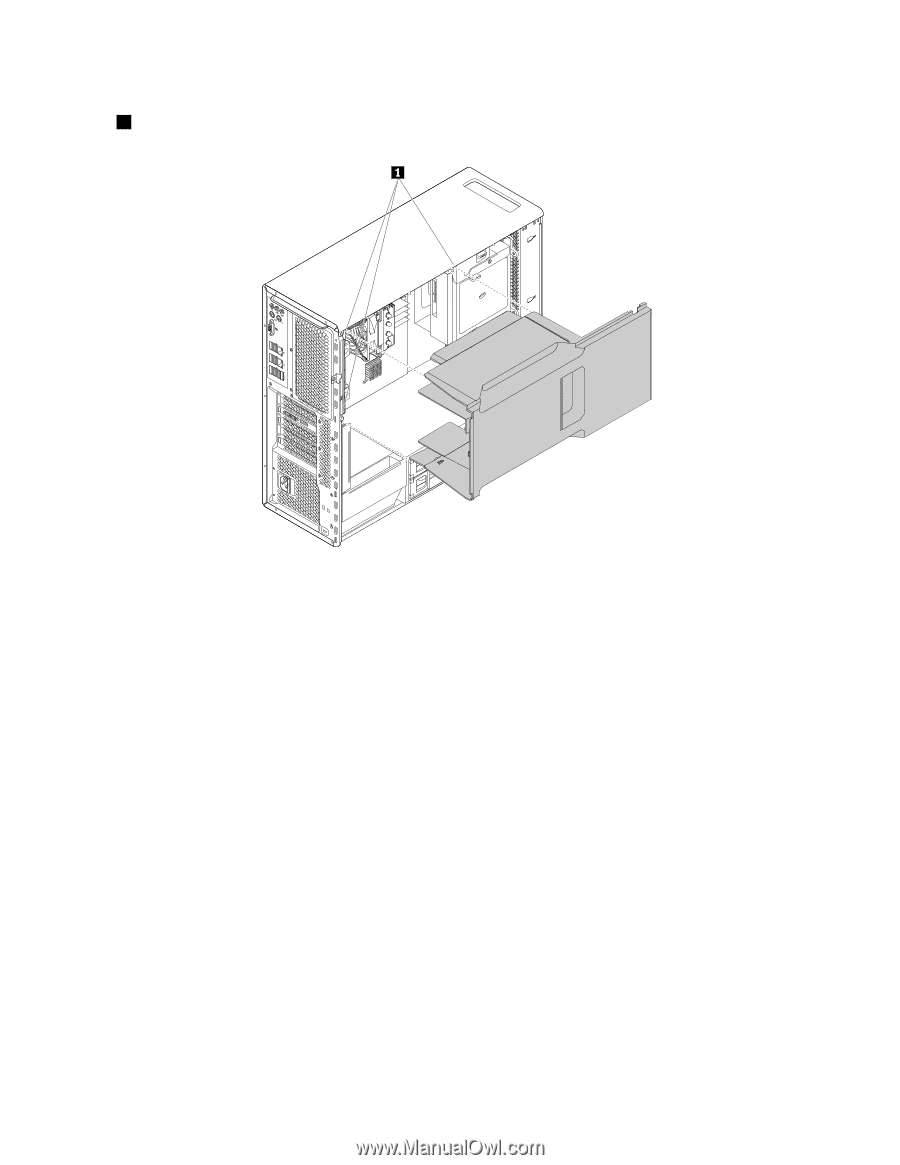
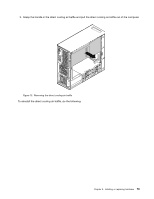
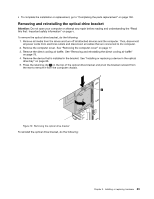
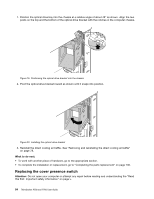
1. Align the plastic boards on the top and bottom sides of the direct cooling air baffle with the small gaps 1 in the computer chassis. Figure 14. Installing the direct cooling air baffle 2. Push the direct cooling air baffle in until it is placed firmly in position. Note: If necessary, adjust the position of the direct cooling air baffle slightly to avoid the interference from other components in the chassis. What to do next: • To work with another piece of hardware, go to the appropriate section. • To complete the installation or replacement, go to "Completing the parts replacement" on page 130. Installing or replacing a device in the optical drive bay Attention: Do not open your computer or attempt any repair before reading and understanding the "Read this first: Important safety information" on page v. The optical drive bay of your computer supports the following devices: • Optical drive • Flex module • Front-access storage enclosure The following instructions on how to install or replace an optical drive also apply to the other two devices. To install or replace an optical drive, do the following: 1. Remove all media from the drives and turn off all attached devices and the computer. Then, disconnect all power cords from electrical outlets and disconnect all cables that are connected to the computer. 2. Remove the computer cover. See "Removing the computer cover" on page 77. 80 ThinkStation P500 and P700 User Guide
-
 1
1 -
2
-
3
-
4
-
5
-
6
-
7
-
8
-
9
-
10
-
11
-
12
-
13
-
14
-
15
-
16
-
17
-
18
-
19
-
20
-
21
-
22
-
23
-
24
-
25
-
26
-
27
-
28
-
29
-
30
-
31
-
32
-
33
-
34
-
35
-
36
-
37
-
38
-
39
-
40
-
41
-
42
-
43
-
44
-
45
-
46
-
47
-
48
-
49
-
50
-
51
-
52
-
53
-
54
-
55
-
56
-
57
-
58
-
59
-
60
-
61
-
62
-
63
-
64
-
65
-
66
-
67
-
68
-
69
-
70
-
71
-
72
-
73
-
74
-
75
-
76
-
77
-
78
-
79
-
80
-
81
-
82
-
83
-
84
-
85
-
86
-
 87
87 -
 88
88 -
 89
89 -
 90
90 -
 91
91 -
 92
92 -
 93
93 -
 94
94 -
 95
95 -
 96
96 -
 97
97 -
98
-
99
-
100
-
101
-
102
-
103
-
104
-
105
-
106
-
107
-
108
-
109
-
110
-
111
-
112
-
113
-
114
-
115
-
116
-
117
-
118
-
119
-
120
-
121
-
122
-
123
-
124
-
125
-
126
-
127
-
128
-
129
-
130
-
131
-
132
-
133
-
134
-
135
-
136
-
137
-
138
-
139
-
140
-
141
-
142
-
143
-
144
-
145
-
146
-
147
-
148
-
149
-
150
-
151
-
152
-
153
-
154
-
155
-
156
-
157
-
158
-
159
-
160
-
161
-
162
-
163
-
164
-
165
-
166
-
167
-
168
-
169
-
170
 |
 |