Netgear GS728TPP GS728TP/GS728TPP/GS752TP Software Administration Manual - Page 86
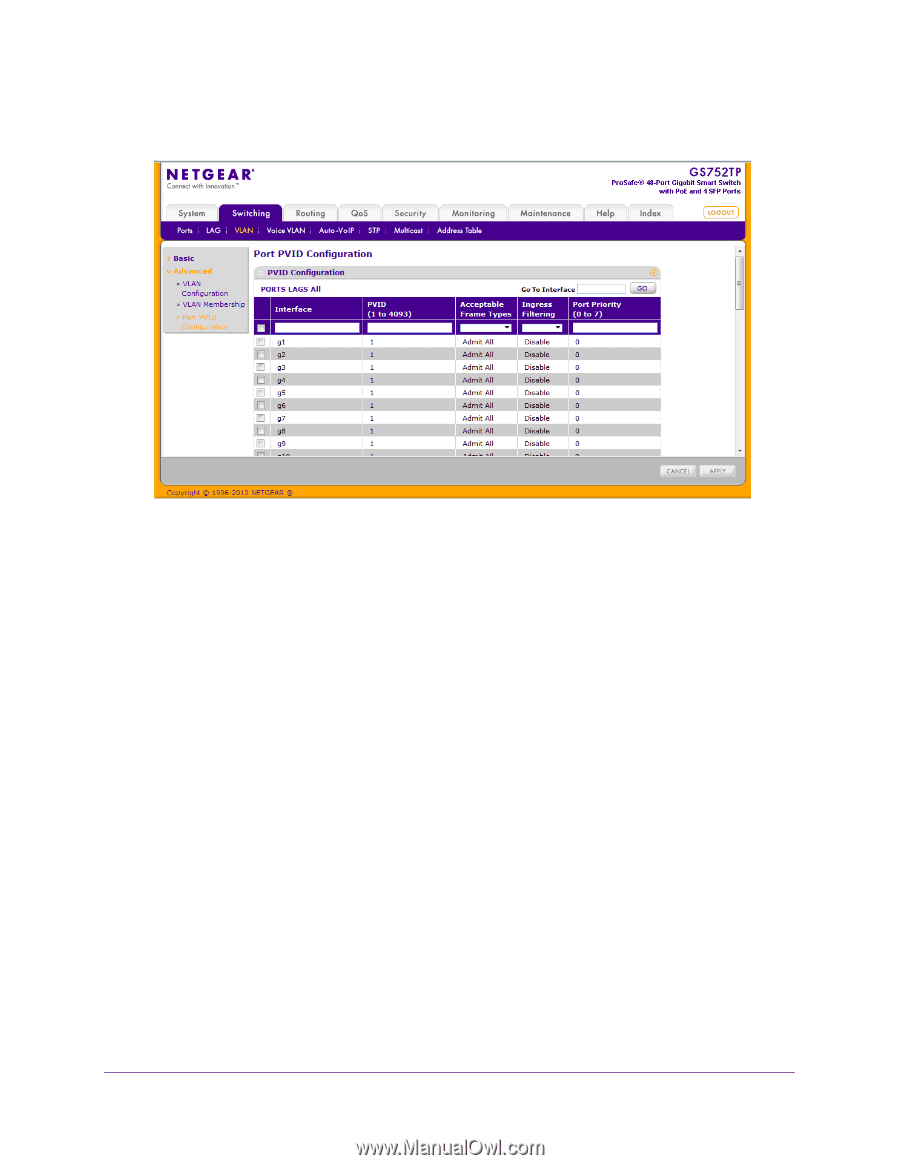
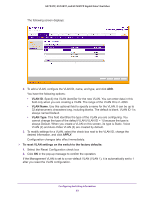
PORTS, VLAN Only, Admit All, Enable, Disable, 1Q VLAN standard. The factory default is Admit All.
 |
View all Netgear GS728TPP manuals
Add to My Manuals
Save this manual to your list of manuals |
Page 86 highlights
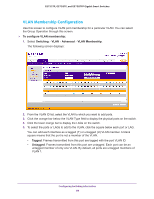
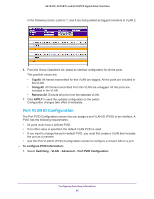
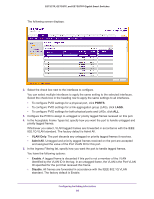
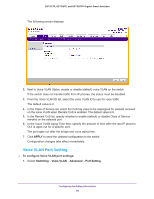
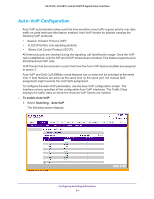
GS752TP, GS728TP, and GS728TPP Gigabit Smart Switches The following screen displays: 2. Select the check box next to the interfaces to configure. You can select multiple interfaces to apply the same setting to the selected interfaces. Select the check box in the heading row to apply the same settings to all interfaces. • To configure PVID settings for a physical port, click PORTS. • To configure PVID settings for a link aggregation group (LAG), click LAGS. • To configure PVID settings for both physical ports and LAGs, click ALL. 3. Configure the PVID to assign to untagged or priority tagged frames received on this port. 4. In the Acceptable Frame Types list, specify how you want the port to handle untagged and priority tagged frames. Whichever you select, VLAN tagged frames are forwarded in accordance with the IEEE 802.1Q VLAN standard. The factory default is Admit All. • VLAN Only. The port discards any untagged or priority tagged frames it receives. • Admit All. Untagged and priority tagged frames received on the port are accepted and assigned the value of the Port VLAN ID for this port. 5. In the Ingress Filtering list, specify how you want the port to handle tagged frames. You have the following options: • Enable. A tagged frame is discarded if this port is not a member of the VLAN identified by the VLAN ID in the tag. In an untagged frame, the VLAN is the Port VLAN ID specified for the port that received this frame. • Disable. All frames are forwarded in accordance with the IEEE 802.1Q VLAN standard. The factory default is Enable. Configuring Switching Information 86
-
 1
1 -
2
-
3
-
4
-
5
-
6
-
7
-
8
-
9
-
10
-
11
-
12
-
13
-
14
-
15
-
16
-
17
-
18
-
19
-
20
-
21
-
22
-
23
-
24
-
25
-
26
-
27
-
28
-
29
-
30
-
31
-
32
-
33
-
34
-
35
-
36
-
37
-
38
-
39
-
40
-
41
-
42
-
43
-
44
-
45
-
46
-
47
-
48
-
49
-
50
-
51
-
52
-
53
-
54
-
55
-
56
-
57
-
58
-
59
-
60
-
61
-
62
-
63
-
64
-
65
-
66
-
67
-
68
-
69
-
70
-
71
-
72
-
73
-
74
-
75
-
76
-
77
-
78
-
79
-
80
-
 81
81 -
 82
82 -
 83
83 -
 84
84 -
 85
85 -
 86
86 -
 87
87 -
 88
88 -
 89
89 -
 90
90 -
 91
91 -
92
-
93
-
94
-
95
-
96
-
97
-
98
-
99
-
100
-
101
-
102
-
103
-
104
-
105
-
106
-
107
-
108
-
109
-
110
-
111
-
112
-
113
-
114
-
115
-
116
-
117
-
118
-
119
-
120
-
121
-
122
-
123
-
124
-
125
-
126
-
127
-
128
-
129
-
130
-
131
-
132
-
133
-
134
-
135
-
136
-
137
-
138
-
139
-
140
-
141
-
142
-
143
-
144
-
145
-
146
-
147
-
148
-
149
-
150
-
151
-
152
-
153
-
154
-
155
-
156
-
157
-
158
-
159
-
160
-
161
-
162
-
163
-
164
-
165
-
166
-
167
-
168
-
169
-
170
-
171
-
172
-
173
-
174
-
175
-
176
-
177
-
178
-
179
-
180
-
181
-
182
-
183
-
184
-
185
-
186
-
187
-
188
-
189
-
190
-
191
-
192
-
193
-
194
-
195
-
196
-
197
-
198
-
199
-
200
-
201
-
202
-
203
-
204
-
205
-
206
-
207
-
208
-
209
-
210
-
211
-
212
-
213
-
214
-
215
-
216
-
217
-
218
-
219
-
220
-
221
-
222
-
223
-
224
-
225
-
226
-
227
-
228
-
229
-
230
-
231
-
232
-
233
-
234
-
235
-
236
-
237
-
238
-
239
-
240
-
241
-
242
-
243
-
244
-
245
-
246
-
247
-
248
-
249
-
250
-
251
-
252
-
253
-
254
-
255
-
256
-
257
-
258
-
259
-
260
-
261
-
262
-
263
-
264
-
265
-
266
-
267
-
268
-
269
-
270
-
271
-
272
-
273
-
274
-
275
 |
 |