Nokia n95 8gb User Guide - Page 67
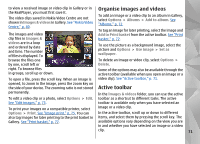
After recording a video, Camera settings
 |
UPC - 758478012215
View all Nokia n95 8gb manuals
Add to My Manuals
Save this manual to your list of manuals |
Page 67 highlights
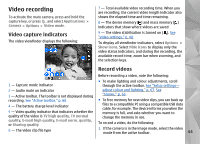
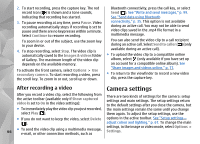
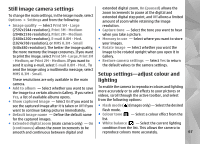
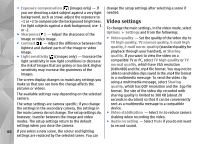
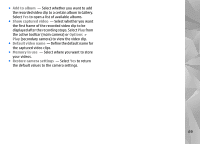
2. To start recording, press the capture key. The red record icon ( ) is shown and a tone sounds, indicating that recording has started. 3. To pause recording at any time, press Pause. Video recording automatically stops if recording is set to pause and there are no keypresses within a minute. Select Continue to resume recording. To zoom in or out of the subject, use the zoom key in your device. 4. To stop recording, select Stop. The video clip is automatically saved to the Images & videos folder of Gallery. The maximum length of the video clip depends on the available memory. To activate the front camera, select Options > Use secondary camera. To start recording a video, press the scroll key. To zoom in or out, scroll up or down. Bluetooth connectivity, press the call key, or select Send ( ). See "Write and send messages," p. 99. See "Send data using Bluetooth connectivity," p. 35. This option is not available during an active call. You may not be able to send video clips saved in the .mp4 file format in a multimedia message. You can also send the video clip to a call recipient during an active call. Select Send to caller ( ) (only available during an active call). ● To upload the video clip to a compatible online album, select (only available if you have set up an account for a compatible online album). See "Share images and videos online," p. 77. ● To return to the viewfinder to record a new video clip, press the capture key. After recording a video Camera settings After you record a video clip, select the following from the active toolbar (available only if Show captured video is set to On in the video settings): ● To immediately play the video clip you just recorded, select Play ( ). There are two kinds of settings for the camera: setup settings and main settings. The setup settings return to the default settings after you close the camera, but the main settings remain the same until you change them again. To adjust the setup settings, use the ● If you do not want to keep the video, select Delete options in the active toolbar. See "Setup settings- ( ). adjust colour and lighting," p. 67. To change the main settings, in the image or video mode, select Options > 66 ● To send the video clip using a multimedia message, e-mail, or other connection methods, such as Settings.
-
 1
1 -
2
-
3
-
4
-
5
-
6
-
7
-
8
-
9
-
10
-
11
-
12
-
13
-
14
-
15
-
16
-
17
-
18
-
19
-
20
-
21
-
22
-
23
-
24
-
25
-
26
-
27
-
28
-
29
-
30
-
31
-
32
-
33
-
34
-
35
-
36
-
37
-
38
-
39
-
40
-
41
-
42
-
43
-
44
-
45
-
46
-
47
-
48
-
49
-
50
-
51
-
52
-
53
-
54
-
55
-
56
-
57
-
58
-
59
-
60
-
61
-
 62
62 -
 63
63 -
 64
64 -
 65
65 -
 66
66 -
 67
67 -
 68
68 -
 69
69 -
 70
70 -
 71
71 -
 72
72 -
73
-
74
-
75
-
76
-
77
-
78
-
79
-
80
-
81
-
82
-
83
-
84
-
85
-
86
-
87
-
88
-
89
-
90
-
91
-
92
-
93
-
94
-
95
-
96
-
97
-
98
-
99
-
100
-
101
-
102
-
103
-
104
-
105
-
106
-
107
-
108
-
109
-
110
-
111
-
112
-
113
-
114
-
115
-
116
-
117
-
118
-
119
-
120
-
121
-
122
-
123
-
124
-
125
-
126
-
127
-
128
-
129
-
130
-
131
-
132
-
133
-
134
-
135
-
136
-
137
-
138
-
139
-
140
-
141
-
142
-
143
-
144
-
145
-
146
-
147
-
148
-
149
-
150
-
151
-
152
-
153
-
154
-
155
-
156
-
157
-
158
-
159
-
160
-
161
-
162
-
163
 |
 |
