Panasonic WJ-HD716/1000 Installation Guide - Page 133
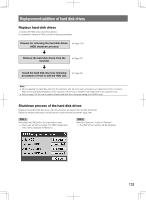
Replacement/addition of hard disk drives
 |
View all Panasonic WJ-HD716/1000 manuals
Add to My Manuals
Save this manual to your list of manuals |
Page 133 highlights
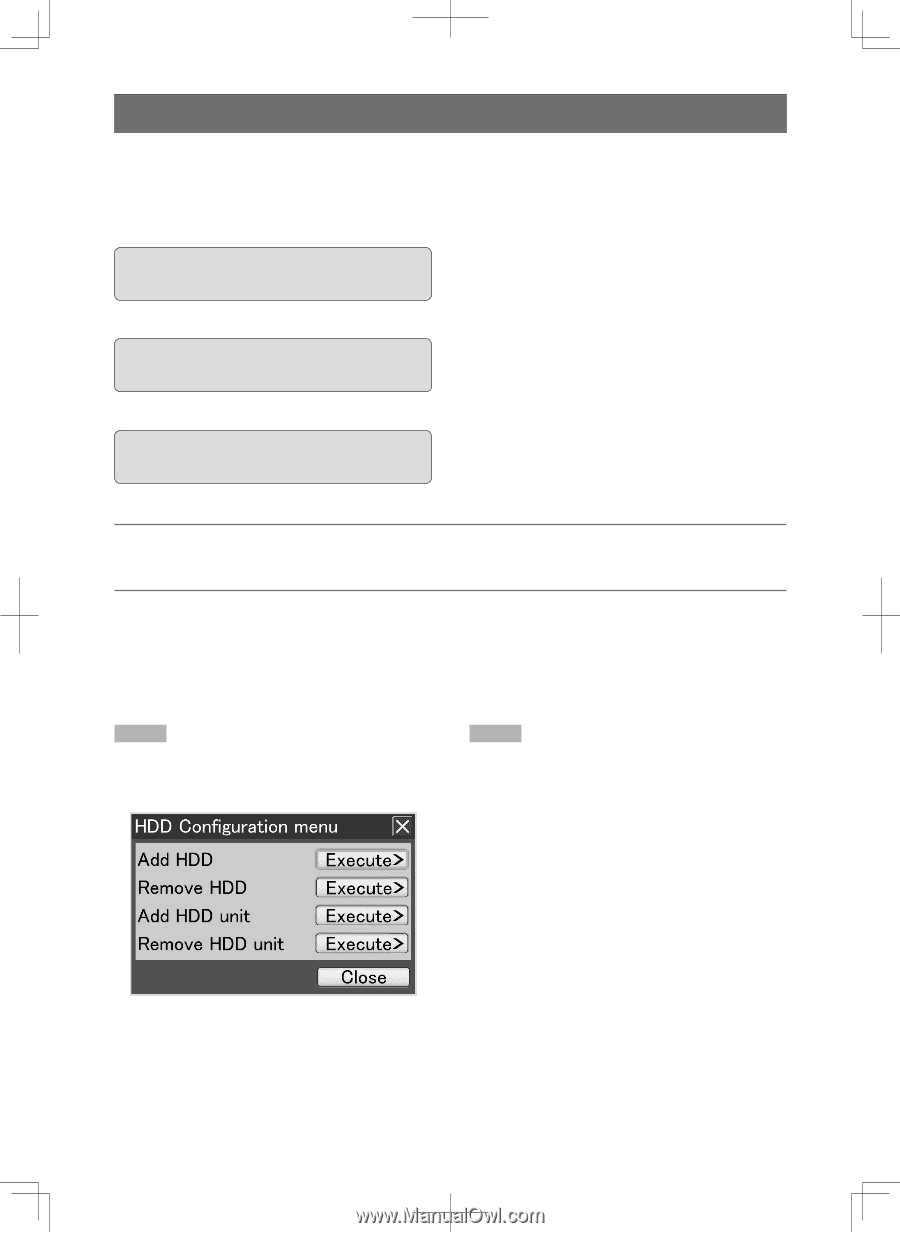
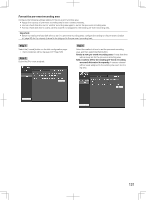
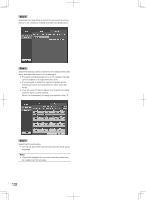
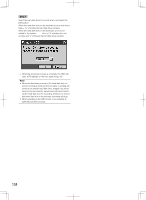
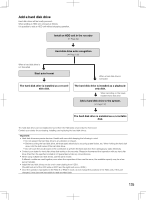
Replacement/addition of hard disk drives Replace hard disk drives To replace the HDD units, proceed as follows. It is possible to replace an HDD unit without stopping operation. Prepare for removing the hard disk drives. (☞ Page 133) (HDD shutdown process) Remove the hard disk drives from the recorder. (☞ Page 53) ➜➜ Install the hard disk drives by following procedures of how to add the HDD unit. (☞ Page 52) Note: • When replacing the hard disk units from the extension unit, take the same procedures as replacement of the recorder's. Refer to the operating instructions of the extension unit for how to install the hard disk units on the extension unit. • Refer to page 146 for how to replace a faulty hard disk drive during operating in the RAID mode. Shutdown process of the hard disk drives Before removing the hard disk drives, start the shutdown process of the hard disk drives first. Before the following procedure, remove the front cover from the recorder.(☞ page 146) Step 1 Hold down the [USE] button for 2 seconds or more. → The buzzer will start sounding. The HDD Configuration menu will be displayed on Monitor 2. Step 2 Select the "Execute>" button of "Remove". → The HDD remove window will be displayed. 133
-
 1
1 -
2
-
3
-
4
-
5
-
6
-
7
-
8
-
9
-
10
-
11
-
12
-
13
-
14
-
15
-
16
-
17
-
18
-
19
-
20
-
21
-
22
-
23
-
24
-
25
-
26
-
27
-
28
-
29
-
30
-
31
-
32
-
33
-
34
-
35
-
36
-
37
-
38
-
39
-
40
-
41
-
42
-
43
-
44
-
45
-
46
-
47
-
48
-
49
-
50
-
51
-
52
-
53
-
54
-
55
-
56
-
57
-
58
-
59
-
60
-
61
-
62
-
63
-
64
-
65
-
66
-
67
-
68
-
69
-
70
-
71
-
72
-
73
-
74
-
75
-
76
-
77
-
78
-
79
-
80
-
81
-
82
-
83
-
84
-
85
-
86
-
87
-
88
-
89
-
90
-
91
-
92
-
93
-
94
-
95
-
96
-
97
-
98
-
99
-
100
-
101
-
102
-
103
-
104
-
105
-
106
-
107
-
108
-
109
-
110
-
111
-
112
-
113
-
114
-
115
-
116
-
117
-
118
-
119
-
120
-
121
-
122
-
123
-
124
-
125
-
126
-
127
-
 128
128 -
 129
129 -
 130
130 -
 131
131 -
 132
132 -
 133
133 -
 134
134 -
 135
135 -
 136
136 -
 137
137 -
 138
138 -
139
-
140
-
141
-
142
-
143
-
144
-
145
-
146
-
147
-
148
-
149
-
150
-
151
-
152
-
153
-
154
-
155
-
156
 |
 |