Panasonic WJ-HD716/1000 Installation Guide - Page 99
Con the settings relating to network [Network]
 |
View all Panasonic WJ-HD716/1000 manuals
Add to My Manuals
Save this manual to your list of manuals |
Page 99 highlights
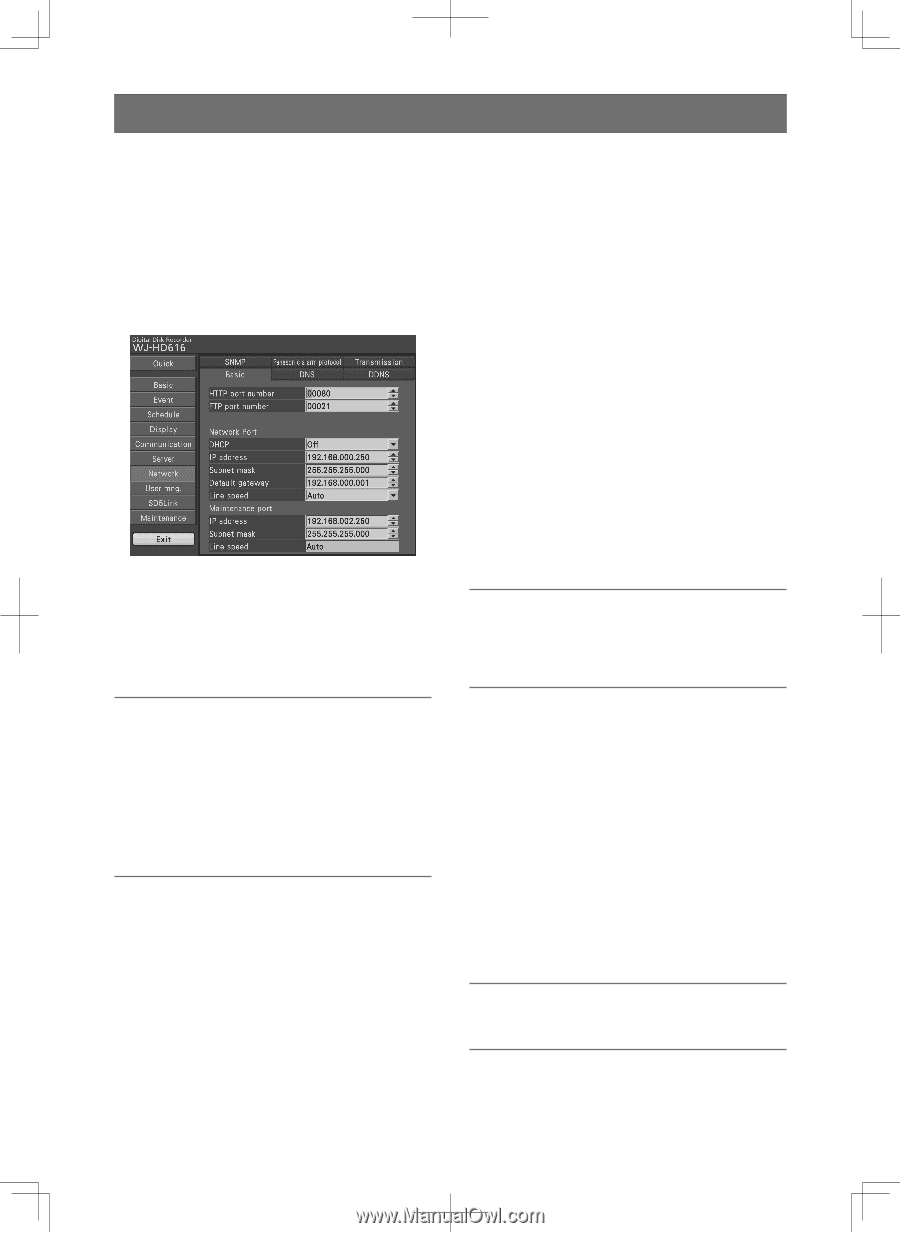
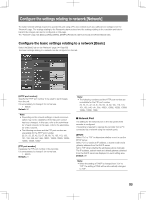
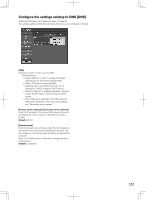
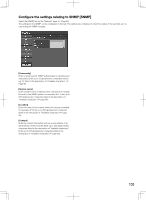
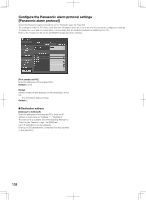
Configure the settings relating to network [Network] The basic network settings required to operate this unit using a PC via a network such as a LAN can be configured on the "Network" page. The settings relating to the Panasonic alarm protocol and the settings relating to the resolution and rate to transmit live images can also be configured on this page. The "Network" page has [Basic], [DNS], [DDNS], [SNMP], [Panasonic alarm protocol] and [Transmission] tabs. Configure the basic settings relating to a network [Basic] Select the [Basic] tab on the "Network" page. (☞ Page 60) The basic settings relating to a network can be configured on this tab. [HTTP port number] Specify the HTTP port number to be used to send images from the unit. It is unnecessary to change it for normal use. 1 - 65535 Default: 80 Note: • Depending on the network settings, network communi- cation may not be established if the http port number has been changed. In this case, refer to the administrator of each network. In this case, refer to the administrator of the network. • The following numbers and the FTP port number are unavailable for the HTTP port number. 20, 21, 23, 25, 42, 53, 67, 68, 69, 79, 105, 110, 123, 161, 162, 546, 547, 995, 10001, 10002, 10003, 10004, 10005, 10006, 10007 [FTP port number] Designate the FTP port number of the recorder. It is unnecessary to change it for normal use. 1 - 65535 Default: 21 Note: • The following numbers and the HTTP port number are unavailable for the FTP port number. 20, 23, 25, 42, 53, 67, 68, 69, 79, 80, 105, 110, 123, 161, 162, 546, 547, 995, 10001, 10002, 10003, 10004, 10005, 10006, 10007 ■ Network Port The setting for the network port on the rear panel of the recorder is configured. This setting is required to operate the recorder from a PC connected via a network using the network ports. [DHCP] Select "On" or "Off" to determine whether or not to use the DHCP server. Select "On" to obtain an IP address, a subnet mask and a gateway address from the DHCP server. Set to "Off" when entering the addresses above manually. The IP address, subnet mask and default gateway obtained from the DHCP server are displayed on each setting area. Default: Off Note: • When the setting of DHCP is changed from "On" to "Off", the setting of DNS will be automatically changed to "Off". 99
-
 1
1 -
2
-
3
-
4
-
5
-
6
-
7
-
8
-
9
-
10
-
11
-
12
-
13
-
14
-
15
-
16
-
17
-
18
-
19
-
20
-
21
-
22
-
23
-
24
-
25
-
26
-
27
-
28
-
29
-
30
-
31
-
32
-
33
-
34
-
35
-
36
-
37
-
38
-
39
-
40
-
41
-
42
-
43
-
44
-
45
-
46
-
47
-
48
-
49
-
50
-
51
-
52
-
53
-
54
-
55
-
56
-
57
-
58
-
59
-
60
-
61
-
62
-
63
-
64
-
65
-
66
-
67
-
68
-
69
-
70
-
71
-
72
-
73
-
74
-
75
-
76
-
77
-
78
-
79
-
80
-
81
-
82
-
83
-
84
-
85
-
86
-
87
-
88
-
89
-
90
-
91
-
92
-
93
-
 94
94 -
 95
95 -
 96
96 -
 97
97 -
 98
98 -
 99
99 -
 100
100 -
 101
101 -
 102
102 -
 103
103 -
 104
104 -
105
-
106
-
107
-
108
-
109
-
110
-
111
-
112
-
113
-
114
-
115
-
116
-
117
-
118
-
119
-
120
-
121
-
122
-
123
-
124
-
125
-
126
-
127
-
128
-
129
-
130
-
131
-
132
-
133
-
134
-
135
-
136
-
137
-
138
-
139
-
140
-
141
-
142
-
143
-
144
-
145
-
146
-
147
-
148
-
149
-
150
-
151
-
152
-
153
-
154
-
155
-
156
 |
 |