Panasonic WJ-HD716/1000 Installation Guide - Page 139
Shutdown process of the extension unit
 |
View all Panasonic WJ-HD716/1000 manuals
Add to My Manuals
Save this manual to your list of manuals |
Page 139 highlights
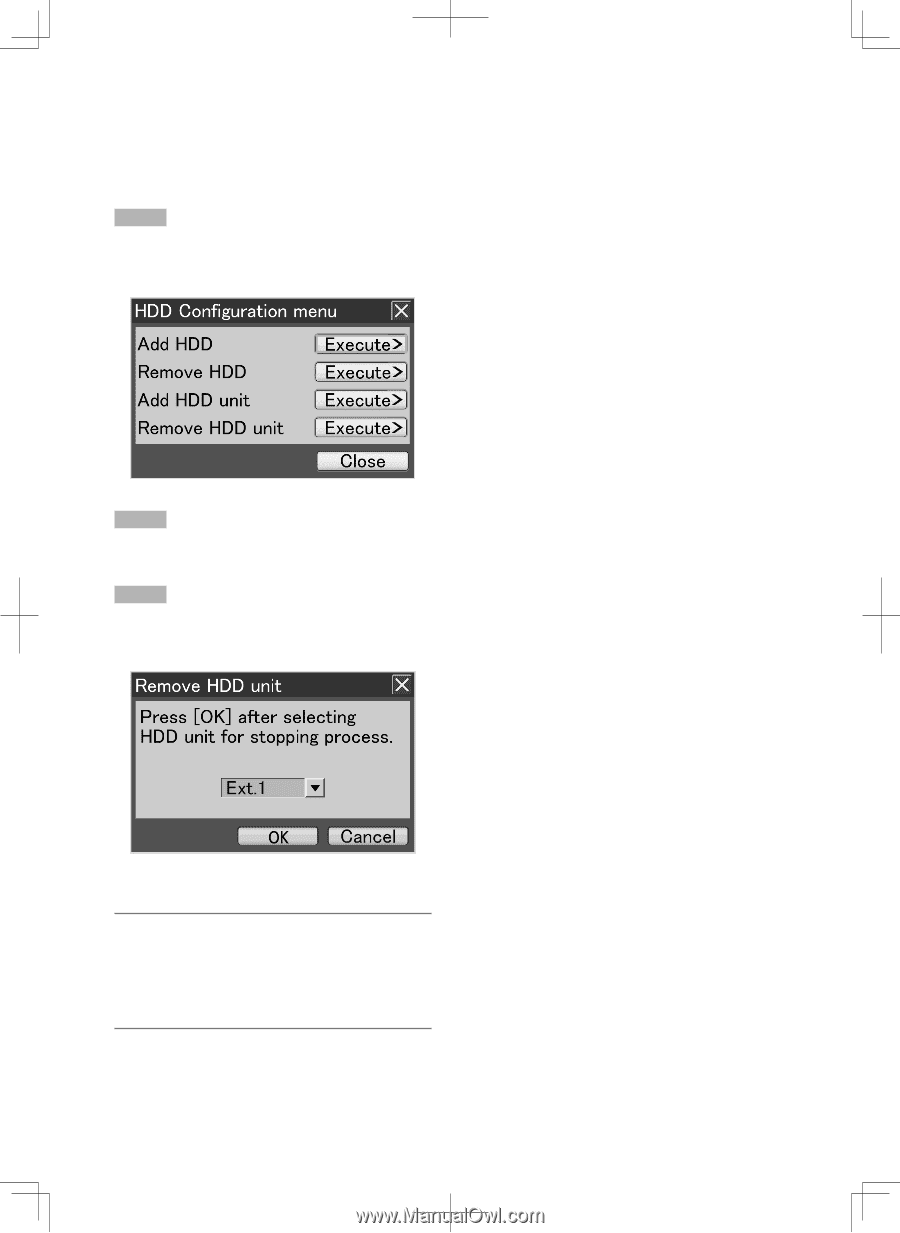
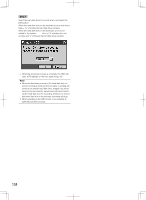
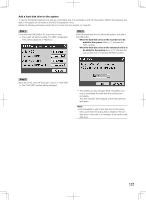
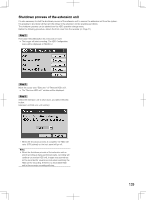
Shutdown process of the extension unit It is also necessary to start the shutdown process of the extension unit to remove the extension unit from the system. It is possible to shut down all the hard disk drives in the extension unit by operating as follows. The shutdown process can be started from the HDD operation change menu. Before the following procedure, detach the front cover from the recorder. (☞ Page 21) Step 1 Hold down the [USE] button for 2 seconds or more. → The buzzer will start sounding. The HDD Configuration menu will be displayed on Monitor 2. Step 2 Move the cursor onto "Execute>" of "Remove HDD unit". → The "Remove HDD unit" window will be displayed. Step 3 Select the extension unit to shut down, and select the [OK] button. Extension unit: Ext.x (x: unit number) → When the shutdown process is complete, the HDD indicator (STS (status)) on the front panel will go off. Note: • When the shutdown process of the extension unit on which recording is being performed starts, recording will continue on another HDD unit. Images may sometimes not be recorded for several seconds when switching the HDD unit for recording. If there is no recordable HDD unit in the recorder, recording will stop. 139
-
 1
1 -
2
-
3
-
4
-
5
-
6
-
7
-
8
-
9
-
10
-
11
-
12
-
13
-
14
-
15
-
16
-
17
-
18
-
19
-
20
-
21
-
22
-
23
-
24
-
25
-
26
-
27
-
28
-
29
-
30
-
31
-
32
-
33
-
34
-
35
-
36
-
37
-
38
-
39
-
40
-
41
-
42
-
43
-
44
-
45
-
46
-
47
-
48
-
49
-
50
-
51
-
52
-
53
-
54
-
55
-
56
-
57
-
58
-
59
-
60
-
61
-
62
-
63
-
64
-
65
-
66
-
67
-
68
-
69
-
70
-
71
-
72
-
73
-
74
-
75
-
76
-
77
-
78
-
79
-
80
-
81
-
82
-
83
-
84
-
85
-
86
-
87
-
88
-
89
-
90
-
91
-
92
-
93
-
94
-
95
-
96
-
97
-
98
-
99
-
100
-
101
-
102
-
103
-
104
-
105
-
106
-
107
-
108
-
109
-
110
-
111
-
112
-
113
-
114
-
115
-
116
-
117
-
118
-
119
-
120
-
121
-
122
-
123
-
124
-
125
-
126
-
127
-
128
-
129
-
130
-
131
-
132
-
133
-
 134
134 -
 135
135 -
 136
136 -
 137
137 -
 138
138 -
 139
139 -
 140
140 -
 141
141 -
 142
142 -
 143
143 -
 144
144 -
145
-
146
-
147
-
148
-
149
-
150
-
151
-
152
-
153
-
154
-
155
-
156
 |
 |