Panasonic WJ-HD716/1000 Installation Guide - Page 59
How to operate the setup menu
 |
View all Panasonic WJ-HD716/1000 manuals
Add to My Manuals
Save this manual to your list of manuals |
Page 59 highlights
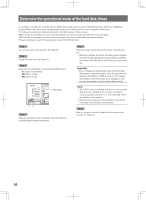
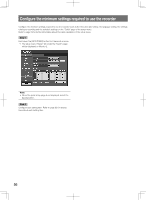
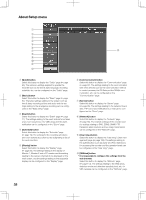
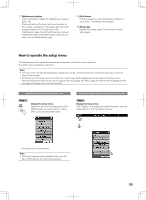
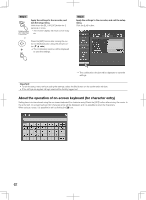
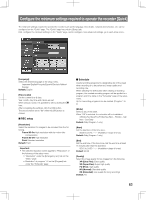
!1 [Maintenance] button Select this button to display the "Maintenance" page (☞ page 119). Check and setup of the hard disk drive information of the recorder, management of the setup data and check of log information can be carried out on the "Maintenance" page. Formatting SD memory cards and displaying the disk configuration page can also be carried out on the "Maintenance" page. !2 [Exit] button Exits the setup menu when finishing the operation of setup menu. The settings will be applied. !3 Setup page Displays each setup page. There are tabs for some setup pages. How to operate the setup menu The settings required to operate the recorder are configured on the setup menu in advance. The setup menu is displayed on Monitor 2. Note: • The setup menu can also be displayed by holding down the [SETUP/ESC] button (for more than 2 seconds) on the front panel of the recorder. • At the startup of the setup menu for the first time, "Quick" page will be displayed as the top page of the setup menu. After operating the recorder on the "Quick" page or each setup page, the "Basic" page (☞ page 65) will be displayed as the top page of the setup menu from the next time. Operation using buttons on the front cover Operation using a mouse connected to the recorder Step 1 SUB MENU Display the setup menu. Display the sub menu by pressing the [SUB MENU] button, move the cursor to "Setup Menu", and press the [SET] button. Step 1 Display the setup menu. Click "S.Menu" on the status bar below the screen, and click "Setup Menu" on the "Sub Menu" window. ➜ → The setup menu window opens. Note: • While live images are being displayed, hold down the [SETUP/ESC] button for more than 2 seconds. 59
-
 1
1 -
2
-
3
-
4
-
5
-
6
-
7
-
8
-
9
-
10
-
11
-
12
-
13
-
14
-
15
-
16
-
17
-
18
-
19
-
20
-
21
-
22
-
23
-
24
-
25
-
26
-
27
-
28
-
29
-
30
-
31
-
32
-
33
-
34
-
35
-
36
-
37
-
38
-
39
-
40
-
41
-
42
-
43
-
44
-
45
-
46
-
47
-
48
-
49
-
50
-
51
-
52
-
53
-
 54
54 -
 55
55 -
 56
56 -
 57
57 -
 58
58 -
 59
59 -
 60
60 -
 61
61 -
 62
62 -
 63
63 -
 64
64 -
65
-
66
-
67
-
68
-
69
-
70
-
71
-
72
-
73
-
74
-
75
-
76
-
77
-
78
-
79
-
80
-
81
-
82
-
83
-
84
-
85
-
86
-
87
-
88
-
89
-
90
-
91
-
92
-
93
-
94
-
95
-
96
-
97
-
98
-
99
-
100
-
101
-
102
-
103
-
104
-
105
-
106
-
107
-
108
-
109
-
110
-
111
-
112
-
113
-
114
-
115
-
116
-
117
-
118
-
119
-
120
-
121
-
122
-
123
-
124
-
125
-
126
-
127
-
128
-
129
-
130
-
131
-
132
-
133
-
134
-
135
-
136
-
137
-
138
-
139
-
140
-
141
-
142
-
143
-
144
-
145
-
146
-
147
-
148
-
149
-
150
-
151
-
152
-
153
-
154
-
155
-
156
 |
 |