Panasonic WJ-HD716/1000 Installation Guide - Page 81
Assign a program after setting the time zone [Time table]
 |
View all Panasonic WJ-HD716/1000 manuals
Add to My Manuals
Save this manual to your list of manuals |
Page 81 highlights
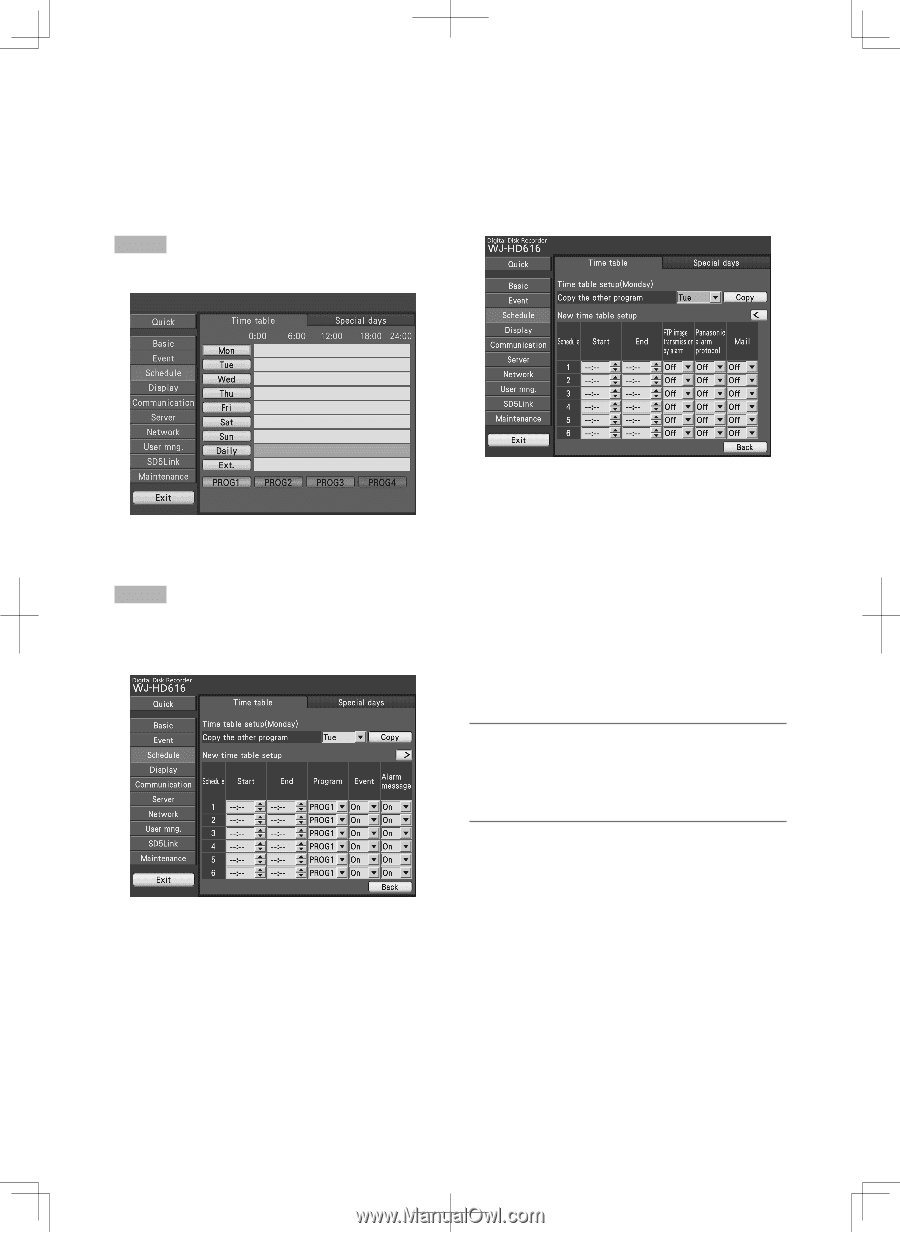
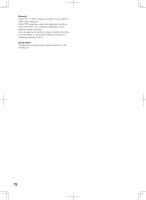
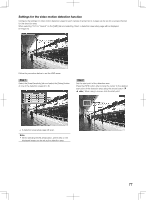
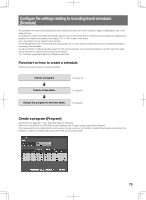
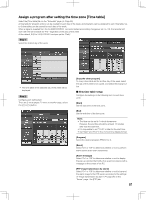
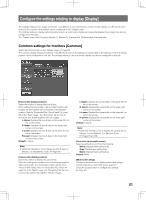
Assign a program after setting the time zone [Time table] Select the [Time table] tab on the "Schedule" page. (☞ Page 60) A time table for program actions can be created for each day of the week, and programs can be assigned to each time table. Up to 6 time tables can be created for each day of the week. When a signal is supplied from the ALARM/CONTROL connector (external recording changeover, pin no. 24), the recorder will work with the set timetable for "Ext." regardless of the days of the week. At the default, 0:00 to 24:00, PROG1 has been set for "Daily". Step 1 Select the desired day of the week. → The time table of the selected day of the week will be displayed. Step 2 Configure each setting item. There are 2 setup pages. To move to another page, select the [k] or [l] button. [Copy the other program] To copy a time table set for another day of the week, select the day of the week to be copied, and select the [Copy] button. ■ New time table setup Configure the settings of the following item for each time zone. [Start] Set the start time of the time zone. [End] Set the end time of the time zone. Note: • The time can be set in 1-minute increments. However, the end time should be at least 15 minutes later than the start time. • It is impossible to set "23:46" or later for the start time. • Set "Start" and "End" in the 24-hour time display format. [Program] Select the desired program (PROG1 to 4). [Event] Select "On" or "Off" to determine whether or not to perform event actions at an event occurrence. [Alarm message] Select "On" or "Off" to determine whether or not to display the pop-up window that notify of an event occurrence with a message on the screen of the PC. [FTP image transmission by alarm] Select "On" or "Off" to determine whether or not to transmit the alarm image to the FTP server according to the settings of "Image transmission by alarm" (☞ page 96) on the "Server" page - the [FTP] tab. 81
-
 1
1 -
2
-
3
-
4
-
5
-
6
-
7
-
8
-
9
-
10
-
11
-
12
-
13
-
14
-
15
-
16
-
17
-
18
-
19
-
20
-
21
-
22
-
23
-
24
-
25
-
26
-
27
-
28
-
29
-
30
-
31
-
32
-
33
-
34
-
35
-
36
-
37
-
38
-
39
-
40
-
41
-
42
-
43
-
44
-
45
-
46
-
47
-
48
-
49
-
50
-
51
-
52
-
53
-
54
-
55
-
56
-
57
-
58
-
59
-
60
-
61
-
62
-
63
-
64
-
65
-
66
-
67
-
68
-
69
-
70
-
71
-
72
-
73
-
74
-
75
-
 76
76 -
 77
77 -
 78
78 -
 79
79 -
 80
80 -
 81
81 -
 82
82 -
 83
83 -
 84
84 -
 85
85 -
 86
86 -
87
-
88
-
89
-
90
-
91
-
92
-
93
-
94
-
95
-
96
-
97
-
98
-
99
-
100
-
101
-
102
-
103
-
104
-
105
-
106
-
107
-
108
-
109
-
110
-
111
-
112
-
113
-
114
-
115
-
116
-
117
-
118
-
119
-
120
-
121
-
122
-
123
-
124
-
125
-
126
-
127
-
128
-
129
-
130
-
131
-
132
-
133
-
134
-
135
-
136
-
137
-
138
-
139
-
140
-
141
-
142
-
143
-
144
-
145
-
146
-
147
-
148
-
149
-
150
-
151
-
152
-
153
-
154
-
155
-
156
 |
 |