Panasonic WJ-HD716/1000 Installation Guide - Page 52
Install/remove HDD units
 |
View all Panasonic WJ-HD716/1000 manuals
Add to My Manuals
Save this manual to your list of manuals |
Page 52 highlights
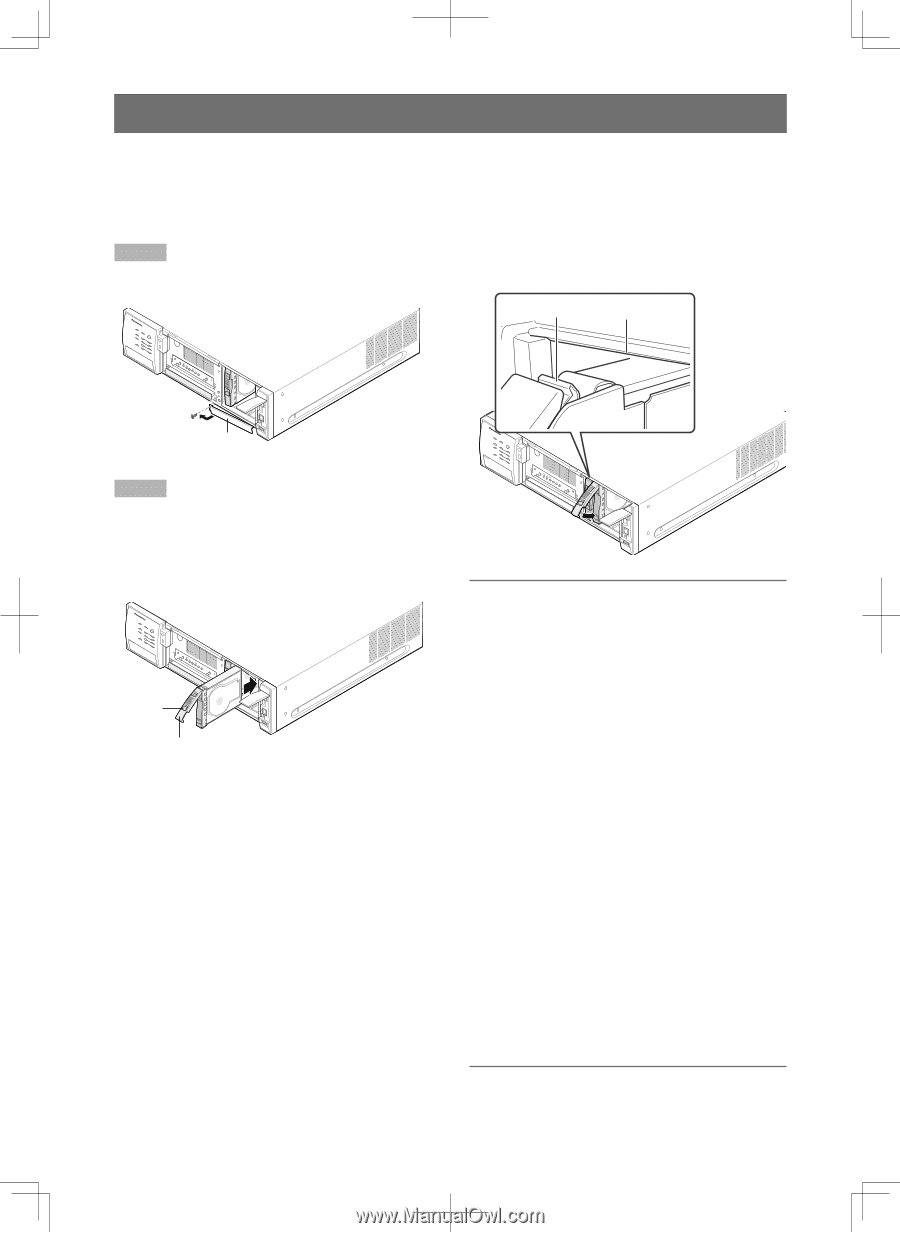
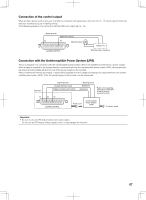
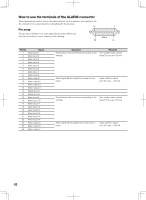
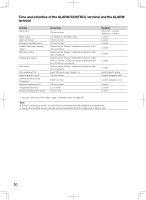
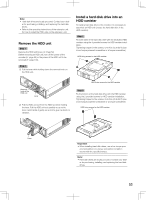
Install/remove HDD units Install the HDD units Install the HDD units by referring the disk slot number. Detach the front cover in advance. (☞ Page 21) Step 1 Remove the HDD unit brace. Removal knob of the(3H)DDPruensits the lever down and push it until the removal knob clicks. Lever (2) Hook Rim HDD unit brace Step 2 Install the HDD units by referring the disk slot number. (1) Lift the lever on the HDD unit while holding down the removal knob, and then insert the HDD unit all the way into the HDD slot. Removal knob of the HDD unit Lever (2) Pinch the rim on the HDD slot with the hook on the HDD unit securely. 52 (3) Important: • Keep the removed HDD unit brace securely. When trans- porting the recorder, it is necessary to attach it. • Hard disk drives are precise devices. Handle with care while keeping the following in mind. • Do not subject the hard disk drive to any vibration or impact. Before touching the hard disk drive, eliminate static elec- tricity by touching a steel locker, etc. When holding the hard disk drive, hold the both sides of the hard disk drive. • Do not touch the circuit board or the connectors to prevent the hard disk drive from damaging by static electricity. • Contact your dealer for hard disk drives that works on the recorder. Please be forewarned that operation with any hard disk drive other than the specified models is not guaranteed under any circumstances. • When using multiple hard disk drives, use the same model. If different models are used together, even when the capacities of them are the same, the available capacity may be a few percent smaller. • Install the hard disk drives one by one in order starting from HDD1.(The leftmost slot of the HDD slots is HDD1 and the rightmost one is HDD4.) • Once the operation has started in the RAID 5 or RAID 6 mode, do not change the positions of the HDD units. If they are changed, it may become impossible to read recorded data.
-
 1
1 -
2
-
3
-
4
-
5
-
6
-
7
-
8
-
9
-
10
-
11
-
12
-
13
-
14
-
15
-
16
-
17
-
18
-
19
-
20
-
21
-
22
-
23
-
24
-
25
-
26
-
27
-
28
-
29
-
30
-
31
-
32
-
33
-
34
-
35
-
36
-
37
-
38
-
39
-
40
-
41
-
42
-
43
-
44
-
45
-
46
-
 47
47 -
 48
48 -
 49
49 -
 50
50 -
 51
51 -
 52
52 -
 53
53 -
 54
54 -
 55
55 -
 56
56 -
 57
57 -
58
-
59
-
60
-
61
-
62
-
63
-
64
-
65
-
66
-
67
-
68
-
69
-
70
-
71
-
72
-
73
-
74
-
75
-
76
-
77
-
78
-
79
-
80
-
81
-
82
-
83
-
84
-
85
-
86
-
87
-
88
-
89
-
90
-
91
-
92
-
93
-
94
-
95
-
96
-
97
-
98
-
99
-
100
-
101
-
102
-
103
-
104
-
105
-
106
-
107
-
108
-
109
-
110
-
111
-
112
-
113
-
114
-
115
-
116
-
117
-
118
-
119
-
120
-
121
-
122
-
123
-
124
-
125
-
126
-
127
-
128
-
129
-
130
-
131
-
132
-
133
-
134
-
135
-
136
-
137
-
138
-
139
-
140
-
141
-
142
-
143
-
144
-
145
-
146
-
147
-
148
-
149
-
150
-
151
-
152
-
153
-
154
-
155
-
156
 |
 |