Samsung SGH-T499 User Manual (user Manual) (ver.f9) (English) - Page 68
Finding a Contact
 |
View all Samsung SGH-T499 manuals
Add to My Manuals
Save this manual to your list of manuals |
Page 68 highlights
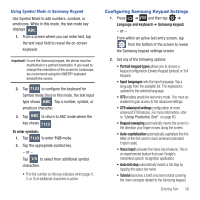
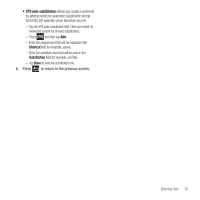
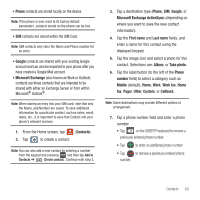
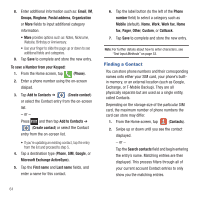
8. Enter additional information such as: Email, IM, Groups, Ringtone, Postal address, Organization or More fields to input additional category information. • More provides options such as: Notes, Nickname, Website, Birthday or Anniversary. • Use your finger to slide the page up or down to see additional fields and categories. 9. Tap Save to complete and store the new entry. To save a Number from your Keypad: 1. From the Home screen, tap (Phone). 2. Enter a phone number using the on-screen dialpad. 3. Tap Add to Contacts ➔ (Create contact) or select the Contact entry from the on-screen list. - or - Press and then tap Add to Contacts ➔ (Create contact) or select the Contact entry from the on-screen list. • If you're updating an existing contact, tap the entry from the list and proceed to step 5. 4. Tap a destination type (Phone, SIM, Google, or Microsoft Exchange ActiveSync). 5. Tap the First name and Last name fields, and enter a name for this contact. 6. Tap the label button (to the left of the Phone number field) to select a category such as Mobile (default), Home, Work, Work fax, Home fax, Pager, Other, Custom, or Callback. 7. Tap Save to complete and store the new entry. Note: For further details about how to enter characters, see "Text Input Methods" on page 53. Finding a Contact You can store phone numbers and their corresponding names onto either your SIM card, your phone's builtin memory, or an external location (such as Google, Exchange, or T-Mobile Backup). They are all physically separate but are used as a single entity, called Contacts. Depending on the storage size of the particular SIM card, the maximum number of phone numbers the card can store may differ. 1. From the Home screen, tap (Contacts). 2. Swipe up or down until you see the contact displayed. - or - Tap the Search contacts field and begin entering the entry's name. Matching entries are then displayed. This process filters through all of your current account Contact entries to only show you the matching entries. 64
-
 1
1 -
2
-
3
-
4
-
5
-
6
-
7
-
8
-
9
-
10
-
11
-
12
-
13
-
14
-
15
-
16
-
17
-
18
-
19
-
20
-
21
-
22
-
23
-
24
-
25
-
26
-
27
-
28
-
29
-
30
-
31
-
32
-
33
-
34
-
35
-
36
-
37
-
38
-
39
-
40
-
41
-
42
-
43
-
44
-
45
-
46
-
47
-
48
-
49
-
50
-
51
-
52
-
53
-
54
-
55
-
56
-
57
-
58
-
59
-
60
-
61
-
62
-
 63
63 -
 64
64 -
 65
65 -
 66
66 -
 67
67 -
 68
68 -
 69
69 -
 70
70 -
 71
71 -
 72
72 -
 73
73 -
74
-
75
-
76
-
77
-
78
-
79
-
80
-
81
-
82
-
83
-
84
-
85
-
86
-
87
-
88
-
89
-
90
-
91
-
92
-
93
-
94
-
95
-
96
-
97
-
98
-
99
-
100
-
101
-
102
-
103
-
104
-
105
-
106
-
107
-
108
-
109
-
110
-
111
-
112
-
113
-
114
-
115
-
116
-
117
-
118
-
119
-
120
-
121
-
122
-
123
-
124
-
125
-
126
-
127
-
128
-
129
-
130
-
131
-
132
-
133
-
134
-
135
-
136
-
137
-
138
-
139
-
140
-
141
-
142
-
143
-
144
-
145
-
146
-
147
-
148
-
149
-
150
-
151
-
152
-
153
-
154
-
155
-
156
-
157
-
158
-
159
-
160
-
161
-
162
-
163
-
164
-
165
-
166
-
167
-
168
-
169
-
170
-
171
-
172
-
173
-
174
-
175
-
176
-
177
-
178
-
179
-
180
-
181
-
182
-
183
-
184
-
185
-
186
-
187
-
188
-
189
-
190
-
191
-
192
-
193
-
194
-
195
 |
 |
