Samsung SGH-T499 User Manual (user Manual) (ver.f9) (English) - Page 77
My Profile, Additional Contact Options, Select Contacts to Sync
 |
View all Samsung SGH-T499 manuals
Add to My Manuals
Save this manual to your list of manuals |
Page 77 highlights
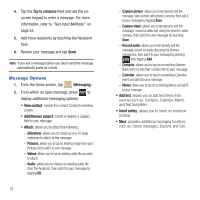
3. Enter your account's access Email and Password information and tap Login. 4. Select a sync interval (from None to Once a day) and tap Next. 5. Tap those settings you wish to synchronize (all are enabled by default). A green checkmark indicates the feature is enabled. • Choose from: Select Contacts to Sync, Sync all contacts, or Sync Calendar. 6. Tap Done to save these settings and return to Accounts and sync screen. 7. Tap to confirm your Facebook contacts are now synchronized and appear in your Contacts list. My Profile You can send this Virtual Business Card (V-card) to other contacts as an attachment. My Profile is the first Contact listed in the Contacts list. Note: As with any profile, your profile can be associated with a group. To create My Profile: 1. From the Home screen, tap . 2. Press and then tap My profile. 3. Enter information into the various fields. 4. Tap Save to store the new entry. To edit My Profile: 1. With My profile displayed, press tap Edit. and then 2. Modify any of the information contained in My Profile, then tap Save. Additional Contact Options Sending an Email to a Contact Note: Contacts must contain and email account and address before you can use the Send email feature. 1. From the Home screen, tap . 2. Press and then tap More ➔ Send email. Contacts that contain an email address display. 3. Tap the contact to which you want to send an email. A check mark displays next to the selection. Note: The select contact must have an email as part of their details screen. 4. Tap Add. 5. Select an email account type. 6. Compose the email and tap Send. Export/Import For more information, refer to "Copying Contact Information" on page 70. Contacts 73
-
 1
1 -
2
-
3
-
4
-
5
-
6
-
7
-
8
-
9
-
10
-
11
-
12
-
13
-
14
-
15
-
16
-
17
-
18
-
19
-
20
-
21
-
22
-
23
-
24
-
25
-
26
-
27
-
28
-
29
-
30
-
31
-
32
-
33
-
34
-
35
-
36
-
37
-
38
-
39
-
40
-
41
-
42
-
43
-
44
-
45
-
46
-
47
-
48
-
49
-
50
-
51
-
52
-
53
-
54
-
55
-
56
-
57
-
58
-
59
-
60
-
61
-
62
-
63
-
64
-
65
-
66
-
67
-
68
-
69
-
70
-
71
-
 72
72 -
 73
73 -
 74
74 -
 75
75 -
 76
76 -
 77
77 -
 78
78 -
 79
79 -
 80
80 -
 81
81 -
 82
82 -
83
-
84
-
85
-
86
-
87
-
88
-
89
-
90
-
91
-
92
-
93
-
94
-
95
-
96
-
97
-
98
-
99
-
100
-
101
-
102
-
103
-
104
-
105
-
106
-
107
-
108
-
109
-
110
-
111
-
112
-
113
-
114
-
115
-
116
-
117
-
118
-
119
-
120
-
121
-
122
-
123
-
124
-
125
-
126
-
127
-
128
-
129
-
130
-
131
-
132
-
133
-
134
-
135
-
136
-
137
-
138
-
139
-
140
-
141
-
142
-
143
-
144
-
145
-
146
-
147
-
148
-
149
-
150
-
151
-
152
-
153
-
154
-
155
-
156
-
157
-
158
-
159
-
160
-
161
-
162
-
163
-
164
-
165
-
166
-
167
-
168
-
169
-
170
-
171
-
172
-
173
-
174
-
175
-
176
-
177
-
178
-
179
-
180
-
181
-
182
-
183
-
184
-
185
-
186
-
187
-
188
-
189
-
190
-
191
-
192
-
193
-
194
-
195
 |
 |
