ZyXEL NBG6515 User Guide - Page 47
Status Screen in Easy Mode
 |
View all ZyXEL NBG6515 manuals
Add to My Manuals
Save this manual to your list of manuals |
Page 47 highlights
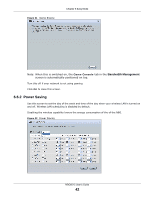
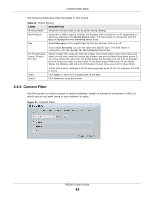
Chapter 6 Easy Mode The following table describes the labels in this screen. Table 23 Wireless Security: WPS LABEL Wireless Security WPS DESCRIPTION Click this to go back to the Wireless Security screen. Create a secure wireless network simply by pressing a button. The NBG scans for a WPS-enabled device within the range and performs wireless security information synchronization. Register Exit Note: After you click the WPS button on this screen, you have to press a similar button in the wireless station utility within 2 minutes. To add the second wireless station, you have to press these buttons on both device and the wireless station again after the first 2 minutes. Create a secure wireless network simply by entering a wireless client's PIN (Personal Identification Number) in the NBG's interface and pushing this button. Type the same PIN number generated in the wireless station's utility. Then click Register to associate to each other and perform the wireless security information synchronization. Click Exit to close this screen. 6.7 Status Screen in Easy Mode In the Network Map screen, click Status to view read-only information about the NBG. Figure 38 Status Screen in Easy Mode The following table describes the labels in this screen. Table 24 Status Screen in Easy Mode ITEM Name Time DESCRIPTION This is the name of the NBG in the network. You can change this in the Maintenance > General screen in Section 25.3 on page 160. This is the current system date and time. WAN IP MAC Address Firmware Version The date is in YYYY:MM:DD (Year-Month-Day) format. The time is in HH:MM:SS (Hour:Minutes:Seconds) format. This is the IP address of the WAN port. This is the MAC address of the NBG. This shows the firmware version of the NBG. The firmware version format shows the trunk version, model code and release number. NBG6515 User's Guide 47
-
 1
1 -
2
-
3
-
4
-
5
-
6
-
7
-
8
-
9
-
10
-
11
-
12
-
13
-
14
-
15
-
16
-
17
-
18
-
19
-
20
-
21
-
22
-
23
-
24
-
25
-
26
-
27
-
28
-
29
-
30
-
31
-
32
-
33
-
34
-
35
-
36
-
37
-
38
-
39
-
40
-
41
-
 42
42 -
 43
43 -
 44
44 -
 45
45 -
 46
46 -
 47
47 -
 48
48 -
 49
49 -
 50
50 -
 51
51 -
 52
52 -
53
-
54
-
55
-
56
-
57
-
58
-
59
-
60
-
61
-
62
-
63
-
64
-
65
-
66
-
67
-
68
-
69
-
70
-
71
-
72
-
73
-
74
-
75
-
76
-
77
-
78
-
79
-
80
-
81
-
82
-
83
-
84
-
85
-
86
-
87
-
88
-
89
-
90
-
91
-
92
-
93
-
94
-
95
-
96
-
97
-
98
-
99
-
100
-
101
-
102
-
103
-
104
-
105
-
106
-
107
-
108
-
109
-
110
-
111
-
112
-
113
-
114
-
115
-
116
-
117
-
118
-
119
-
120
-
121
-
122
-
123
-
124
-
125
-
126
-
127
-
128
-
129
-
130
-
131
-
132
-
133
-
134
-
135
-
136
-
137
-
138
-
139
-
140
-
141
-
142
-
143
-
144
-
145
-
146
-
147
-
148
-
149
-
150
-
151
-
152
-
153
-
154
-
155
-
156
-
157
-
158
-
159
-
160
-
161
-
162
-
163
-
164
-
165
-
166
-
167
-
168
-
169
-
170
-
171
-
172
-
173
-
174
-
175
-
176
-
177
-
178
-
179
-
180
-
181
-
182
-
183
-
184
-
185
-
186
-
187
-
188
-
189
-
190
-
191
-
192
-
193
-
194
-
195
-
196
-
197
-
198
-
199
-
200
-
201
-
202
-
203
-
204
-
205
-
206
-
207
-
208
-
209
-
210
-
211
-
212
-
213
-
214
-
215
-
216
-
217
-
218
-
219
-
220
-
221
-
222
-
223
-
224
-
225
-
226
-
227
-
228
-
229
-
230
-
231
-
232
-
233
-
234
-
235
-
236
-
237
-
238
-
239
-
240
-
241
-
242
-
243
-
244
-
245
-
246
-
247
-
248
-
249
 |
 |
