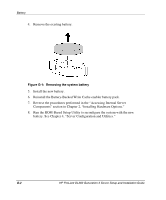
HP DL360 HP ProLiant DL360 Generation 3 Server Setup and Installation Guide - Page 114
Network Teaming and Configuration, Network Interface Controllers NICs
 |
UPC - 613326948835
View all HP DL360 manuals
Add to My Manuals
Save this manual to your list of manuals |
Page 114 highlights
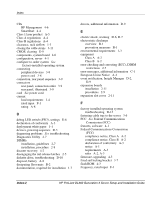
Index J jacks, leveling 1-6 Japanese notice A-5 L labels access panel, location 2-1 laser A-6 rating 1-4 laser Class 1 product A-5 compliance A-6 device regulatory compliance notice A-5 information A-7 product label A-6 regulations, CDRH A-6 type A-7 latches, rail release See rail release latches LEDs front panel E-2 internal E-5 network activity E-4 network link E-4 rear panel E-3 rear unit identification E-4 troubleshooting D-4 leveling jacks 1-6 lithium battery A-7 M maintenance and service guide, website D-13 maintenance, routine 3-15 marking the rack for server installation 3-3 measuring with the template 3-2 memory See DIMMs installation guidelines 2-7 installation procedure 2-8 modifications, FCC compliance statement A-3 monitor, troubleshooting D-5 mouse, FCC compliance statement A-9 N Network Interface Controllers (NICs) configuration 4-10 LEDs, activity status E-4 LEDs, link status E-4 load balancing and teaming 4-10 setting the operating mode E-10 Network Teaming and Configuration Utility 4-10 notice Canadian A-4 European Union A-4 Japanese A-5 Taiwanese A-5 O online registration, server 3-15 opening the cable straps 3-10 operating systems installation instructions 3-13 supported D-9 troubleshooting D-11 upgrading, additional information D-9 website D-9 optical drive installing 2-13 troubleshooting D-10 option kits, DIMMs 2-8 option ROM configuration for smart arrays (ORCA) utility 4-7 options battery-backed write cache 2-25 expansion boards installation 2-11 hot-plug hard drives 2-15 hot-plug power supply 2-19 installation procedures 2-1 Index-4 HP ProLiant DL360 Generation 3 Server Setup and Installation Guide
-
 1
1 -
2
-
3
-
4
-
5
-
6
-
7
-
8
-
9
-
10
-
11
-
12
-
13
-
14
-
15
-
16
-
17
-
18
-
19
-
20
-
21
-
22
-
23
-
24
-
25
-
26
-
27
-
28
-
29
-
30
-
31
-
32
-
33
-
34
-
35
-
36
-
37
-
38
-
39
-
40
-
41
-
42
-
43
-
44
-
45
-
46
-
47
-
48
-
49
-
50
-
51
-
52
-
53
-
54
-
55
-
56
-
57
-
58
-
59
-
60
-
61
-
62
-
63
-
64
-
65
-
66
-
67
-
68
-
69
-
70
-
71
-
72
-
73
-
74
-
75
-
76
-
77
-
78
-
79
-
80
-
81
-
82
-
83
-
84
-
85
-
86
-
87
-
88
-
89
-
90
-
91
-
92
-
93
-
94
-
95
-
96
-
97
-
98
-
99
-
100
-
101
-
102
-
103
-
104
-
105
-
106
-
107
-
108
-
 109
109 -
 110
110 -
 111
111 -
 112
112 -
 113
113 -
 114
114 -
 115
115 -
 116
116 -
 117
117 -
 118
118
 |
 |