HP DL360 HP ProLiant DL360 Generation 3 Server Setup and Installation Guide - Page 41
Installing a Hot-Plug Redundant Power Supply, Appendix E, LEDs, Switches, and Jumpers.
 |
UPC - 613326948835
View all HP DL360 manuals
Add to My Manuals
Save this manual to your list of manuals |
Page 41 highlights
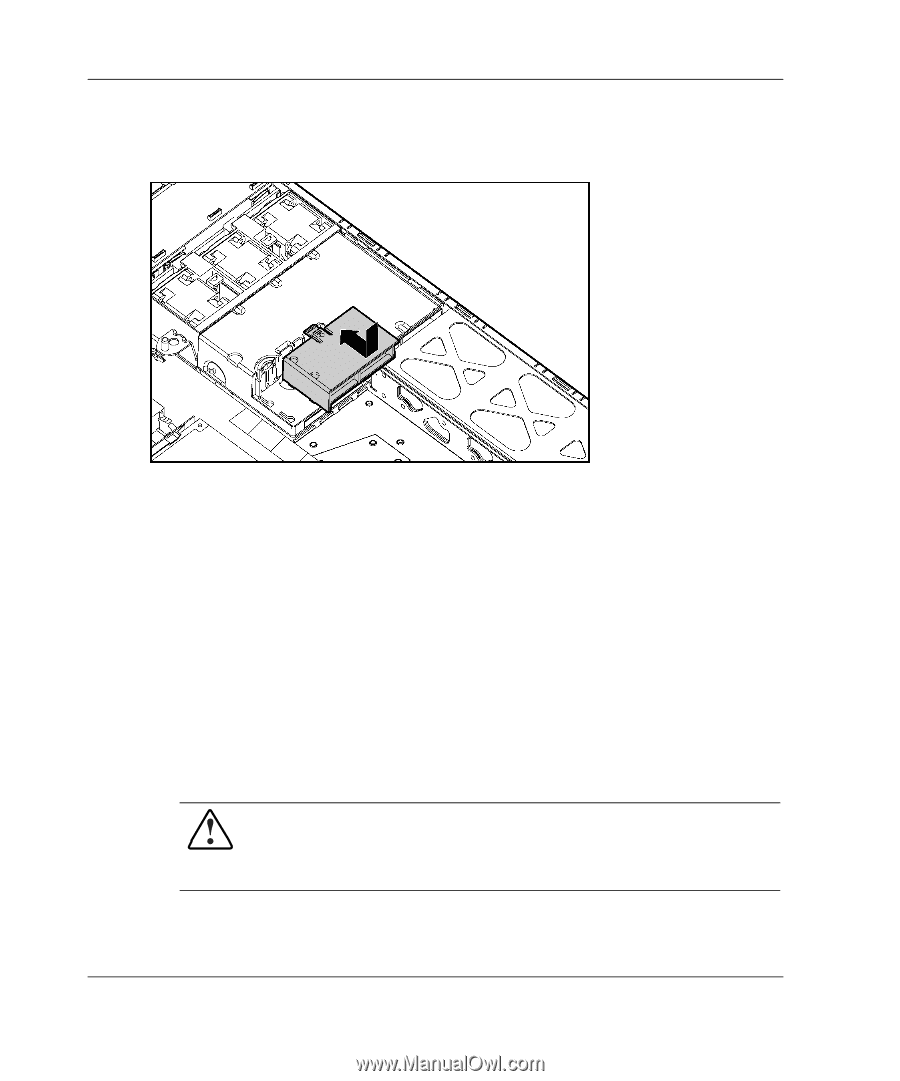
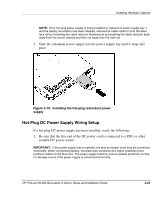
Installing Hardware Options 5. Install the power supply fan baffle to the power converter housing by pushing in until the tabs on the baffle snap into place on the housing. Figure 2-18: Installing the power supply fan baffle 6. Set the Redundant Power Supply Install switch to On. Refer to SW1 settings in Appendix E, "LEDs, Switches, and Jumpers." 7. Replace the access panel on the server, install the server in a rack and power up the server. Refer to documentation that shipped with the server. Installing a Hot-Plug Redundant Power Supply IMPORTANT: This procedure assumes the server was previously configured for redundant hot-plug power supplies. 1. If replacing an existing power supply, eject the power supply by grasping the handle and pushing the power supply ejector button above the handle on the right side. WARNING: When replacing a power supply, the surface may be hot to the touch when first removed. To reduce the risk of injury from a hot surface when handling the power supply, use the power supply handle and other identified touch points. 2-22 HP ProLiant DL360 Generation 3 Server Setup and Installation Guide
-
 1
1 -
2
-
3
-
4
-
5
-
6
-
7
-
8
-
9
-
10
-
11
-
12
-
13
-
14
-
15
-
16
-
17
-
18
-
19
-
20
-
21
-
22
-
23
-
24
-
25
-
26
-
27
-
28
-
29
-
30
-
31
-
32
-
33
-
34
-
35
-
 36
36 -
 37
37 -
 38
38 -
 39
39 -
 40
40 -
 41
41 -
 42
42 -
 43
43 -
 44
44 -
 45
45 -
 46
46 -
47
-
48
-
49
-
50
-
51
-
52
-
53
-
54
-
55
-
56
-
57
-
58
-
59
-
60
-
61
-
62
-
63
-
64
-
65
-
66
-
67
-
68
-
69
-
70
-
71
-
72
-
73
-
74
-
75
-
76
-
77
-
78
-
79
-
80
-
81
-
82
-
83
-
84
-
85
-
86
-
87
-
88
-
89
-
90
-
91
-
92
-
93
-
94
-
95
-
96
-
97
-
98
-
99
-
100
-
101
-
102
-
103
-
104
-
105
-
106
-
107
-
108
-
109
-
110
-
111
-
112
-
113
-
114
-
115
-
116
-
117
-
118
 |
 |