HP DL360 HP ProLiant DL360 Generation 3 Server Setup and Installation Guide - Page 40
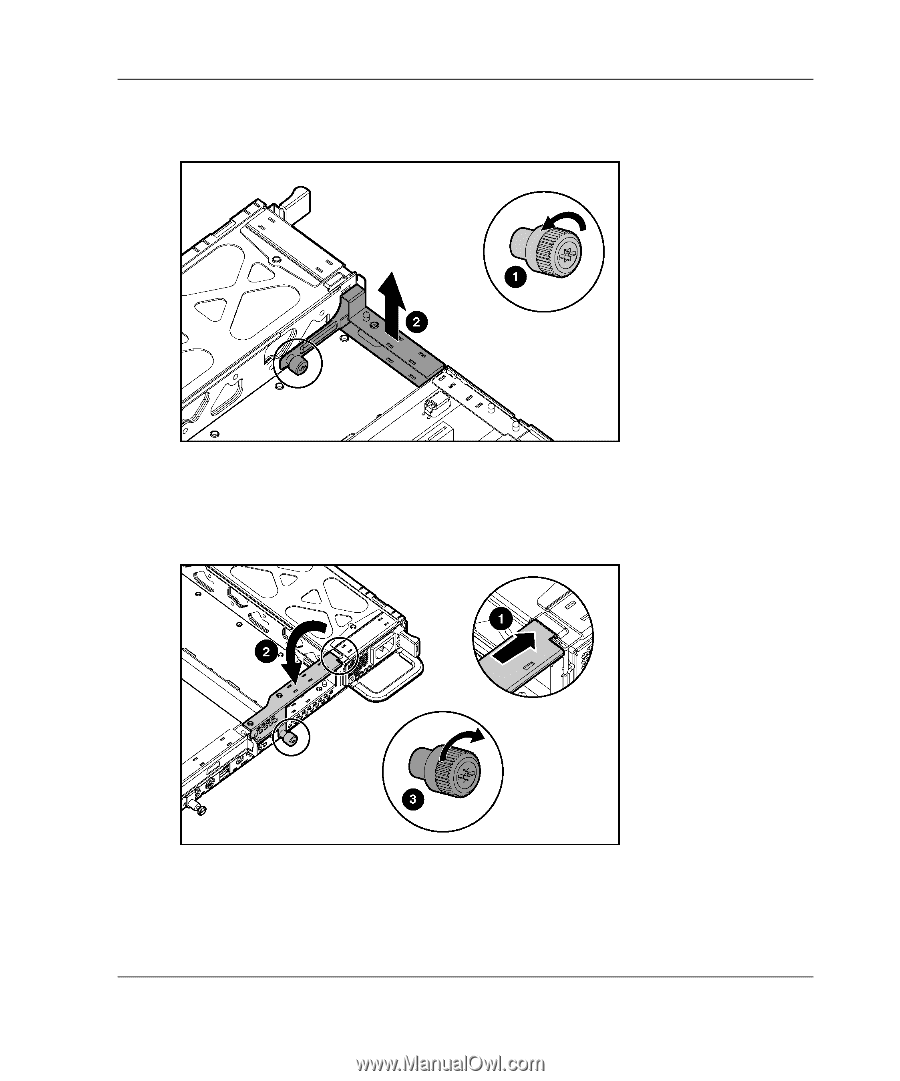
then tighten the thumbscrew 3., the opening on the chassis 1
 |
UPC - 613326948835
View all HP DL360 manuals
Add to My Manuals
Save this manual to your list of manuals |
Page 40 highlights
Installing Hardware Options 3. Loosen the thumbscrew (1) and remove the power supply blank (2). Figure 2-16: Removing the power supply blank 4. Install the PCI blank in the chassis by inserting the rear tab of the PCI blank into the opening on the chassis (1), then lowering the PCI blank into position (2), and then tighten the thumbscrew (3). Figure 2-17: Installing the PCI blank on the chassis HP ProLiant DL360 Generation 3 Server Setup and Installation Guide 2-21
-
 1
1 -
2
-
3
-
4
-
5
-
6
-
7
-
8
-
9
-
10
-
11
-
12
-
13
-
14
-
15
-
16
-
17
-
18
-
19
-
20
-
21
-
22
-
23
-
24
-
25
-
26
-
27
-
28
-
29
-
30
-
31
-
32
-
33
-
34
-
 35
35 -
 36
36 -
 37
37 -
 38
38 -
 39
39 -
 40
40 -
 41
41 -
 42
42 -
 43
43 -
 44
44 -
 45
45 -
46
-
47
-
48
-
49
-
50
-
51
-
52
-
53
-
54
-
55
-
56
-
57
-
58
-
59
-
60
-
61
-
62
-
63
-
64
-
65
-
66
-
67
-
68
-
69
-
70
-
71
-
72
-
73
-
74
-
75
-
76
-
77
-
78
-
79
-
80
-
81
-
82
-
83
-
84
-
85
-
86
-
87
-
88
-
89
-
90
-
91
-
92
-
93
-
94
-
95
-
96
-
97
-
98
-
99
-
100
-
101
-
102
-
103
-
104
-
105
-
106
-
107
-
108
-
109
-
110
-
111
-
112
-
113
-
114
-
115
-
116
-
117
-
118
 |
 |
Installing Hardware Options
HP ProLiant DL360 Generation 3 Server Setup and Installation Guide
2-21
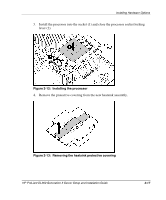
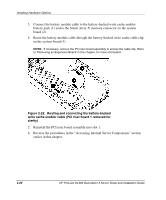
3.
Loosen the thumbscrew (1) and remove the power supply blank (2).
Figure 2-16:
Removing the power supply blank
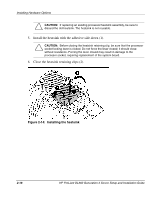
4.
Install the PCI blank in the chassis by inserting the rear tab of the PCI blank into
the opening on the chassis (1), then lowering the PCI blank into position (2), and
then tighten the thumbscrew (3).
Figure 2-17:
Installing the PCI blank on the chassis