HP Visualize J210XC IRIX to HP-UX Migration Guide - Page 112
Using SAM to Install sendmail, Manually Installing sendmail, Installing a Configuration File
 |
View all HP Visualize J210XC manuals
Add to My Manuals
Save this manual to your list of manuals |
Page 112 highlights
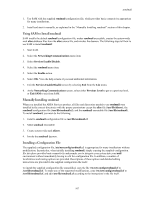
sendmail 1. Use SAM with the supplied sendmail configuration file, which provides basic connectivity appropriate for many installations. 2. Install and start it manually, as explained in the "Manually Installing sendmail" section of this chapter. Using SAM to Install sendmail SAM installs the default sendmail configuration file, makes sendmail executable, creates the system-wide mail alias database files from the alias source file, and invokes the daemon. The following steps tell how to use SAM to install sendmail: 1. Start SAM. 2. Select the Networking/Communications menu item. 3. Select Services Enable/Disable. 4. Select the sendmail menu item. 5. Select the Enable action. 6. Select OK. View the help screens if you need additional information. 7. Exit the Services Enable/Disable screen by selecting Exit from the List menu. 8. At the Networking/Communications screen, select either Previous Level to get to a previous level, or Exit SAM to exit from SAM. Manually Installing sendmail When you installed the ARPA Services product, all files and directories needed to use sendmail were installed in the correct directories with the proper permissions except the alias file (/usr/lib/aliases), the sendmail configuration file (/usr/lib/sendmail.cf), and the sendmail executable file (/usr/lib/sendmail). To install sendmail, you must do the following: 1. Install a sendmail configuration file as /usr/lib/sendmail.cf. 2. Make sendmail executable. 3. Create system-wide mail aliases. 4. Invoke the sendmail daemon. Installing a Configuration File The supplied configuration file, /etc/newconfig/sendmail.cf, is appropriate for many installations without modification. In particular, when initially installing sendmail, simply copying the supplied configuration file into place provides basic connectivity and permits you to integrate your system into your mail environment without immediately having to edit the configuration file. In addition, a number of localizations and routing options are provided. Descriptions of these options and detailed editing instructions are provided in the supplied configuration file itself. To install the supplied configuration file unmodified, copy the file /etc/newconfig/sendmail.cf to /usr/lib/sendmail.cf. To make any of the supported modifications, copy /etc/newconfig/sendmail.cf to /usr/lib/sendmail.cf, and edit /usr/lib/sendmail.cf according to the instructions in the file itself. 107
-
 1
1 -
2
-
3
-
4
-
5
-
6
-
7
-
8
-
9
-
10
-
11
-
12
-
13
-
14
-
15
-
16
-
17
-
18
-
19
-
20
-
21
-
22
-
23
-
24
-
25
-
26
-
27
-
28
-
29
-
30
-
31
-
32
-
33
-
34
-
35
-
36
-
37
-
38
-
39
-
40
-
41
-
42
-
43
-
44
-
45
-
46
-
47
-
48
-
49
-
50
-
51
-
52
-
53
-
54
-
55
-
56
-
57
-
58
-
59
-
60
-
61
-
62
-
63
-
64
-
65
-
66
-
67
-
68
-
69
-
70
-
71
-
72
-
73
-
74
-
75
-
76
-
77
-
78
-
79
-
80
-
81
-
82
-
83
-
84
-
85
-
86
-
87
-
88
-
89
-
90
-
91
-
92
-
93
-
94
-
95
-
96
-
97
-
98
-
99
-
100
-
101
-
102
-
103
-
104
-
105
-
106
-
 107
107 -
 108
108 -
 109
109 -
 110
110 -
 111
111 -
 112
112 -
 113
113 -
 114
114 -
 115
115 -
 116
116 -
 117
117 -
118
-
119
-
120
-
121
-
122
-
123
-
124
-
125
 |
 |