HP Visualize J210XC IRIX to HP-UX Migration Guide - Page 50
Adding a Local Printer to the lp Spooler, Adding a Remote Printer to the lp Spooler
 |
View all HP Visualize J210XC manuals
Add to My Manuals
Save this manual to your list of manuals |
Page 50 highlights
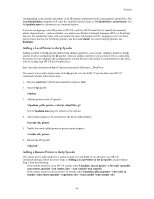
Printers corresponding to the models and names of all HP printers and plotters (plus some generic model files). The /usr/sbin/lpadmin command will copy the identified model script to /etc/lp/interface/ printername. See the lpadmin man for information on command options. If you are configuring a non-HP printer to HP-UX, read the ASCII model files to identify the essential printer characteristics-such as whether your printer uses Printer Command Language (PCL) or PostScript. Also see the manual that came with your printer for more information on PCL language levels. For thirdparty printers that are not PostScript printers, use the model dumb; for non-PostScript plotters, use dumbplot. Adding a Local Printer to the lp Spooler Adding a printer to the lp spooler differs from adding a printer to your system. Adding a printer to the lp spooler involves configuring the lp spooler; whereas, adding a printer to your system involves connecting the printer to your computer and configuring the needed drivers in the kernel. For information on the latter, refer to Configuring HP-UX for Peripherals at: http://docs.hp.com/dynaweb/hpux11/hpuxen1a/perien1a/@Generic__BookView. The easiest way to add a local printer to the lp spooler is to run SAM. If you decide to use HP-UX commands instead, follow these steps: 1. Become superuser with the su command or login as root. 2. Stop the lp spooler: # lpshut 3. Add the printer to the LP spooler: # lpadmin -pchk_printer -v/dev/lp -mhp2934a -g7 See the lpadmin man page for details on the options. 4. Allow print requests to be accepted for the newly added printer: # accept chk_printer 5. Enable the newly added printer to process print requests: # enable chk_printer 6. Restart the LP spooler: # lpsched Adding a Remote Printer to the lp Spooler The easiest way to add a printer to a remote system is to run SAM. If you decide to use HP-UX commands instead, follow the above steps in Adding a Local Printer to the lp Spooler, except replace Step 3 with the following. • If the remote printer is on an HP-UX system, enter # lpadmin -plocal_printer -v/dev/null -mrmodel - orm remote_machine \-orp remote_dest - ocm rcmodel -osm rsmodel • If the remote printer is not on an HP-UX system, enter # lpadmin -plocal_printer -v/dev/null -m rmodel -orm remote_machine \-orpremote_dest -ocm rcmodel -osm rsmodel -ob3 45
-
 1
1 -
2
-
3
-
4
-
5
-
6
-
7
-
8
-
9
-
10
-
11
-
12
-
13
-
14
-
15
-
16
-
17
-
18
-
19
-
20
-
21
-
22
-
23
-
24
-
25
-
26
-
27
-
28
-
29
-
30
-
31
-
32
-
33
-
34
-
35
-
36
-
37
-
38
-
39
-
40
-
41
-
42
-
43
-
44
-
 45
45 -
 46
46 -
 47
47 -
 48
48 -
 49
49 -
 50
50 -
 51
51 -
 52
52 -
 53
53 -
 54
54 -
 55
55 -
56
-
57
-
58
-
59
-
60
-
61
-
62
-
63
-
64
-
65
-
66
-
67
-
68
-
69
-
70
-
71
-
72
-
73
-
74
-
75
-
76
-
77
-
78
-
79
-
80
-
81
-
82
-
83
-
84
-
85
-
86
-
87
-
88
-
89
-
90
-
91
-
92
-
93
-
94
-
95
-
96
-
97
-
98
-
99
-
100
-
101
-
102
-
103
-
104
-
105
-
106
-
107
-
108
-
109
-
110
-
111
-
112
-
113
-
114
-
115
-
116
-
117
-
118
-
119
-
120
-
121
-
122
-
123
-
124
-
125
 |
 |
