HP Visualize J210XC IRIX to HP-UX Migration Guide - Page 57
lp Spooler, Printers and Plotters, Add Local Printer/Plotter >, Actions, Diagnose Missing Card, lp
 |
View all HP Visualize J210XC manuals
Add to My Manuals
Save this manual to your list of manuals |
Page 57 highlights
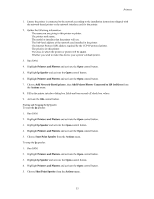
Printers 5. Highlight lp Spooler and activate the Open control button. 6. Choose Printers and Plotters. 7. Choose Add Local Printer/Plotter > and the menu item associated with the printer interface type from the Actions menu. NOTE: The printer driver must be part of the kernel to add the printer to the lp spooler. If the printer driver is not currently configured into the kernel, SAM prompts you to add the driver(s) and reboot the system. 8. Highlight the interface to which you connected the printer, fill in any additional information (port number or bus address) and activate the OK control button. If an interface entry is not listed, activate the Diagnose Missing Card control button. 9. Fill in the printer interface dialog box fields, choose from the menu button values, and turn on and off check box values. 10. Activate the OK control button. Adding a Remote Printer 1. Ensure that the remote system has the printer installed and configured into the system's line printer spooler system. Gather the following information: • The name you are giving to this printer or plotter. • Whether you wish to make this device your system's default printer. • The name of the remote system to which the printer or plotter is attached. • The name of the remote printer or plotter. • The "cancel" model on the remote system (optional). • The "status" model on the remote system (optional). • Whether you wish to allow any user to cancel any printing request. • Whether the remote printer is on a system using Berkeley Software Distribution (BSD) UNIX (using BSD disables any lp -oparm options; BSD systems do not understand the -o option) 2. Run SAM 3. Highlight Printers and Plotters and activate the Open control button. 4. Highlight lp Spooler and activate the Open control button. 5. Highlight Printers and Plotters and activate the Open control button. 6. Choose Add Remote Printer/Plotter and the menu item associated with the printer interface type from the Actions menu. 7. Fill in the printer interface dialog box fields and turn on off check box values. 8. Activate the OK control button. To configure a remote printer into your lp spooler, you must be able to access the system with the printer via a LAN. The process of adding a remote printer is similar to that of adding a local printer, though you will need to supply SAM with some slightly different information. Remote printers cannot be members of a printer class. Adding a Network-Based Printer To add a network-based printer or plotter using SAM: 52
-
 1
1 -
2
-
3
-
4
-
5
-
6
-
7
-
8
-
9
-
10
-
11
-
12
-
13
-
14
-
15
-
16
-
17
-
18
-
19
-
20
-
21
-
22
-
23
-
24
-
25
-
26
-
27
-
28
-
29
-
30
-
31
-
32
-
33
-
34
-
35
-
36
-
37
-
38
-
39
-
40
-
41
-
42
-
43
-
44
-
45
-
46
-
47
-
48
-
49
-
50
-
51
-
 52
52 -
 53
53 -
 54
54 -
 55
55 -
 56
56 -
 57
57 -
 58
58 -
 59
59 -
 60
60 -
 61
61 -
 62
62 -
63
-
64
-
65
-
66
-
67
-
68
-
69
-
70
-
71
-
72
-
73
-
74
-
75
-
76
-
77
-
78
-
79
-
80
-
81
-
82
-
83
-
84
-
85
-
86
-
87
-
88
-
89
-
90
-
91
-
92
-
93
-
94
-
95
-
96
-
97
-
98
-
99
-
100
-
101
-
102
-
103
-
104
-
105
-
106
-
107
-
108
-
109
-
110
-
111
-
112
-
113
-
114
-
115
-
116
-
117
-
118
-
119
-
120
-
121
-
122
-
123
-
124
-
125
 |
 |
