HP Visualize J210XC IRIX to HP-UX Migration Guide - Page 58
Printers and Plotters, lp Spooler, Add Network-Based printer, Add Printer/Plotter Connected to HP
 |
View all HP Visualize J210XC manuals
Add to My Manuals
Save this manual to your list of manuals |
Page 58 highlights
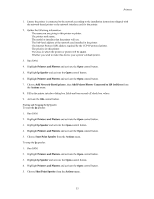
Printers 1. Ensure the printer is connected to the network according to the installation instructions shipped with the network-based printer or the network interface card for the printer. 2. Gather the following information: • The name you are giving to this printer or plotter. • The printer node name. • The model or interface that the printer will use. • The link-level address of the network card installed in the printer. • The Internet Protocol (IP) address required by the TCP-IP protocol printer. • The priority for this printer. • The class to which the printer or plotter will be added. • Whether you wish to make this device your system's default printer. 3. Run SAM. 4. Highlight Printers and Plotters and activate the Open control button. 5. Highlight lp Spooler and activate the Open control button. 6. Highlight Printers and Plotters and activate the Open control button. 7. Choose Add Network-Based printer, then Add Printer/Plotter Connected to HP JetDirect from the Actions menu. 8. Fill in the printer interface dialog box fields and turn on and off check box values. 9. Activate the OK control button. Starting and Stopping the lp Spooler To start the lp spooler: 1. Run SAM. 2. Highlight Printers and Plotters and activate the Open control button. 3. Highlight lp Spooler and activate the Open control button. 4. Highlight Printers and Plotters and activate the Open control button. 5. Choose Start Print Spooler from the Actions menu. To stop the lp spooler: 1. Run SAM. 2. Highlight Printers and Plotters and activate the Open control button. 3. Highlight lp Spooler and activate the Open control button. 4. Highlight Printers and Plotters and activate the Open control button. 5. Choose Shut Print Spooler from the Actions menu. 53
-
 1
1 -
2
-
3
-
4
-
5
-
6
-
7
-
8
-
9
-
10
-
11
-
12
-
13
-
14
-
15
-
16
-
17
-
18
-
19
-
20
-
21
-
22
-
23
-
24
-
25
-
26
-
27
-
28
-
29
-
30
-
31
-
32
-
33
-
34
-
35
-
36
-
37
-
38
-
39
-
40
-
41
-
42
-
43
-
44
-
45
-
46
-
47
-
48
-
49
-
50
-
51
-
52
-
 53
53 -
 54
54 -
 55
55 -
 56
56 -
 57
57 -
 58
58 -
 59
59 -
 60
60 -
 61
61 -
 62
62 -
 63
63 -
64
-
65
-
66
-
67
-
68
-
69
-
70
-
71
-
72
-
73
-
74
-
75
-
76
-
77
-
78
-
79
-
80
-
81
-
82
-
83
-
84
-
85
-
86
-
87
-
88
-
89
-
90
-
91
-
92
-
93
-
94
-
95
-
96
-
97
-
98
-
99
-
100
-
101
-
102
-
103
-
104
-
105
-
106
-
107
-
108
-
109
-
110
-
111
-
112
-
113
-
114
-
115
-
116
-
117
-
118
-
119
-
120
-
121
-
122
-
123
-
124
-
125
 |
 |
