Samsung GT-P5210 User Manual Generic Gt-p5210 Galaxy Tab 3 Jb English User Man - Page 156
Accessibility, Settings, TalkBack, OFF / ON, Important, Screen rotation
 |
View all Samsung GT-P5210 manuals
Add to My Manuals
Save this manual to your list of manuals |
Page 156 highlights
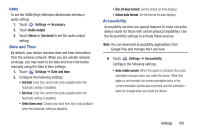
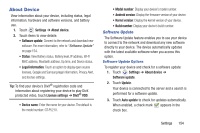
Tip: From any screen, touch the top of the screen and swipe downward, to display the Quick Settings screen. Touch Screen rotation to enable or disable the auto-rotate feature. For more information, refer to "Quick Settings" on page 26. • Screen timeout: Select the screen delay time the screen delays shutting off after inactivity for the selected period of time. • Lock automatically: This option only appears depending on the Screen lock setting. For more information, refer to "Screen Lock" on page 136. • Speak passwords: Speaks passwords to enter them. • Show shortcut: Set this option to display an Accessibility shortcut on the Device options pop-up when you press and hold the power key. • Manage accessibility: Save and update your accessibility settings or share them with another device. You can export or import your accessibility settings to or from a file and then share the file with Email, Gmail, and so on. Services Enable or disable accessibility services. Note: You must activate Accessibility before enabling services. 1. Touch Settings ➔ Accessibility. 2. Touch TalkBack to activate TalkBack. Note: TalkBack, when installed and enabled, speaks feedback to help blind and low-vision users. 3. Touch the OFF / ON icon to turn TalkBack on. 4. Touch Settings to configure TalkBack. Important! TalkBack can collect all of the text you enter, except passwords, including personal data and credit card numbers. It may also log your user interface interactions with the device. 151
-
 1
1 -
2
-
3
-
4
-
5
-
6
-
7
-
8
-
9
-
10
-
11
-
12
-
13
-
14
-
15
-
16
-
17
-
18
-
19
-
20
-
21
-
22
-
23
-
24
-
25
-
26
-
27
-
28
-
29
-
30
-
31
-
32
-
33
-
34
-
35
-
36
-
37
-
38
-
39
-
40
-
41
-
42
-
43
-
44
-
45
-
46
-
47
-
48
-
49
-
50
-
51
-
52
-
53
-
54
-
55
-
56
-
57
-
58
-
59
-
60
-
61
-
62
-
63
-
64
-
65
-
66
-
67
-
68
-
69
-
70
-
71
-
72
-
73
-
74
-
75
-
76
-
77
-
78
-
79
-
80
-
81
-
82
-
83
-
84
-
85
-
86
-
87
-
88
-
89
-
90
-
91
-
92
-
93
-
94
-
95
-
96
-
97
-
98
-
99
-
100
-
101
-
102
-
103
-
104
-
105
-
106
-
107
-
108
-
109
-
110
-
111
-
112
-
113
-
114
-
115
-
116
-
117
-
118
-
119
-
120
-
121
-
122
-
123
-
124
-
125
-
126
-
127
-
128
-
129
-
130
-
131
-
132
-
133
-
134
-
135
-
136
-
137
-
138
-
139
-
140
-
141
-
142
-
143
-
144
-
145
-
146
-
147
-
148
-
149
-
150
-
 151
151 -
 152
152 -
 153
153 -
 154
154 -
 155
155 -
 156
156 -
 157
157 -
 158
158 -
 159
159 -
 160
160 -
 161
161 -
162
-
163
-
164
-
165
-
166
-
167
-
168
-
169
-
170
-
171
-
172
-
173
-
174
-
175
-
176
-
177
-
178
-
179
-
180
-
181
-
182
-
183
-
184
-
185
-
186
-
187
-
188
-
189
-
190
-
191
-
192
-
193
-
194
-
195
-
196
-
197
-
198
-
199
-
200
-
201
-
202
-
203
-
204
-
205
-
206
-
207
-
208
-
209
-
210
-
211
-
212
-
213
-
214
 |
 |