Samsung SGH-I617 User Manual (user Manual) (ver.f4) (English) - Page 75
Advanced Server Settings, Finish, Messaging, Settings, Add Recipient, Subject, My Text >, Insert &
 |
UPC - 899794003607
View all Samsung SGH-I617 manuals
Add to My Manuals
Save this manual to your list of manuals |
Page 75 highlights
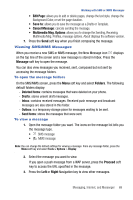
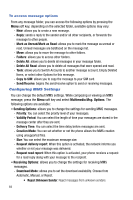
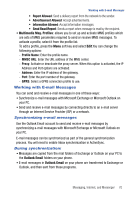
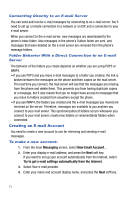
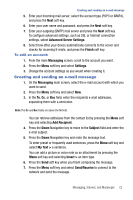
Creating and sending an e-mail message 5. Enter your Incoming mail server; select the account type (POP3 or IMAP4), and press the Next soft key. 6. Enter your user name and password, and press the Next soft key. 7. Enter your outgoing (SMTP) mail server and press the Next soft key. To configure advanced settings, such as SSL or Internet connection settings, select Advanced Server Settings. 8. Select how often your device automatically connects to the server and checks for incoming E-mails, and press the Finish soft key. To edit an account: 1. From the main Messaging screen, scroll to the account you want. 2. Press the Menu soft key and select Settings. 3. Change the account settings as you would when creating it. Creating and sending an e-mail message 1. On the Messaging main screen, select the e-mail account with which you want to send. 2. Press the Menu soft key and select New. 3. In the To, Cc, or Bcc field, enter the recipients e-mail addresses, separating them with a semicolon. Note: The Cc and Bcc fields are above the To field. You can retrieve addresses from the contact list by pressing the Menu soft key and selecting Add Recipient. 4. Press the Down Navigation key to move to the Subject field and enter the e-mail subject. 5. Press the Down Navigation key and enter the message text. To enter preset or frequently used sentences, press the Menu soft key and select My Text > a sentence. You can add a picture or voice note as an attachment by pressing the Menu soft key and selecting Insert > an item type. 6. Press the Send soft key when you finish composing the message. 7. Press the Menu soft key and select Send/Receive to connect to the network and send the message. Messaging, Internet, and Messenger 72
-
 1
1 -
2
-
3
-
4
-
5
-
6
-
7
-
8
-
9
-
10
-
11
-
12
-
13
-
14
-
15
-
16
-
17
-
18
-
19
-
20
-
21
-
22
-
23
-
24
-
25
-
26
-
27
-
28
-
29
-
30
-
31
-
32
-
33
-
34
-
35
-
36
-
37
-
38
-
39
-
40
-
41
-
42
-
43
-
44
-
45
-
46
-
47
-
48
-
49
-
50
-
51
-
52
-
53
-
54
-
55
-
56
-
57
-
58
-
59
-
60
-
61
-
62
-
63
-
64
-
65
-
66
-
67
-
68
-
69
-
 70
70 -
 71
71 -
 72
72 -
 73
73 -
 74
74 -
 75
75 -
 76
76 -
 77
77 -
 78
78 -
 79
79 -
 80
80 -
81
-
82
-
83
-
84
-
85
-
86
-
87
-
88
-
89
-
90
-
91
-
92
-
93
-
94
-
95
-
96
-
97
-
98
-
99
-
100
-
101
-
102
-
103
-
104
-
105
-
106
-
107
-
108
-
109
-
110
-
111
-
112
-
113
-
114
-
115
-
116
-
117
-
118
-
119
-
120
-
121
-
122
-
123
-
124
-
125
-
126
-
127
-
128
-
129
-
130
-
131
-
132
-
133
-
134
-
135
-
136
-
137
-
138
-
139
-
140
-
141
-
142
-
143
-
144
-
145
-
146
-
147
-
148
-
149
-
150
-
151
-
152
-
153
-
154
-
155
-
156
-
157
-
158
-
159
-
160
-
161
-
162
 |
 |