Sharp MX-M363N Installation Manual - Page 10
B. Developer supply, Removal of the fusing heat roller protector, Install the paper exit cover unit - waste toner
 |
View all Sharp MX-M363N manuals
Add to My Manuals
Save this manual to your list of manuals |
Page 10 highlights
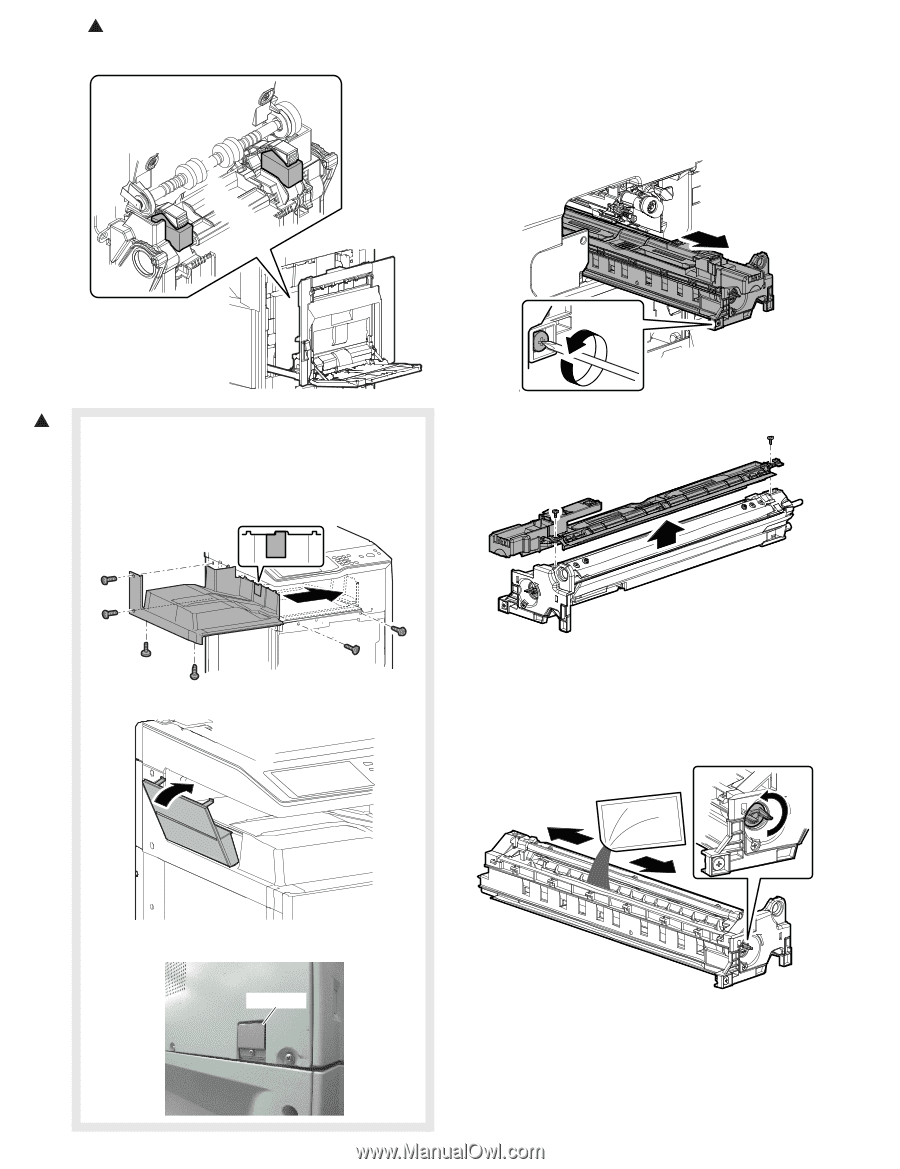
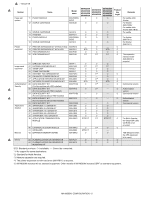
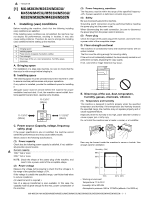
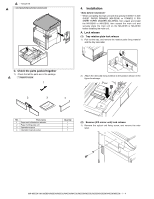
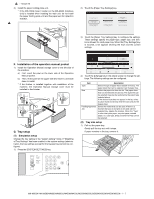
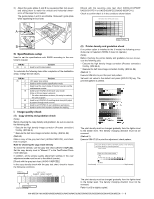
1 : '10/Jun/18 (3) Removal of the fusing heat roller protector B. Developer supply Be careful not to put fingerprints or oil dirt on the roller surface. Do not hold the case adjacent to the DV roller strongly. 1) Open the front cabinet, and remove the waste toner box. 2) Remove the fixing screw of the developing unit, and pull out the developing unit. 1 (4) Install the paper exit cover unit * Europe only. For except Europe, progress to the procedure of B. * If the MX-FNX9 (Inner Finisher) or the MX-RBX3 (Interface Unit) is installed when installing the main unit, do not install the paper holding plate unit and the paper exit full detection actuator. 1) Install the paper exit tray, and fix the screw. 3) Remove two screws. Remove the DV cover. 2) Install the paper exit tray cover. 4) While supplying developer from the developer supply port of the developing unit, turn the MC gear counterclockwise by using long-nose pliers to supply all developer to the developing unit. * Before opening the developer bag, shake the bag to mix toner and developer in the bag, and then supply developer to the developing unit. 3) Remove the screw, and remove the inlet cover. Inlet cover 5) Attach the DV cover to the machine. * Check to confirm that the pawl is securely engaged. 6) Insert the developing unit into the machine, and fix it with the blue screw. 7) Install the waste toner box. MX-M503N MX-M283N/M363N/M363U/M453N/M453U/M503N/M503U/M282N/M362N/M452N/M502N 1 - 5
-
 1
1 -
2
-
3
-
4
-
 5
5 -
 6
6 -
 7
7 -
 8
8 -
 9
9 -
 10
10 -
 11
11 -
 12
12 -
 13
13 -
 14
14 -
 15
15 -
16
-
17
-
18
-
19
-
20
-
21
-
22
-
23
-
24
-
25
-
26
-
27
-
28
-
29
-
30
-
31
-
32
-
33
-
34
-
35
-
36
-
37
-
38
-
39
-
40
-
41
-
42
-
43
-
44
-
45
-
46
-
47
-
48
-
49
-
50
-
51
-
52
-
53
-
54
-
55
-
56
-
57
-
58
-
59
-
60
-
61
-
62
-
63
-
64
-
65
-
66
-
67
-
68
-
69
-
70
-
71
-
72
-
73
-
74
-
75
-
76
-
77
-
78
-
79
-
80
-
81
-
82
-
83
-
84
-
85
-
86
-
87
-
88
-
89
-
90
-
91
-
92
-
93
-
94
-
95
-
96
-
97
-
98
-
99
-
100
-
101
-
102
-
103
-
104
-
105
-
106
-
107
-
108
-
109
-
110
-
111
-
112
-
113
-
114
-
115
-
116
-
117
 |
 |