Sharp MX-M363N Installation Manual - Page 23
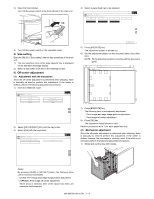
D. Connector connection, E. Paper size switch, Paper size switch from A4 to LT
 |
View all Sharp MX-M363N manuals
Add to My Manuals
Save this manual to your list of manuals |
Page 23 highlights
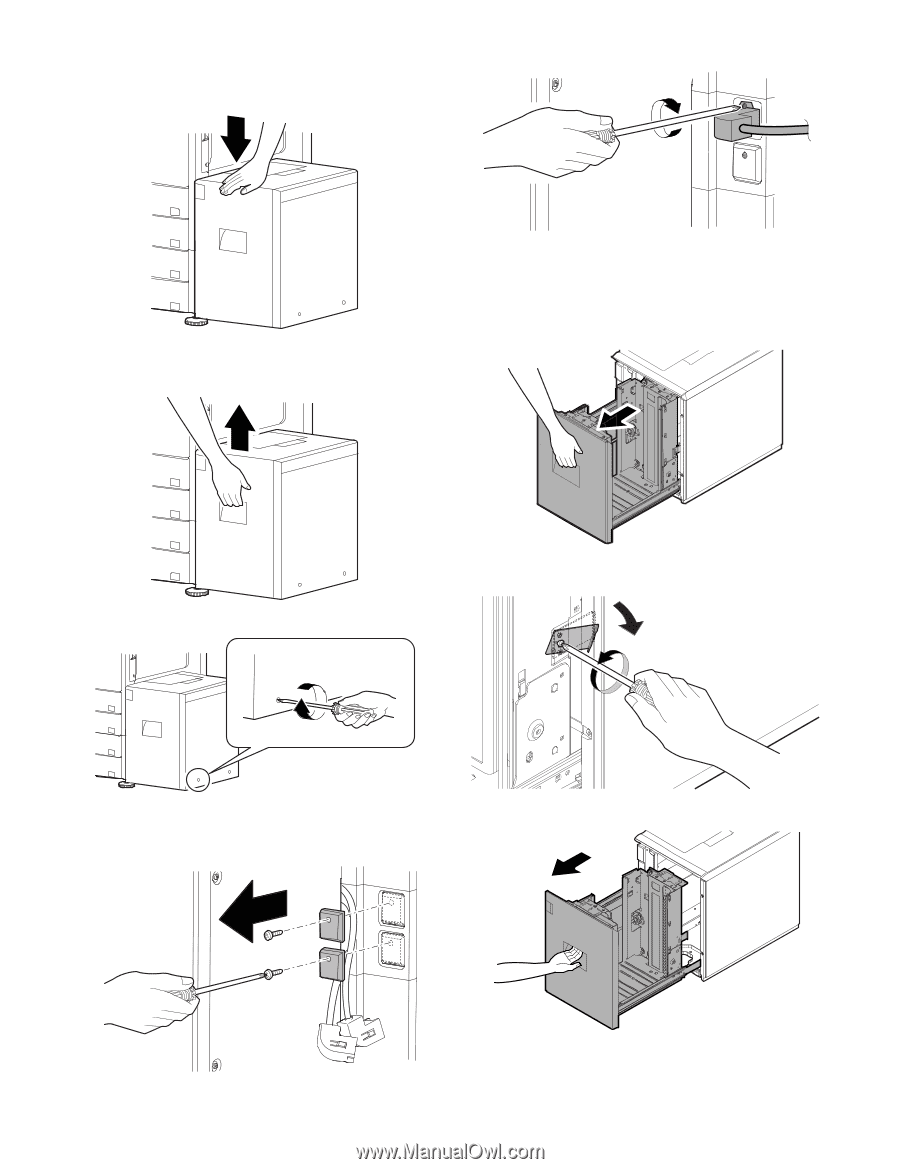
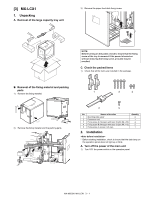
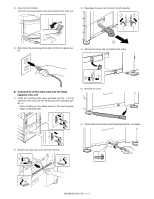
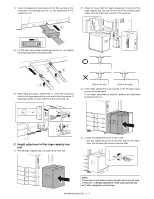
5) In the case of a shift to the right, press the front upper section and fit the height adjustment check rib so that it is in the same line with the axis line of the mounting plate upper. Insert the large capacity tray unit into the main unit. 2) Connect the connector, and tighten the screw. 6) In the case of a shift to the left, lift the grip so that the height adjustment check rib is in the same line with the axis line of the mounting plate upper, and insert the large capacity tray unit. E. Paper size switch (1) Paper size switch from A4 to LT Since the factory setting of the paper size is A4, if paper size switch is required, perform the following procedures. 1) Slowly pull out the tray until it stops. 7) Tighten the loosened screw. 2) Loosen the stopper fixing screw (1 pc) on the right lower side of the tray so that the stopper does not function. D. Connector connection 1) Remove the screw, and remove the connector cover. 3) Pull out the tray again until it stops. MX-M503N MX-LCX1 3 - 4
-
 1
1 -
2
-
3
-
4
-
5
-
6
-
7
-
8
-
9
-
10
-
11
-
12
-
13
-
14
-
15
-
16
-
17
-
 18
18 -
 19
19 -
 20
20 -
 21
21 -
 22
22 -
 23
23 -
 24
24 -
 25
25 -
 26
26 -
 27
27 -
 28
28 -
29
-
30
-
31
-
32
-
33
-
34
-
35
-
36
-
37
-
38
-
39
-
40
-
41
-
42
-
43
-
44
-
45
-
46
-
47
-
48
-
49
-
50
-
51
-
52
-
53
-
54
-
55
-
56
-
57
-
58
-
59
-
60
-
61
-
62
-
63
-
64
-
65
-
66
-
67
-
68
-
69
-
70
-
71
-
72
-
73
-
74
-
75
-
76
-
77
-
78
-
79
-
80
-
81
-
82
-
83
-
84
-
85
-
86
-
87
-
88
-
89
-
90
-
91
-
92
-
93
-
94
-
95
-
96
-
97
-
98
-
99
-
100
-
101
-
102
-
103
-
104
-
105
-
106
-
107
-
108
-
109
-
110
-
111
-
112
-
113
-
114
-
115
-
116
-
117
 |
 |