Sharp MX-M363N Installation Manual - Page 93
MX-KBX2, 1. Unpacking, A. Check the parts in the package, 2. Installation, A. Turn off the power
 |
View all Sharp MX-M363N manuals
Add to My Manuals
Save this manual to your list of manuals |
Page 93 highlights
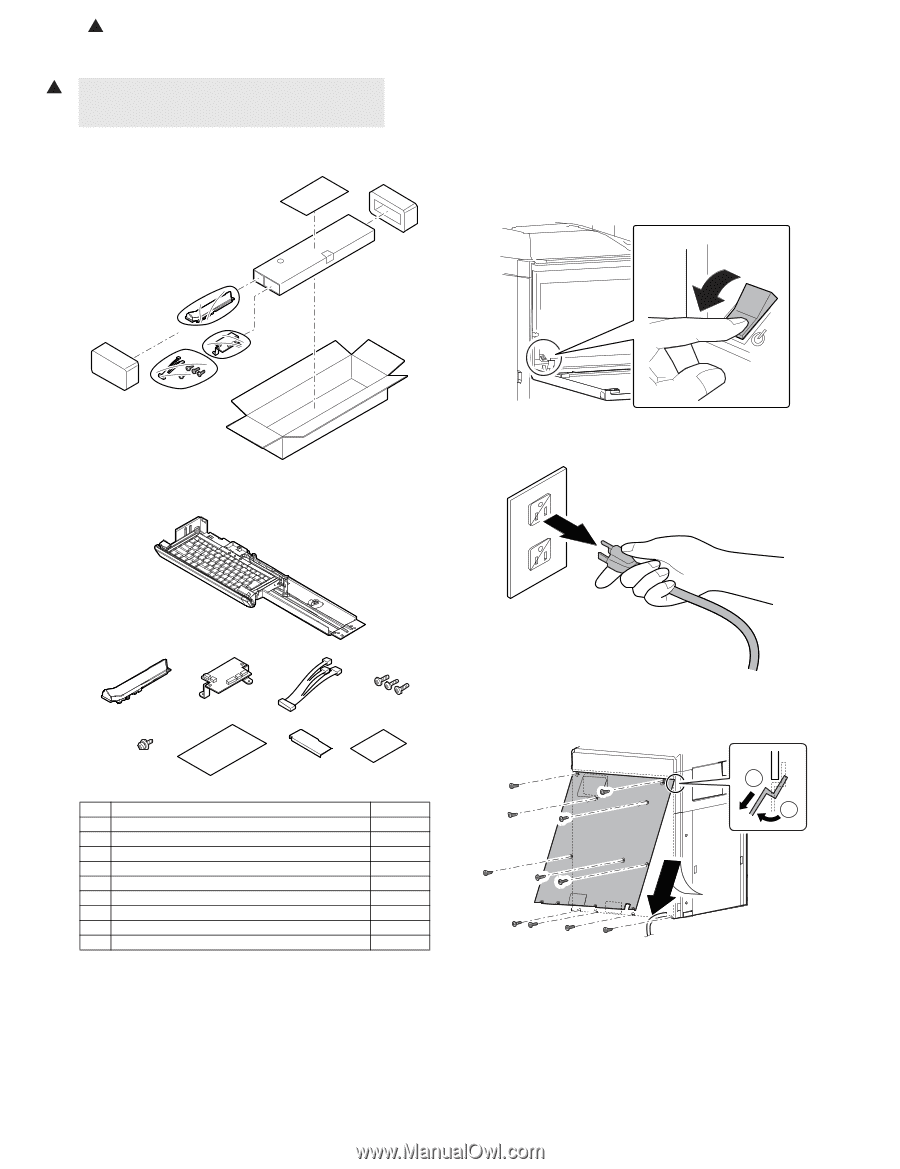
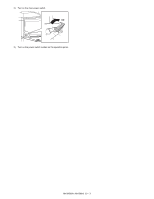
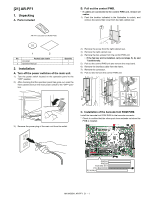
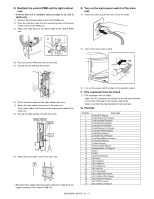
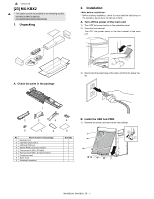
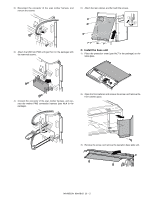
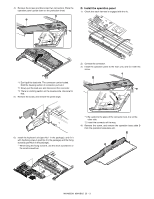
1 : '10/Jun/18 M[2X-3M]50M3NX-KBX2 1 * This option cannot be installed to the following models. MX-M363U/M453U/M503U MX-M282N/M362N/M452N/M502N 1. Unpacking S2e. rvIincsetaMlalantuioaln * Before starting installation, check to insure that the data lamp on the operation panel does not light up or blink. A. Turn off the power of the main unit 1) Turn OFF the power switch on the operation panel. 2) Open the front cabinet. Turn OFF the power switch in the front cabinet of the main unit. OFF A. Check the parts in the package 3) Disconnect the power plug of the main unit from the power outlet. 1 2 3 4 6 7 8 No. Name of parts in the package 1 Keyboard unit 2 Operation base plate C 3 USB hub PWB unit 4 Mother PWB connection harness 5 Fixing screw A (M4 x 8 S tight) 6 Fixing screw B (M3 x 8 3-point system) 7 Protection sheet 8 Black sheet 9 Installing Procedures 5 9 Quantity 1 1 1 1 3 1 1 1 1 B. Install the USB hub PWB. 1) Remove the screw, and remove the rear cabinet. 2 1 MX-M503N MX-KBX2 23 - 1
-
 1
1 -
2
-
3
-
4
-
5
-
6
-
7
-
8
-
9
-
10
-
11
-
12
-
13
-
14
-
15
-
16
-
17
-
18
-
19
-
20
-
21
-
22
-
23
-
24
-
25
-
26
-
27
-
28
-
29
-
30
-
31
-
32
-
33
-
34
-
35
-
36
-
37
-
38
-
39
-
40
-
41
-
42
-
43
-
44
-
45
-
46
-
47
-
48
-
49
-
50
-
51
-
52
-
53
-
54
-
55
-
56
-
57
-
58
-
59
-
60
-
61
-
62
-
63
-
64
-
65
-
66
-
67
-
68
-
69
-
70
-
71
-
72
-
73
-
74
-
75
-
76
-
77
-
78
-
79
-
80
-
81
-
82
-
83
-
84
-
85
-
86
-
87
-
 88
88 -
 89
89 -
 90
90 -
 91
91 -
 92
92 -
 93
93 -
 94
94 -
 95
95 -
 96
96 -
 97
97 -
 98
98 -
99
-
100
-
101
-
102
-
103
-
104
-
105
-
106
-
107
-
108
-
109
-
110
-
111
-
112
-
113
-
114
-
115
-
116
-
117
 |
 |