Sharp MX-M363N Installation Manual - Page 12
F. Installation of the operation manual pocket, G. Tray setup, Simulation setup, Tray size setup - user manual
 |
View all Sharp MX-M363N manuals
Add to My Manuals
Save this manual to your list of manuals |
Page 12 highlights
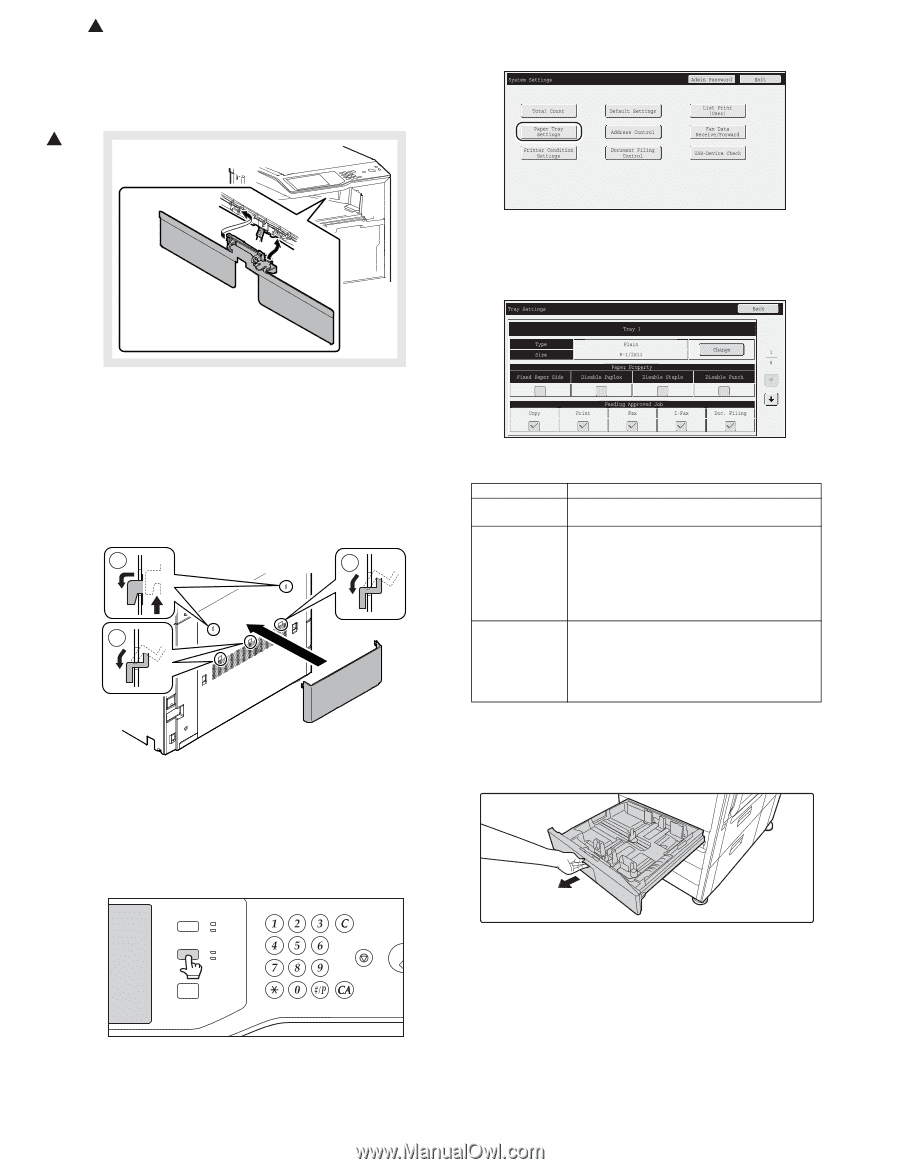
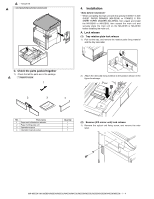
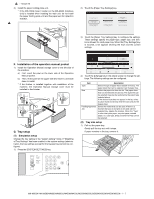
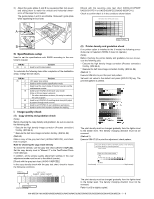
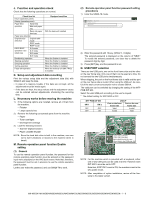
1 : '10/Jun/18 3) Install the paper holding plate unit. * If the MX-FNX9 (Inner Finisher) or the MX-RBX3 (Interface Unit) is installed when installing the main unit, do not install the paper holding plate unit and the paper exit full detection actuator. 1 2) Touch the [Paper Tray Settings] key. 3) Touch the [Paper Tray Settings] key to configure the settings. These settings specify the paper type, paper size, and functions allowed for each paper tray. When the [Tray Settings] key is touched, a list appears showing the trays and the current settings. F. Installation of the operation manual pocket 1) Install the Operation Manual storage cover to the left side of the machine. a) First, insert the pawl on the lower side of the Operation Manual pocket. b) Then, lift the pawl on the upper side and insert it, and slide down to install. * If the finisher is installed together with installation of the machine, the Operation Manual storage cover must be installed to the finisher. 2 1 1 G. Tray setup (1) Simulation setup Change the tray setting in the "system setting" mode. If "Disabling of Tray Settings" has been enabled in the system settings (administrator), the tray settings (except for the bypass tray) cannot be configured. 1) Press the [SYSTEM SETTINGS] key. JOB STATUS SYSTEM SETTINGS PRINT READY DATA IMAGE SEND LINE DATA HOME LOGOUT 4) Touch the [Change] key in the above screen to change the settings. The following settings can be configured. Item Type Size Feeding Approved Job Description Select the type of paper that is loaded in the tray. The paper types that can be selected vary by paper tray. Select the paper size from the list. The paper sizes that can be selected vary by tray. The sizes that can be selected may also be restricted by the paper type selected above. If the desired size does not appear in the list, select [Custom Size] and directly enter the size (only for the bypass tray). Select the modes that can be used. If there is a function that you do not wish to be used with the selected tray, disable the function. When the "Type" is other than plain paper, recycled paper, colored paper, or a user type, [Fax] and [Internet Fax] cannot be selected. (2) Tray size setup 1) Pull out the paper tray. Gently pull the tray out until it stops. If paper remains in the tray, remove it. MX-M503N MX-M283N/M363N/M363U/M453N/M453U/M503N/M503U/M282N/M362N/M452N/M502N 1 - 7
-
 1
1 -
2
-
3
-
4
-
5
-
6
-
 7
7 -
 8
8 -
 9
9 -
 10
10 -
 11
11 -
 12
12 -
 13
13 -
 14
14 -
 15
15 -
 16
16 -
 17
17 -
18
-
19
-
20
-
21
-
22
-
23
-
24
-
25
-
26
-
27
-
28
-
29
-
30
-
31
-
32
-
33
-
34
-
35
-
36
-
37
-
38
-
39
-
40
-
41
-
42
-
43
-
44
-
45
-
46
-
47
-
48
-
49
-
50
-
51
-
52
-
53
-
54
-
55
-
56
-
57
-
58
-
59
-
60
-
61
-
62
-
63
-
64
-
65
-
66
-
67
-
68
-
69
-
70
-
71
-
72
-
73
-
74
-
75
-
76
-
77
-
78
-
79
-
80
-
81
-
82
-
83
-
84
-
85
-
86
-
87
-
88
-
89
-
90
-
91
-
92
-
93
-
94
-
95
-
96
-
97
-
98
-
99
-
100
-
101
-
102
-
103
-
104
-
105
-
106
-
107
-
108
-
109
-
110
-
111
-
112
-
113
-
114
-
115
-
116
-
117
 |
 |