Brother International PE-DESIGN Ver.4 3 2 Instructin Manual for PE-DESIGN Ver. - Page 141
Rectangle Drawing Mode, Drawing a box, Line Drawing Mode, Drawing a broken line
 |
View all Brother International PE-DESIGN Ver.4 3 2 manuals
Add to My Manuals
Save this manual to your list of manuals |
Page 141 highlights
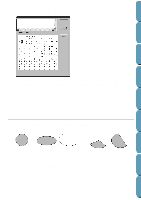
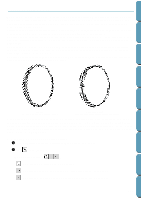
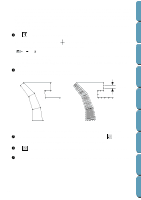
Contents Before Using Getting Started Rectangle Drawing Mode With the rectangle drawing mode, you can create rectangles (boxes) with sharp or rounded corners. A box will automatically have an outline and a region inside that can independently be assigned different sewing attributes. s Drawing a box 1 Click on the Tool Box. The shape of the cursor changes to and displays together with a small rounded box. The Sewing Attributes bar now looks like this: You can set the edge radius, colors and stitches at this step or after creating the pattern. See "Edge radius" on page 136, "Color" on page 143 and "Stitch" on page 145. You can also set the sewing attributes using the Sew menu (see "Sewing Attribute Setting" on page 177). 2 Move the mouse to a point, click and drag the mouse. The point where you start dragging is considered a corner of the box. The point where you release the mouse will be the diagonally opposed corner of the box. Note that you can draw a perfect square by holding the Shift key down while dragging the mouse. Line Drawing Mode The line drawing mode allows you to add broken lines to your pattern. A broken line is made of one or more contiguous straight lines, the ending point of a straight line being the starting point of the next one. If the broken line is open, the pattern will end at the last end point. An open broken line is considered a simple outline when setting the stitch and color. If the broken line is closed, the last point will be automatically joined with the first one to form a polygon. A polygon has an outline and a region inside that can be assigned different stitches and colors. However, if two pieces of straight lines cross each other, the application cannot determine a region inside, and the pattern will be a simple outline. Design Center Layout & Editing File Utility Programmable Stich Creator Quik Reference Alphabetic Index Ending point Starting point Open broken line Closed broken line This closed broken line has no region inside s Drawing a broken line 1 Click on the Tool Box. The shape of the cursor changes to ing Attributes bar now looks like this: and displays together with a small broken line. The Sew- You can select the path shape, colors and stitches at this step or after creating the pattern. See "Path shape" on page 137, "Color" on page 143 and "Stitch" on page 145. 131
-
 1
1 -
2
-
3
-
4
-
5
-
6
-
7
-
8
-
9
-
10
-
11
-
12
-
13
-
14
-
15
-
16
-
17
-
18
-
19
-
20
-
21
-
22
-
23
-
24
-
25
-
26
-
27
-
28
-
29
-
30
-
31
-
32
-
33
-
34
-
35
-
36
-
37
-
38
-
39
-
40
-
41
-
42
-
43
-
44
-
45
-
46
-
47
-
48
-
49
-
50
-
51
-
52
-
53
-
54
-
55
-
56
-
57
-
58
-
59
-
60
-
61
-
62
-
63
-
64
-
65
-
66
-
67
-
68
-
69
-
70
-
71
-
72
-
73
-
74
-
75
-
76
-
77
-
78
-
79
-
80
-
81
-
82
-
83
-
84
-
85
-
86
-
87
-
88
-
89
-
90
-
91
-
92
-
93
-
94
-
95
-
96
-
97
-
98
-
99
-
100
-
101
-
102
-
103
-
104
-
105
-
106
-
107
-
108
-
109
-
110
-
111
-
112
-
113
-
114
-
115
-
116
-
117
-
118
-
119
-
120
-
121
-
122
-
123
-
124
-
125
-
126
-
127
-
128
-
129
-
130
-
131
-
132
-
133
-
134
-
135
-
 136
136 -
 137
137 -
 138
138 -
 139
139 -
 140
140 -
 141
141 -
 142
142 -
 143
143 -
 144
144 -
 145
145 -
 146
146 -
147
-
148
-
149
-
150
-
151
-
152
-
153
-
154
-
155
-
156
-
157
-
158
-
159
-
160
-
161
-
162
-
163
-
164
-
165
-
166
-
167
-
168
-
169
-
170
-
171
-
172
-
173
-
174
-
175
-
176
-
177
-
178
-
179
-
180
-
181
-
182
-
183
-
184
-
185
-
186
-
187
-
188
-
189
-
190
-
191
-
192
-
193
-
194
-
195
-
196
-
197
-
198
-
199
-
200
-
201
-
202
-
203
-
204
-
205
-
206
-
207
-
208
-
209
-
210
-
211
-
212
-
213
-
214
-
215
-
216
-
217
-
218
-
219
-
220
-
221
-
222
-
223
-
224
-
225
-
226
-
227
-
228
-
229
-
230
-
231
-
232
-
233
-
234
-
235
-
236
-
237
-
238
-
239
-
240
-
241
-
242
-
243
-
244
-
245
-
246
-
247
-
248
-
249
-
250
-
251
-
252
 |
 |
