Brother International PE-DESIGN Ver.4 3 2 Instructin Manual for PE-DESIGN Ver. - Page 69
Using the Stage 2 Tool Box, Drawing and Erasing, Drawing, Zoom-in Mode
 |
View all Brother International PE-DESIGN Ver.4 3 2 manuals
Add to My Manuals
Save this manual to your list of manuals |
Page 69 highlights
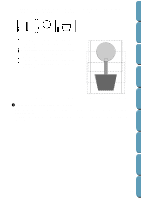
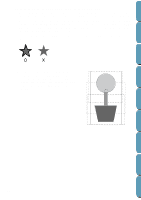
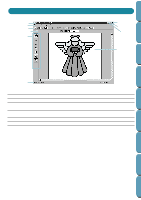
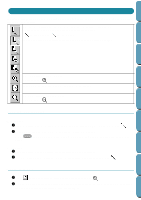
Contents Using the Stage 2 Tool Box In Stage 2, the Tool Box is used to modify the line image generated from the original image or to create a line image from scratch. The five first buttons are used as pens and erasers of different thicknesses. Cursor shape when moved or dragged over the work area: for the pens and for the erasers. When you start the application, the number 2 Pen tool is active by default. Before Using Getting Started Design Center Layout & Editing File Utility Sets the cursor in zoom-in mode. Cursor shape: Maximizes the selected Design Page to fit in the window. Sets the cursor in zoom-out mode. Cursor shape: Drawing and Erasing s Drawing 1 Click the button with the desired pen thickness on the Tool Box. The cursor changes to . 2 To add a dot, click; to draw a line, drag with the mouse's left button. If the Shift key is held down while moving the mouse, only vertical or horizontal lines will be drawn. s Erasing 1 Click the button with the desired eraser thickness on the Tool Box. 2 To erase, drag while pressing the mouse's right button. The cursor changes to . Zoom-in Mode 1 Click on the Tool Box. The shape of the cursor changes to . 2 Click on the area you want to enlarge or drag the cursor across the area that you want to enlarge, then release it. You can repeat this step several times. 59 Programmable Stich Creator Quik Reference Alphabetic Index
-
 1
1 -
2
-
3
-
4
-
5
-
6
-
7
-
8
-
9
-
10
-
11
-
12
-
13
-
14
-
15
-
16
-
17
-
18
-
19
-
20
-
21
-
22
-
23
-
24
-
25
-
26
-
27
-
28
-
29
-
30
-
31
-
32
-
33
-
34
-
35
-
36
-
37
-
38
-
39
-
40
-
41
-
42
-
43
-
44
-
45
-
46
-
47
-
48
-
49
-
50
-
51
-
52
-
53
-
54
-
55
-
56
-
57
-
58
-
59
-
60
-
61
-
62
-
63
-
 64
64 -
 65
65 -
 66
66 -
 67
67 -
 68
68 -
 69
69 -
 70
70 -
 71
71 -
 72
72 -
 73
73 -
 74
74 -
75
-
76
-
77
-
78
-
79
-
80
-
81
-
82
-
83
-
84
-
85
-
86
-
87
-
88
-
89
-
90
-
91
-
92
-
93
-
94
-
95
-
96
-
97
-
98
-
99
-
100
-
101
-
102
-
103
-
104
-
105
-
106
-
107
-
108
-
109
-
110
-
111
-
112
-
113
-
114
-
115
-
116
-
117
-
118
-
119
-
120
-
121
-
122
-
123
-
124
-
125
-
126
-
127
-
128
-
129
-
130
-
131
-
132
-
133
-
134
-
135
-
136
-
137
-
138
-
139
-
140
-
141
-
142
-
143
-
144
-
145
-
146
-
147
-
148
-
149
-
150
-
151
-
152
-
153
-
154
-
155
-
156
-
157
-
158
-
159
-
160
-
161
-
162
-
163
-
164
-
165
-
166
-
167
-
168
-
169
-
170
-
171
-
172
-
173
-
174
-
175
-
176
-
177
-
178
-
179
-
180
-
181
-
182
-
183
-
184
-
185
-
186
-
187
-
188
-
189
-
190
-
191
-
192
-
193
-
194
-
195
-
196
-
197
-
198
-
199
-
200
-
201
-
202
-
203
-
204
-
205
-
206
-
207
-
208
-
209
-
210
-
211
-
212
-
213
-
214
-
215
-
216
-
217
-
218
-
219
-
220
-
221
-
222
-
223
-
224
-
225
-
226
-
227
-
228
-
229
-
230
-
231
-
232
-
233
-
234
-
235
-
236
-
237
-
238
-
239
-
240
-
241
-
242
-
243
-
244
-
245
-
246
-
247
-
248
-
249
-
250
-
251
-
252
 |
 |
