Brother International PE-DESIGN Ver.4 3 2 Instructin Manual for PE-DESIGN Ver. - Page 171
Group, Cut, order in that position. The sewing order of the grouped objects can not be changed
 |
View all Brother International PE-DESIGN Ver.4 3 2 manuals
Add to My Manuals
Save this manual to your list of manuals |
Page 171 highlights
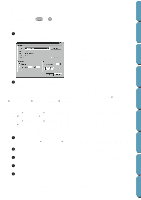
Contents Operation: 1 Click Edit, then Redo. The effect of the last Undo is cancelled. For example, you have used Undo just after drawing a circle. Undo deleted the circle. Using Redo will make the circle reappear. See also: "Undo" on page 160 Before Using Getting Started s Group Purpose: Turns several selected objects into one object. Shortcut key: Ctrl + G Toolbar: No button for this function Operation: 1 Select several objects. 2 Click Edit then Group. The selected objects will become one object. You can treat the objects as one object for any further editing functions. NOTE: When this function is operated, the sewing order for the selected objects will change. The grouped objects will be moved to the sewing position of the last object in the group, and will be sewn in order in that position. The sewing order of the grouped objects can not be changed, nor can another object be inserted in the sewing order of the grouped objects. If you want to change the sewing order in those ways, cancel the grouping. Design Center Layout & Editing NOTE: • If you select either a path, or text fit to a path, both will be included in the grouping. • When selecting an object set as part of a hole sewing pattern, the entire hole sewing pattern will be included in the grouping. See also: "Ungroup" below File Utility Programmable Stich Creator s Ungroup Purpose: Cancels the grouping for grouped objects. Shortcut key: Shift + G Toolbar: No button for this function Operation: 1 Select a grouped object. 2 Click Edit then Ungroup. The grouping of the selected object is cancelled. After completing this operation, you can carry out editing operations on each object individually. See also: "Group" above Quik Reference Alphabetic Index s Cut Purpose: Shortcut key: Toolbar: Removes the selected pattern(s) from the screen while saving a copy in the clipboard. Ctrl + X 161
-
 1
1 -
2
-
3
-
4
-
5
-
6
-
7
-
8
-
9
-
10
-
11
-
12
-
13
-
14
-
15
-
16
-
17
-
18
-
19
-
20
-
21
-
22
-
23
-
24
-
25
-
26
-
27
-
28
-
29
-
30
-
31
-
32
-
33
-
34
-
35
-
36
-
37
-
38
-
39
-
40
-
41
-
42
-
43
-
44
-
45
-
46
-
47
-
48
-
49
-
50
-
51
-
52
-
53
-
54
-
55
-
56
-
57
-
58
-
59
-
60
-
61
-
62
-
63
-
64
-
65
-
66
-
67
-
68
-
69
-
70
-
71
-
72
-
73
-
74
-
75
-
76
-
77
-
78
-
79
-
80
-
81
-
82
-
83
-
84
-
85
-
86
-
87
-
88
-
89
-
90
-
91
-
92
-
93
-
94
-
95
-
96
-
97
-
98
-
99
-
100
-
101
-
102
-
103
-
104
-
105
-
106
-
107
-
108
-
109
-
110
-
111
-
112
-
113
-
114
-
115
-
116
-
117
-
118
-
119
-
120
-
121
-
122
-
123
-
124
-
125
-
126
-
127
-
128
-
129
-
130
-
131
-
132
-
133
-
134
-
135
-
136
-
137
-
138
-
139
-
140
-
141
-
142
-
143
-
144
-
145
-
146
-
147
-
148
-
149
-
150
-
151
-
152
-
153
-
154
-
155
-
156
-
157
-
158
-
159
-
160
-
161
-
162
-
163
-
164
-
165
-
 166
166 -
 167
167 -
 168
168 -
 169
169 -
 170
170 -
 171
171 -
 172
172 -
 173
173 -
 174
174 -
 175
175 -
 176
176 -
177
-
178
-
179
-
180
-
181
-
182
-
183
-
184
-
185
-
186
-
187
-
188
-
189
-
190
-
191
-
192
-
193
-
194
-
195
-
196
-
197
-
198
-
199
-
200
-
201
-
202
-
203
-
204
-
205
-
206
-
207
-
208
-
209
-
210
-
211
-
212
-
213
-
214
-
215
-
216
-
217
-
218
-
219
-
220
-
221
-
222
-
223
-
224
-
225
-
226
-
227
-
228
-
229
-
230
-
231
-
232
-
233
-
234
-
235
-
236
-
237
-
238
-
239
-
240
-
241
-
242
-
243
-
244
-
245
-
246
-
247
-
248
-
249
-
250
-
251
-
252
 |
 |
