Canon CanoScan FB 1200S User Guide - Page 36
Previewing All the Frames
 |
View all Canon CanoScan FB 1200S manuals
Add to My Manuals
Save this manual to your list of manuals |
Page 36 highlights
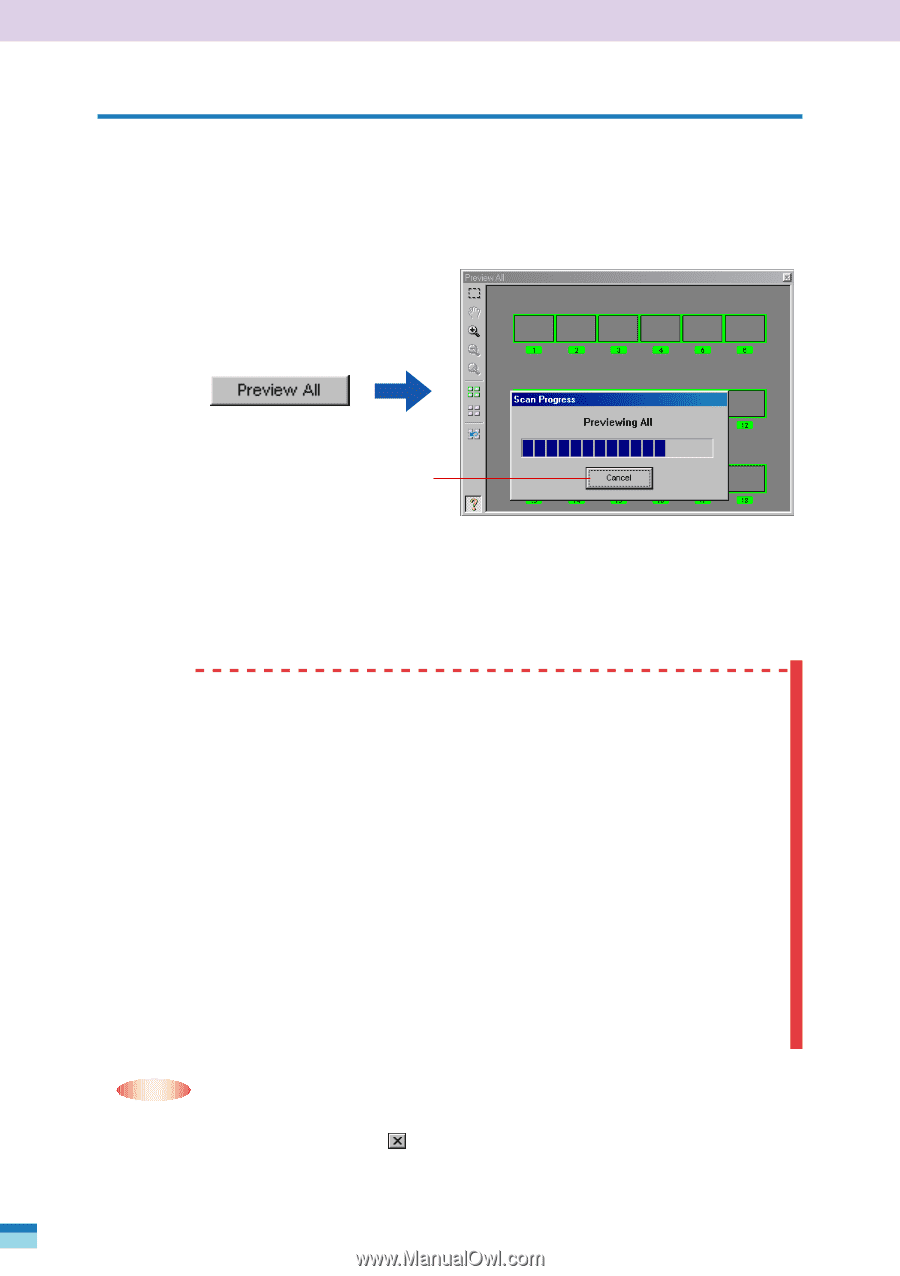
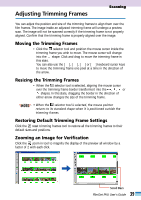
Previewing All the Frames Once you have selected the film type and image mode, you should confirm the position of the film frames on the scanner platen with the preview all function. Click the [Preview All] button. The preview all window will display everything detected on the scanner platen. A preview scan progress bar will display. Click the [Cancel] button if you wish to cancel the command. Preview All Window (showing 35 mm sleeve film) When the preview all scan is complete, the preview all window will show the position of the film and the trimming frames. WARNING • FilmGet FAU automatically calibrates itself and displays the 'Calibrating' message before it performs the preview all scan. This process is to teach the correct white balance to the scanner, which uses it as the registration color to correctly scan all the other colors. Do not open the Film Adapter Unit for any reason during this process. • The scanner may take a few moments to respond to the [Cancel] button when it is clicked during calibration. • If the 'Insufficient free space on hard disk drive' message or a similar message displays during the preview all scan, it means that your hard disk drive is too full to store the data for the preview scan. Delete unnecessary files from the hard drive to free sufficient space and reinitiate the preview all scan. • The images in the preview all scan cannot be saved or adjusted. • NOTE • • You can display the preview all window by clicking the [Show Preview All Window] button at the top right of the main window. Click the (close box) at the top right (top left of the Macintosh version) of the preview all window to hide it again. 36 FilmGet FAU User's Guide
-
 1
1 -
2
-
3
-
4
-
5
-
6
-
7
-
8
-
9
-
10
-
11
-
12
-
13
-
14
-
15
-
16
-
17
-
18
-
19
-
20
-
21
-
22
-
23
-
24
-
25
-
26
-
27
-
28
-
29
-
30
-
 31
31 -
 32
32 -
 33
33 -
 34
34 -
 35
35 -
 36
36 -
 37
37 -
 38
38 -
 39
39 -
 40
40 -
 41
41 -
42
-
43
-
44
-
45
-
46
-
47
-
48
-
49
-
50
-
51
-
52
-
53
-
54
-
55
-
56
-
57
-
58
-
59
-
60
-
61
-
62
-
63
-
64
-
65
-
66
-
67
-
68
-
69
-
70
-
71
-
72
-
73
-
74
-
75
-
76
-
77
-
78
-
79
-
80
-
81
-
82
-
83
-
84
-
85
-
86
-
87
-
88
-
89
-
90
-
91
-
92
-
93
-
94
-
95
-
96
-
97
-
98
-
99
-
100
-
101
-
102
-
103
-
104
-
105
-
106
-
107
-
108
-
109
-
110
-
111
-
112
 |
 |