Canon CanoScan FB 1200S User Guide - Page 47
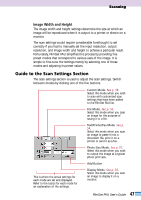
Guide to the Scan Settings Image Width and Height
 |
View all Canon CanoScan FB 1200S manuals
Add to My Manuals
Save this manual to your list of manuals |
Page 47 highlights
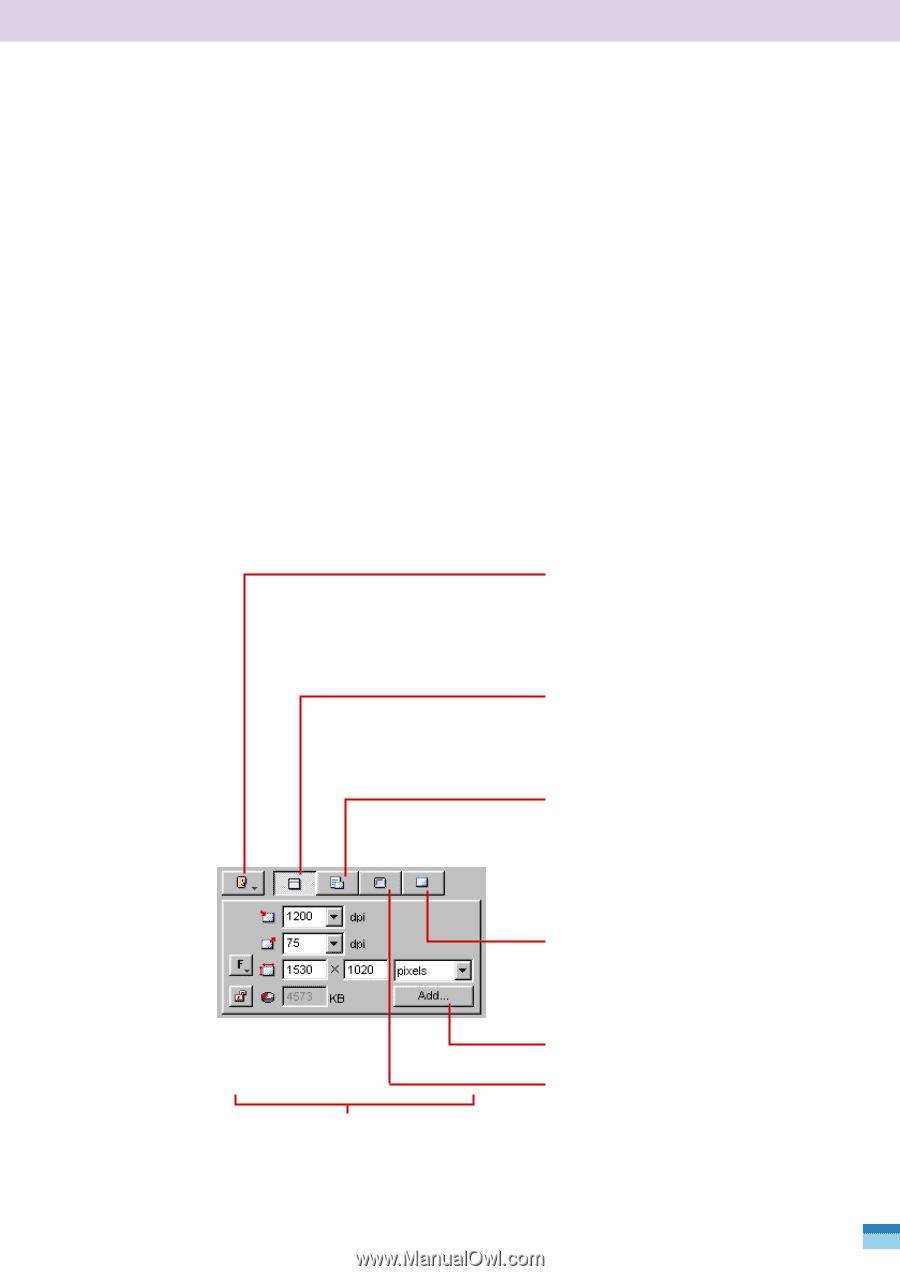
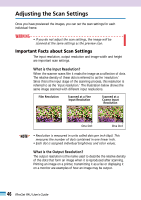
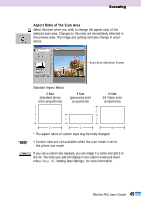
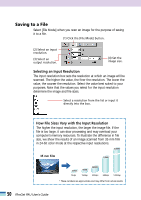
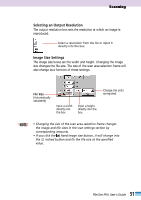
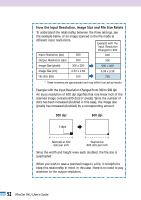
Scanning Image Width and Height The image width and height settings determine the size at which an image will be reproduced when it is output to a printer or shown on a monitor. The scan settings would require considerable forethought to set correctly if you had to manually set the input resolution, output resolution, and image width and height to achieve a particular result. Fortunately, FilmGet FAU simplifies this process by providing five preset modes that correspond to various uses of the image. It is simple to fine-tune the settings merely by selecting one of these modes and adjusting its preset values. Guide to the Scan Settings Section The scan settings section is used to adjust the scan settings. Switch between modes by clicking one of the five buttons. This is where the actual settings for each mode are set and displayed. Refer to the topics for each mode for an explanation of the settings. Custom Mode. See p. 58. Select this mode when you wish to scan with customized scan settings that have been added to the FilmGet FAU list. File Mode. See p. 50. Select this mode when you scan an image for the purpose of saving it to a file. Text/Printer/Fax Mode. See p. 54. Select this mode when you scan an image to paste it into a document file, print it on a printer or send it as a fax. Photo Size Mode. See p. 57. Select this mode when you wish to output the image at a typical photo print size. Add Button Display Mode. See p. 56. Select this mode when you scan an image to display it on a monitor. 47 FilmGet FAU User's Guide
-
 1
1 -
2
-
3
-
4
-
5
-
6
-
7
-
8
-
9
-
10
-
11
-
12
-
13
-
14
-
15
-
16
-
17
-
18
-
19
-
20
-
21
-
22
-
23
-
24
-
25
-
26
-
27
-
28
-
29
-
30
-
31
-
32
-
33
-
34
-
35
-
36
-
37
-
38
-
39
-
40
-
41
-
 42
42 -
 43
43 -
 44
44 -
 45
45 -
 46
46 -
 47
47 -
 48
48 -
 49
49 -
 50
50 -
 51
51 -
 52
52 -
53
-
54
-
55
-
56
-
57
-
58
-
59
-
60
-
61
-
62
-
63
-
64
-
65
-
66
-
67
-
68
-
69
-
70
-
71
-
72
-
73
-
74
-
75
-
76
-
77
-
78
-
79
-
80
-
81
-
82
-
83
-
84
-
85
-
86
-
87
-
88
-
89
-
90
-
91
-
92
-
93
-
94
-
95
-
96
-
97
-
98
-
99
-
100
-
101
-
102
-
103
-
104
-
105
-
106
-
107
-
108
-
109
-
110
-
111
-
112
 |
 |