Dell PowerVault TL4000 Dell Model TL2000/TL4000 Tape Library- User's Guide - Page 126
Service: Display Contrast, Clean Drive, Drive Tests, Service, Cancel, Drive Power
 |
View all Dell PowerVault TL4000 manuals
Add to My Manuals
Save this manual to your list of manuals |
Page 126 highlights
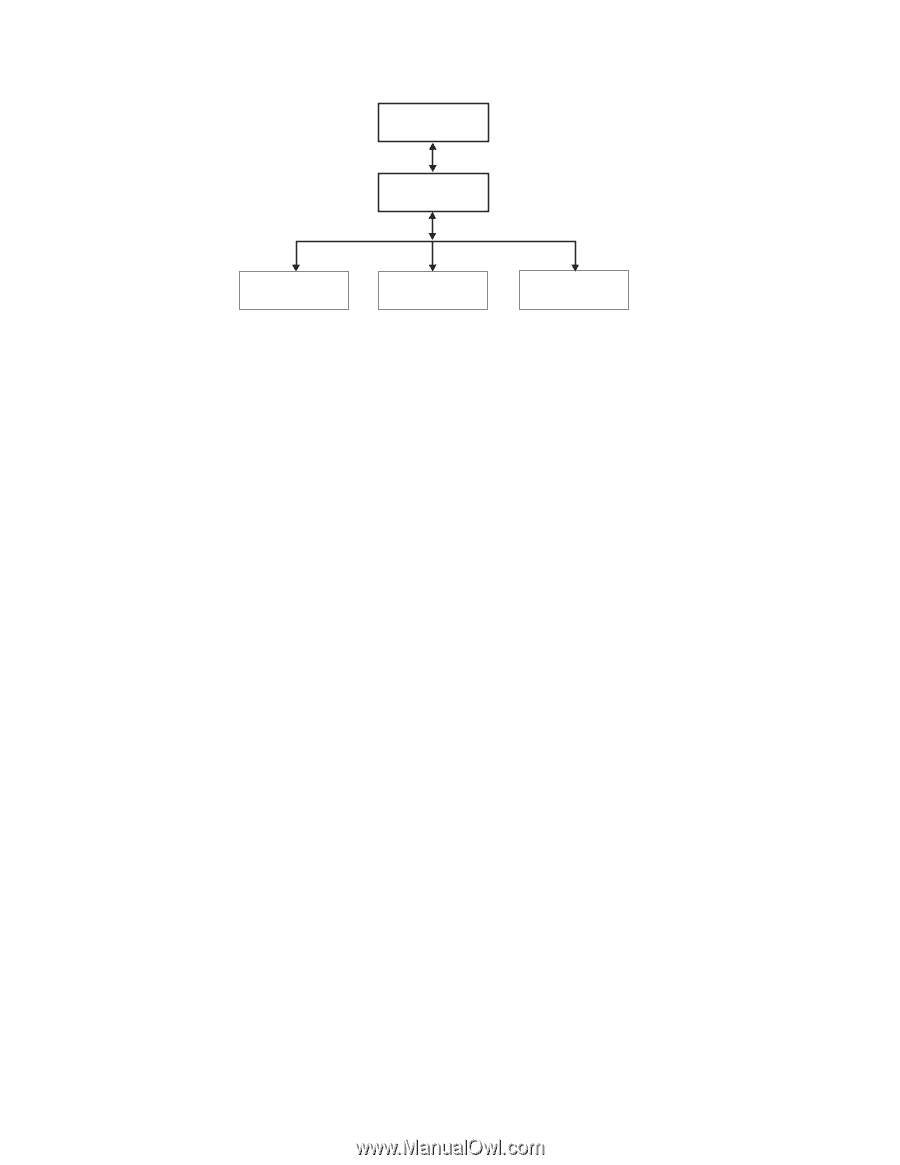
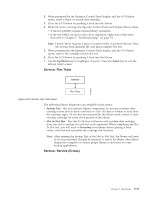
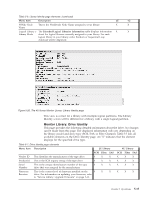
Service Service a77ug058 Clean Drive Drive Tests Drive Power Figure 5-24. Service: Service menu The following drive diagnostics and service procedures are available in this menu: v Clean Drive - The accessor takes the cleaning cartridge from the dedicated cleaning cartridge slot (DCS), or previously reserved slot if no DCS is available, and inserts it into the drive. After the cleaning is complete, the accessor removes the cleaning cartridge from the drive and returns it to the dedicated cleaning cartridge slot or reserved slot. v Drive Tests - Power On Self Test (POST), Normal Read/Write Test, Head Test, Media Test 1. Navigate to the desired test (Service → Service → Drive Tests). Choose the drive if more than one is installed. 2. Follow the instructions displayed on the Operator Control Panel, and, if required, insert a blank or scratch cartridge into the I/O Station when requested. 3. The test will execute. - If the test PASSES, resume normal library operations. - If the test FAILS, an error will be displayed. Make note of the error, then refer to "Isolating Drive Sled Problems" on page 7-9. 4. Remove the cartridge from the I/O Station, if needed, then close the I/O Station. 5. Press Cancel to exit the screen. v Drive Power - use this item to turn drive power ON and OFF Note: When configuration changes of a disabled drive are made from the Operator Control Panel (OCP), the drive powers ON after committing changes. When configuration changes of a disabled drive are made from the Web Interface (RMU), the drive does not power ON after committing changes. Service: Display Contrast 5-32 Dell PowerVault TL2000 Tape Library and TL4000 Tape Library User's Guide
-
 1
1 -
2
-
3
-
4
-
5
-
6
-
7
-
8
-
9
-
10
-
11
-
12
-
13
-
14
-
15
-
16
-
17
-
18
-
19
-
20
-
21
-
22
-
23
-
24
-
25
-
26
-
27
-
28
-
29
-
30
-
31
-
32
-
33
-
34
-
35
-
36
-
37
-
38
-
39
-
40
-
41
-
42
-
43
-
44
-
45
-
46
-
47
-
48
-
49
-
50
-
51
-
52
-
53
-
54
-
55
-
56
-
57
-
58
-
59
-
60
-
61
-
62
-
63
-
64
-
65
-
66
-
67
-
68
-
69
-
70
-
71
-
72
-
73
-
74
-
75
-
76
-
77
-
78
-
79
-
80
-
81
-
82
-
83
-
84
-
85
-
86
-
87
-
88
-
89
-
90
-
91
-
92
-
93
-
94
-
95
-
96
-
97
-
98
-
99
-
100
-
101
-
102
-
103
-
104
-
105
-
106
-
107
-
108
-
109
-
110
-
111
-
112
-
113
-
114
-
115
-
116
-
117
-
118
-
119
-
120
-
 121
121 -
 122
122 -
 123
123 -
 124
124 -
 125
125 -
 126
126 -
 127
127 -
 128
128 -
 129
129 -
 130
130 -
 131
131 -
132
-
133
-
134
-
135
-
136
-
137
-
138
-
139
-
140
-
141
-
142
-
143
-
144
-
145
-
146
-
147
-
148
-
149
-
150
-
151
-
152
-
153
-
154
-
155
-
156
-
157
-
158
-
159
-
160
-
161
-
162
-
163
-
164
-
165
-
166
-
167
-
168
-
169
-
170
-
171
-
172
-
173
-
174
-
175
-
176
-
177
-
178
-
179
-
180
-
181
-
182
-
183
-
184
-
185
-
186
-
187
-
188
-
189
-
190
-
191
-
192
-
193
-
194
-
195
-
196
-
197
-
198
-
199
-
200
-
201
-
202
-
203
-
204
-
205
-
206
-
207
-
208
-
209
-
210
-
211
-
212
-
213
-
214
-
215
-
216
-
217
-
218
-
219
-
220
-
221
-
222
-
223
-
224
-
225
-
226
-
227
-
228
-
229
-
230
-
231
-
232
-
233
-
234
-
235
-
236
-
237
-
238
-
239
-
240
-
241
-
242
-
243
-
244
-
245
-
246
-
247
-
248
-
249
-
250
-
251
-
252
-
253
-
254
-
255
-
256
-
257
-
258
-
259
-
260
-
261
-
262
-
263
-
264
-
265
-
266
-
267
-
268
-
269
-
270
-
271
-
272
-
273
-
274
-
275
-
276
-
277
-
278
-
279
-
280
-
281
-
282
-
283
 |
 |