Dell PowerVault TL4000 Dell Model TL2000/TL4000 Tape Library- User's Guide - Page 75
Choosing General Library Settings, Bar Code Label Length Reported to Host - firmware upgrade
 |
View all Dell PowerVault TL4000 manuals
Add to My Manuals
Save this manual to your list of manuals |
Page 75 highlights
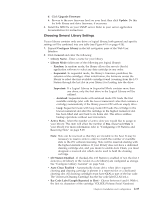
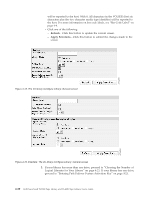
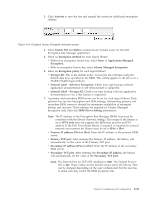
d. Click Upgrade Firmware. e. Browse to the new firmware level on your host, then click Update. Do this for both library and drive firmware, if necessary. 4. Install the MIB file on your SNMP server. Refer to your server application documentation for instructions. Choosing General Library Settings If your library contains only one drive or logical library, both general and specific settings will be combined into one table (see Figure 4-18 on page 4-20). 1. Expand Configure Library in the left navigation pane of the Web User Interface. 2. Click General and enter the following: v Library Name - Enter a name for your library. v Library Mode (select one of the following per logical library): - Random: In random mode, the library allows the server's (host's) application software to select any data cartridge in any order. - Sequential: In sequential mode, the library's firmware predefines the selection of the cartridges. After initialization, the firmware causes the library to select the first available cartridge found (counting from the I/O Station through the last slot in your library) for loading into the drive. Important: If a Logical Library in Sequential Mode contains more than one drive, only the first drive in the Logical Library will be utilized. - Autoload: Sequential mode with autoload mode ON loads the first available cartridge (slot with the lowest numerical value that contains a cartridge) automatically if the library powers ON with an empty drive. - Loop: Sequential mode with loop mode ON loads the cartridge in the lowest numerical slot after the cartridge in the highest numerical slot has been filled and sent back to its home slot. This allows endless backup operations without user interaction. v Active Slots - Select the number of active slots you would like to assign in your library. This item will affect the number of Res. (Reserved) Slots in your library. For more information refer to "Configuring I/O Stations and Reserving Slots" on page 5-65. Note: Slots can be reserved so that they are invisible to the host. It may be necessary to reserve slots in order to match the number of available slots to the ISV software licensing. Slots will be reserved starting with the highest element address. If your library does not have a dedicated cleaning cartridge slot, and you desire to enable Auto Clean, you must designate a reserved slot which can be used to hold the cleaning cartridge. v I/O Station Enabled - If checked, the I/O Station is enabled. If not, the first 3 slots (in a 4U library or the 1st slot in a 2U library) are configured as storage. See "Configure Library: General" on page 5-44. v Auto Clean Enabled - Automatically cleans drive when drive requests cleaning and cleaning cartridge is present in a reserved slot or a dedicated cleaning slot. All cleaning cartridges must have CLN as part of the bar code. The Universal Cleaning Cartridge has the bar code label CLNUxxLx. v Bar Code Label Length Reported to Host - Choose between 6 and 8. With 6, the first six characters of the cartridge VOLSER (Volume Serial Numbers) Chapter 4. Installation and Configuration 4-19
-
 1
1 -
2
-
3
-
4
-
5
-
6
-
7
-
8
-
9
-
10
-
11
-
12
-
13
-
14
-
15
-
16
-
17
-
18
-
19
-
20
-
21
-
22
-
23
-
24
-
25
-
26
-
27
-
28
-
29
-
30
-
31
-
32
-
33
-
34
-
35
-
36
-
37
-
38
-
39
-
40
-
41
-
42
-
43
-
44
-
45
-
46
-
47
-
48
-
49
-
50
-
51
-
52
-
53
-
54
-
55
-
56
-
57
-
58
-
59
-
60
-
61
-
62
-
63
-
64
-
65
-
66
-
67
-
68
-
69
-
 70
70 -
 71
71 -
 72
72 -
 73
73 -
 74
74 -
 75
75 -
 76
76 -
 77
77 -
 78
78 -
 79
79 -
 80
80 -
81
-
82
-
83
-
84
-
85
-
86
-
87
-
88
-
89
-
90
-
91
-
92
-
93
-
94
-
95
-
96
-
97
-
98
-
99
-
100
-
101
-
102
-
103
-
104
-
105
-
106
-
107
-
108
-
109
-
110
-
111
-
112
-
113
-
114
-
115
-
116
-
117
-
118
-
119
-
120
-
121
-
122
-
123
-
124
-
125
-
126
-
127
-
128
-
129
-
130
-
131
-
132
-
133
-
134
-
135
-
136
-
137
-
138
-
139
-
140
-
141
-
142
-
143
-
144
-
145
-
146
-
147
-
148
-
149
-
150
-
151
-
152
-
153
-
154
-
155
-
156
-
157
-
158
-
159
-
160
-
161
-
162
-
163
-
164
-
165
-
166
-
167
-
168
-
169
-
170
-
171
-
172
-
173
-
174
-
175
-
176
-
177
-
178
-
179
-
180
-
181
-
182
-
183
-
184
-
185
-
186
-
187
-
188
-
189
-
190
-
191
-
192
-
193
-
194
-
195
-
196
-
197
-
198
-
199
-
200
-
201
-
202
-
203
-
204
-
205
-
206
-
207
-
208
-
209
-
210
-
211
-
212
-
213
-
214
-
215
-
216
-
217
-
218
-
219
-
220
-
221
-
222
-
223
-
224
-
225
-
226
-
227
-
228
-
229
-
230
-
231
-
232
-
233
-
234
-
235
-
236
-
237
-
238
-
239
-
240
-
241
-
242
-
243
-
244
-
245
-
246
-
247
-
248
-
249
-
250
-
251
-
252
-
253
-
254
-
255
-
256
-
257
-
258
-
259
-
260
-
261
-
262
-
263
-
264
-
265
-
266
-
267
-
268
-
269
-
270
-
271
-
272
-
273
-
274
-
275
-
276
-
277
-
278
-
279
-
280
-
281
-
282
-
283
 |
 |