Dell PowerVault TL4000 Dell Model TL2000/TL4000 Tape Library- User's Guide - Page 216
Installing Your Drive(s) in the Replacement Library Enclosure
 |
View all Dell PowerVault TL4000 manuals
Add to My Manuals
Save this manual to your list of manuals |
Page 216 highlights
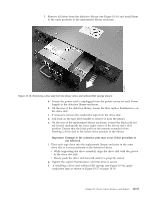
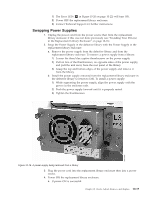
a77ug195 Figure 10-14. Removing the shipping label and lock from the top of the library and storing on the rear panel 5. Store the lock and label on the back panel of the replacement library enclosure (see Figure 10-15). 1 2 Figure 10-15. Library shipping lock and label storage location on the real panel of the library 6. Proceed to "Installing Your Drive(s) in the Replacement Library Enclosure." Installing Your Drive(s) in the Replacement Library Enclosure Note: It is important to install the drives from the defective library into the same positions in the replacement library enclosure in order to maintain your current library configuration. 10-16 Dell PowerVault TL2000 Tape Library and TL4000 Tape Library User's Guide a77ug019
-
 1
1 -
2
-
3
-
4
-
5
-
6
-
7
-
8
-
9
-
10
-
11
-
12
-
13
-
14
-
15
-
16
-
17
-
18
-
19
-
20
-
21
-
22
-
23
-
24
-
25
-
26
-
27
-
28
-
29
-
30
-
31
-
32
-
33
-
34
-
35
-
36
-
37
-
38
-
39
-
40
-
41
-
42
-
43
-
44
-
45
-
46
-
47
-
48
-
49
-
50
-
51
-
52
-
53
-
54
-
55
-
56
-
57
-
58
-
59
-
60
-
61
-
62
-
63
-
64
-
65
-
66
-
67
-
68
-
69
-
70
-
71
-
72
-
73
-
74
-
75
-
76
-
77
-
78
-
79
-
80
-
81
-
82
-
83
-
84
-
85
-
86
-
87
-
88
-
89
-
90
-
91
-
92
-
93
-
94
-
95
-
96
-
97
-
98
-
99
-
100
-
101
-
102
-
103
-
104
-
105
-
106
-
107
-
108
-
109
-
110
-
111
-
112
-
113
-
114
-
115
-
116
-
117
-
118
-
119
-
120
-
121
-
122
-
123
-
124
-
125
-
126
-
127
-
128
-
129
-
130
-
131
-
132
-
133
-
134
-
135
-
136
-
137
-
138
-
139
-
140
-
141
-
142
-
143
-
144
-
145
-
146
-
147
-
148
-
149
-
150
-
151
-
152
-
153
-
154
-
155
-
156
-
157
-
158
-
159
-
160
-
161
-
162
-
163
-
164
-
165
-
166
-
167
-
168
-
169
-
170
-
171
-
172
-
173
-
174
-
175
-
176
-
177
-
178
-
179
-
180
-
181
-
182
-
183
-
184
-
185
-
186
-
187
-
188
-
189
-
190
-
191
-
192
-
193
-
194
-
195
-
196
-
197
-
198
-
199
-
200
-
201
-
202
-
203
-
204
-
205
-
206
-
207
-
208
-
209
-
210
-
 211
211 -
 212
212 -
 213
213 -
 214
214 -
 215
215 -
 216
216 -
 217
217 -
 218
218 -
 219
219 -
 220
220 -
 221
221 -
222
-
223
-
224
-
225
-
226
-
227
-
228
-
229
-
230
-
231
-
232
-
233
-
234
-
235
-
236
-
237
-
238
-
239
-
240
-
241
-
242
-
243
-
244
-
245
-
246
-
247
-
248
-
249
-
250
-
251
-
252
-
253
-
254
-
255
-
256
-
257
-
258
-
259
-
260
-
261
-
262
-
263
-
264
-
265
-
266
-
267
-
268
-
269
-
270
-
271
-
272
-
273
-
274
-
275
-
276
-
277
-
278
-
279
-
280
-
281
-
282
-
283
 |
 |
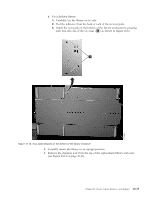
5.
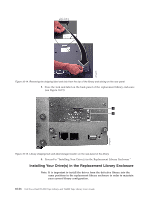
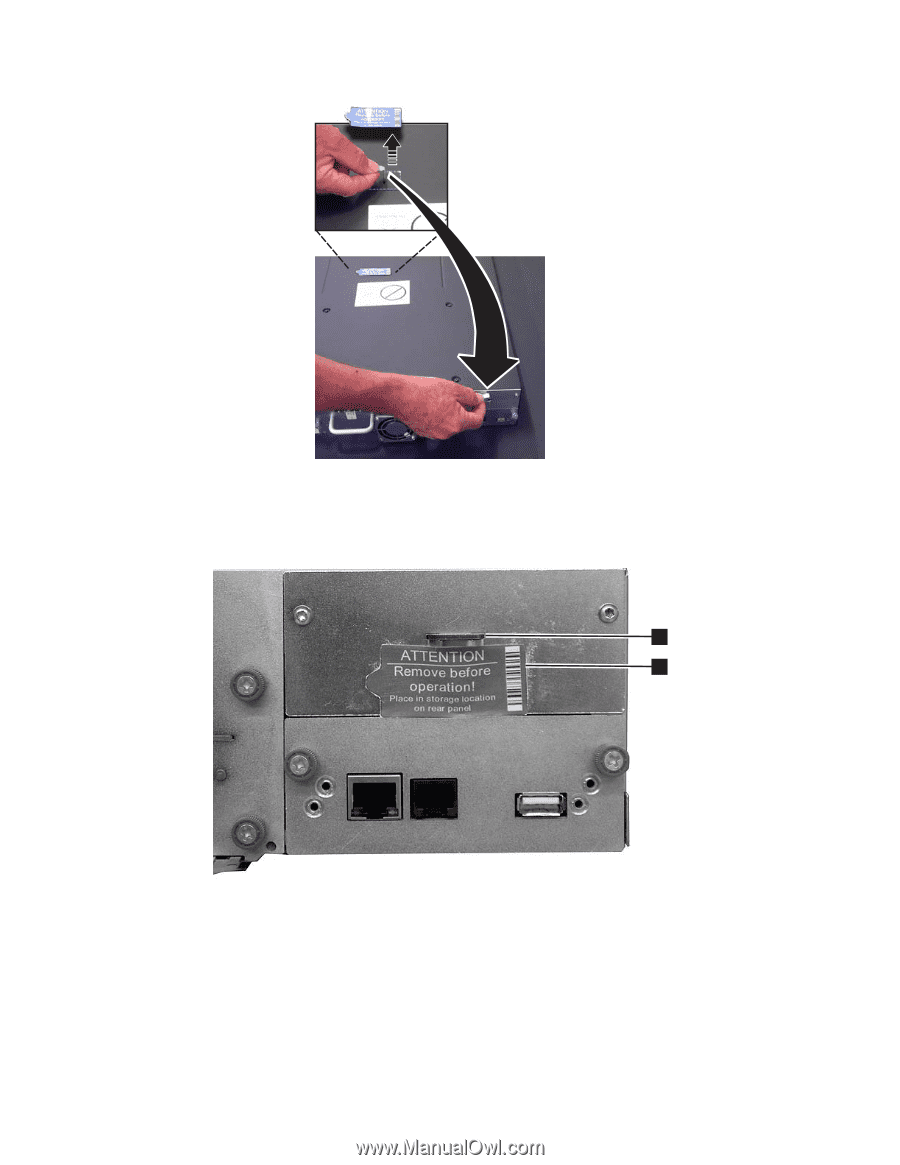
Store the lock and label on the back panel of the replacement library enclosure
(see Figure 10-15).
6.
Proceed to “Installing Your Drive(s) in the Replacement Library Enclosure.”
Installing Your Drive(s) in the Replacement Library Enclosure
Note: It is important to install the drives from the defective library into the
same positions in the replacement library enclosure in order to maintain
your current library configuration.
a77ug195
Figure 10-14. Removing the shipping label and lock from the top of the library and storing on the rear panel
1
2
a77ug019
Figure 10-15. Library shipping lock and label storage location on the real panel of the library
10-16
Dell PowerVault TL2000 Tape Library and TL4000 Tape Library User's Guide