Dell PowerVault TL4000 Dell Model TL2000/TL4000 Tape Library- User's Guide - Page 219
Swapping Power Supplies, The Error LED
 |
View all Dell PowerVault TL4000 manuals
Add to My Manuals
Save this manual to your list of manuals |
Page 219 highlights
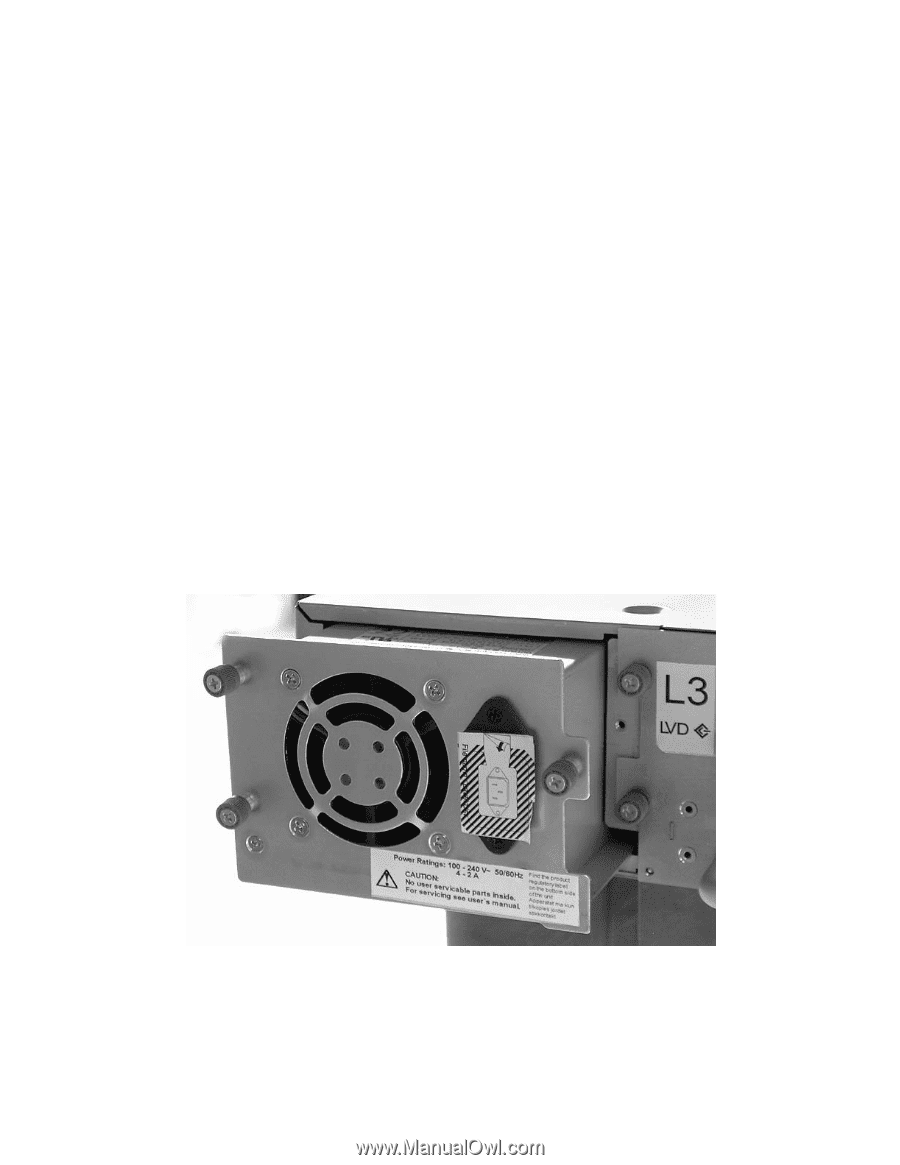
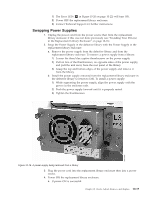
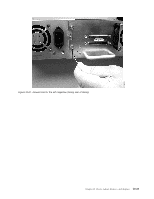
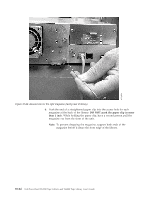
1) The Error LED ( 4 in Figure 10-20 on page 10-22) will turn ON. 2) Power OFF the replacement library enclosure. 3) Contact Technical Support for further instructions. Swapping Power Supplies 1. Unplug the power cord from the power source then from the replacement library enclosure if this was not done previously (see "Installing Your Drive(s) in the Replacement Library Enclosure" on page 10-16). 2. Swap the Power Supply in the defective library with the Power Supply in the replacement library enclosure. a. Remove the power supply from the defective library and from the replacement library enclosure. To remove a power supply from a library: 1) Loosen the three blue captive thumbscrews on the power supply. 2) Pull on two of the thumbscrews, on opposite sides of the power supply, and pull the unit away from the rear panel of the library. 3) Grasp the top and bottom edges of the power supply and remove it from the library. b. Install the power supply removed from the replacement library enclosure in the defective library to return to Dell. To install a power supply: 1) While supporting the power supply, align the power supply with the groove in the enclosure rails. 2) Push the power supply forward until it is properly seated. 3) Tighten the thumbscrews. Figure 10-18. A power supply being removed from a library 3. Plug the power cord into the replacement library enclosure then into a power source. 4. Power ON the replacement library enclosure. a. If power ON is successful: Chapter 10. Check, Adjust, Remove, and Replace 10-19 a66mi096
-
 1
1 -
2
-
3
-
4
-
5
-
6
-
7
-
8
-
9
-
10
-
11
-
12
-
13
-
14
-
15
-
16
-
17
-
18
-
19
-
20
-
21
-
22
-
23
-
24
-
25
-
26
-
27
-
28
-
29
-
30
-
31
-
32
-
33
-
34
-
35
-
36
-
37
-
38
-
39
-
40
-
41
-
42
-
43
-
44
-
45
-
46
-
47
-
48
-
49
-
50
-
51
-
52
-
53
-
54
-
55
-
56
-
57
-
58
-
59
-
60
-
61
-
62
-
63
-
64
-
65
-
66
-
67
-
68
-
69
-
70
-
71
-
72
-
73
-
74
-
75
-
76
-
77
-
78
-
79
-
80
-
81
-
82
-
83
-
84
-
85
-
86
-
87
-
88
-
89
-
90
-
91
-
92
-
93
-
94
-
95
-
96
-
97
-
98
-
99
-
100
-
101
-
102
-
103
-
104
-
105
-
106
-
107
-
108
-
109
-
110
-
111
-
112
-
113
-
114
-
115
-
116
-
117
-
118
-
119
-
120
-
121
-
122
-
123
-
124
-
125
-
126
-
127
-
128
-
129
-
130
-
131
-
132
-
133
-
134
-
135
-
136
-
137
-
138
-
139
-
140
-
141
-
142
-
143
-
144
-
145
-
146
-
147
-
148
-
149
-
150
-
151
-
152
-
153
-
154
-
155
-
156
-
157
-
158
-
159
-
160
-
161
-
162
-
163
-
164
-
165
-
166
-
167
-
168
-
169
-
170
-
171
-
172
-
173
-
174
-
175
-
176
-
177
-
178
-
179
-
180
-
181
-
182
-
183
-
184
-
185
-
186
-
187
-
188
-
189
-
190
-
191
-
192
-
193
-
194
-
195
-
196
-
197
-
198
-
199
-
200
-
201
-
202
-
203
-
204
-
205
-
206
-
207
-
208
-
209
-
210
-
211
-
212
-
213
-
 214
214 -
 215
215 -
 216
216 -
 217
217 -
 218
218 -
 219
219 -
 220
220 -
 221
221 -
 222
222 -
 223
223 -
 224
224 -
225
-
226
-
227
-
228
-
229
-
230
-
231
-
232
-
233
-
234
-
235
-
236
-
237
-
238
-
239
-
240
-
241
-
242
-
243
-
244
-
245
-
246
-
247
-
248
-
249
-
250
-
251
-
252
-
253
-
254
-
255
-
256
-
257
-
258
-
259
-
260
-
261
-
262
-
263
-
264
-
265
-
266
-
267
-
268
-
269
-
270
-
271
-
272
-
273
-
274
-
275
-
276
-
277
-
278
-
279
-
280
-
281
-
282
-
283
 |
 |