Dell PowerVault TL4000 Dell Model TL2000/TL4000 Tape Library- User's Guide - Page 39
Input Modes, Selecting Predefined Values - replace cleaning cartridge
 |
View all Dell PowerVault TL4000 manuals
Add to My Manuals
Save this manual to your list of manuals |
Page 39 highlights
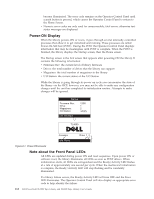
The following are additional operational details of LEDs: v The Ready/Activity LED is illuminated any time the unit is powered ON and functional. The Ready/Activity LED blinks whenever there is library or drive activity. This LED will also blink when the unit is OFFLINE. v The Clean LED is illuminated when either a cleaning requested or a cleaning required flag has been issued by the drive. The LED is turned off after a successful drive cleaning operation. v The Attention LED indicates one of the following conditions. Problem Bad media Drive sled issues Action Required 1. Go to Monitor → Inventory to locate the defective cartridge. 2. Move the defective cartridge to the I/O Station. (Operator Control Panel: Control → Move Cartridges). 3. Open the I/O Station to remove the defective cartridge. (Operator Control Panel: Control → Open I/O). Do one of the following: - Install a drive sled (see "Removing/Installing/Adding a Tape Drive Sled" on page 10-3). - Modify or resubmit Logical Library setting (Operator Control Panel: Configure → Logical Libraries or Web User Interface: Configure Library → Logical Libraries). Redundant power supply failed - Restore defaults (Operator Control Panel: Configure → Restore Defaults or Web User Interface: Configure Library → Restore Defaults). Complete the following steps: 1. Replace the failed power supply (see "Replacing a Power Supply" on page 10-10). Power supply fan failure 2. Cycle library power. Replace the power supply. v The Error LED is illuminated when there is an unrecoverable (i.e. hard) drive or library failure. This will happen at the same time the hard error message is displayed on the screen and the LED will remain lit until the error state is resolved. Note: From the Operator Control Panel, run Service → Library Verify. If Library Verify runs without error, the Error LED turns off. If the error persists, recycle power. Input Modes There are several ways to enter values in the different menu items. These values are selectable predefined values, toggle values (for example, ON/OFF) and numerical values like network addresses. Selecting Predefined Values 1. To set the predefined values, press the SELECT button to select the menu item. 2. Using the UP and DOWN buttons, select one of the various predefined values for that item. Chapter 2. User Interfaces 2-3
-
 1
1 -
2
-
3
-
4
-
5
-
6
-
7
-
8
-
9
-
10
-
11
-
12
-
13
-
14
-
15
-
16
-
17
-
18
-
19
-
20
-
21
-
22
-
23
-
24
-
25
-
26
-
27
-
28
-
29
-
30
-
31
-
32
-
33
-
 34
34 -
 35
35 -
 36
36 -
 37
37 -
 38
38 -
 39
39 -
 40
40 -
 41
41 -
 42
42 -
 43
43 -
 44
44 -
45
-
46
-
47
-
48
-
49
-
50
-
51
-
52
-
53
-
54
-
55
-
56
-
57
-
58
-
59
-
60
-
61
-
62
-
63
-
64
-
65
-
66
-
67
-
68
-
69
-
70
-
71
-
72
-
73
-
74
-
75
-
76
-
77
-
78
-
79
-
80
-
81
-
82
-
83
-
84
-
85
-
86
-
87
-
88
-
89
-
90
-
91
-
92
-
93
-
94
-
95
-
96
-
97
-
98
-
99
-
100
-
101
-
102
-
103
-
104
-
105
-
106
-
107
-
108
-
109
-
110
-
111
-
112
-
113
-
114
-
115
-
116
-
117
-
118
-
119
-
120
-
121
-
122
-
123
-
124
-
125
-
126
-
127
-
128
-
129
-
130
-
131
-
132
-
133
-
134
-
135
-
136
-
137
-
138
-
139
-
140
-
141
-
142
-
143
-
144
-
145
-
146
-
147
-
148
-
149
-
150
-
151
-
152
-
153
-
154
-
155
-
156
-
157
-
158
-
159
-
160
-
161
-
162
-
163
-
164
-
165
-
166
-
167
-
168
-
169
-
170
-
171
-
172
-
173
-
174
-
175
-
176
-
177
-
178
-
179
-
180
-
181
-
182
-
183
-
184
-
185
-
186
-
187
-
188
-
189
-
190
-
191
-
192
-
193
-
194
-
195
-
196
-
197
-
198
-
199
-
200
-
201
-
202
-
203
-
204
-
205
-
206
-
207
-
208
-
209
-
210
-
211
-
212
-
213
-
214
-
215
-
216
-
217
-
218
-
219
-
220
-
221
-
222
-
223
-
224
-
225
-
226
-
227
-
228
-
229
-
230
-
231
-
232
-
233
-
234
-
235
-
236
-
237
-
238
-
239
-
240
-
241
-
242
-
243
-
244
-
245
-
246
-
247
-
248
-
249
-
250
-
251
-
252
-
253
-
254
-
255
-
256
-
257
-
258
-
259
-
260
-
261
-
262
-
263
-
264
-
265
-
266
-
267
-
268
-
269
-
270
-
271
-
272
-
273
-
274
-
275
-
276
-
277
-
278
-
279
-
280
-
281
-
282
-
283
 |
 |