HP LaserJet 4345 HP LaserJet 4345mfp - Software Technical Reference (External) - Page 96
File printing by using the HP LaserJet Utility (Mac OS 9.x only)
 |
View all HP LaserJet 4345 manuals
Add to My Manuals
Save this manual to your list of manuals |
Page 96 highlights
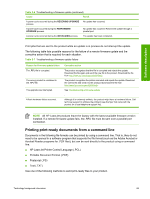
Software description Complete the following steps to print print-ready files by using Fetch. 1 Start the program by clicking the Fetch icon. 2 Enter the IP address of the product in the Host: box 3 Click the Put Files button and browse to the location of the print-ready file. 4 Double-click the file to select it and download it to the product. A confirmation message appears in the main window. 5 Click OK. File printing by using the HP LaserJet Utility (Mac OS 9.x only) Complete the following steps to print a print-ready file by using the HP LaserJet Utility. 1 Make sure that you have the tools and files necessary for the update. You will need the HP LaserJet Utility and the print-ready file that you want to print. The HP LaserJet Utility can be found on the HP LaserJet 4345mfp printing-system software CD that came with the product. If you do not have the CD, you can obtain the HP LaserJet Utility by downloading the latest product installer from www.hp.com. After you have the HP LaserJet Utility and you know the location of the print-ready file that you want to print, you are ready to begin the command-line printing process. 2 Open the HP LaserJet Utility. 3 Click Select Printer and locate the product that you would like to upgrade on the network. 4 Select the product on the right side of the dialog box, and then click OK. An information dialog box for the HP LaserJet 4345mfp appears. 5 On the left side of the Information dialog box, click Files. A dialog box appears where you can select a file to be downloaded to the product. 6 Click Select File. 7 On your hard disk, locate the print-ready file that you want to print, and click the file name to highlight it. Then click Select. The Files dialog box updates showing the print-ready file that you want to print under File to download. 8 Click Download. The HP LaserJet Utility starts downloading the file to the product. A progress bar keeps you updated on how much of the file has been downloaded. While the file is downloading, the PROCESSING JOB message appears on the control-panel display on the product, and the printready file prints. Print-ready file printing by using the LPR command NOTE This command-line printing method is for use in Windows NT 4.0, Windows 2000, Windows XP, and Windows Server 2003. 74 2 Software description
-
 1
1 -
2
-
3
-
4
-
5
-
6
-
7
-
8
-
9
-
10
-
11
-
12
-
13
-
14
-
15
-
16
-
17
-
18
-
19
-
20
-
21
-
22
-
23
-
24
-
25
-
26
-
27
-
28
-
29
-
30
-
31
-
32
-
33
-
34
-
35
-
36
-
37
-
38
-
39
-
40
-
41
-
42
-
43
-
44
-
45
-
46
-
47
-
48
-
49
-
50
-
51
-
52
-
53
-
54
-
55
-
56
-
57
-
58
-
59
-
60
-
61
-
62
-
63
-
64
-
65
-
66
-
67
-
68
-
69
-
70
-
71
-
72
-
73
-
74
-
75
-
76
-
77
-
78
-
79
-
80
-
81
-
82
-
83
-
84
-
85
-
86
-
87
-
88
-
89
-
90
-
 91
91 -
 92
92 -
 93
93 -
 94
94 -
 95
95 -
 96
96 -
 97
97 -
 98
98 -
 99
99 -
 100
100 -
 101
101 -
102
-
103
-
104
-
105
-
106
-
107
-
108
-
109
-
110
-
111
-
112
-
113
-
114
-
115
-
116
-
117
-
118
-
119
-
120
-
121
-
122
-
123
-
124
-
125
-
126
-
127
-
128
-
129
-
130
-
131
-
132
-
133
-
134
-
135
-
136
-
137
-
138
-
139
-
140
-
141
-
142
-
143
-
144
-
145
-
146
-
147
-
148
-
149
-
150
-
151
-
152
-
153
-
154
-
155
-
156
-
157
-
158
-
159
-
160
-
161
-
162
-
163
-
164
-
165
-
166
-
167
-
168
-
169
-
170
-
171
-
172
-
173
-
174
-
175
-
176
-
177
-
178
-
179
-
180
-
181
-
182
-
183
-
184
-
185
-
186
-
187
-
188
-
189
-
190
-
191
-
192
-
193
-
194
-
195
-
196
-
197
-
198
-
199
-
200
-
201
-
202
-
203
-
204
-
205
-
206
-
207
-
208
-
209
-
210
-
211
-
212
-
213
-
214
-
215
-
216
-
217
-
218
-
219
-
220
-
221
-
222
-
223
-
224
-
225
-
226
-
227
-
228
-
229
-
230
-
231
-
232
-
233
-
234
-
235
-
236
-
237
-
238
-
239
-
240
-
241
-
242
-
243
-
244
-
245
-
246
-
247
-
248
-
249
-
250
-
251
-
252
-
253
-
254
-
255
-
256
-
257
-
258
-
259
-
260
-
261
-
262
-
263
-
264
-
265
-
266
-
267
-
268
-
269
-
270
-
271
-
272
-
273
-
274
-
275
-
276
-
277
-
278
-
279
-
280
-
281
-
282
-
283
-
284
-
285
-
286
-
287
-
288
-
289
-
290
-
291
-
292
-
293
-
294
-
295
-
296
-
297
-
298
-
299
-
300
-
301
-
302
-
303
-
304
-
305
-
306
-
307
-
308
-
309
-
310
-
311
-
312
-
313
-
314
-
315
-
316
-
317
-
318
-
319
-
320
-
321
-
322
-
323
-
324
-
325
-
326
-
327
-
328
-
329
-
330
-
331
-
332
-
333
-
334
-
335
-
336
-
337
-
338
-
339
-
340
-
341
-
342
-
343
-
344
-
345
-
346
-
347
-
348
-
349
-
350
-
351
-
352
 |
 |