HP NetServer AA 4000 HP Netserver AA Solution Administrator's Guide v - Page 233
Installing a Replacement MIC
 |
View all HP NetServer AA 4000 manuals
Add to My Manuals
Save this manual to your list of manuals |
Page 233 highlights
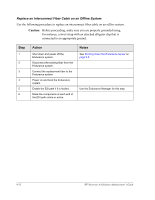
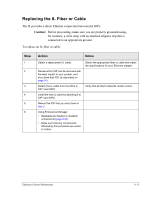
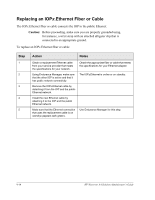
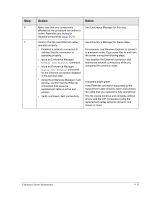
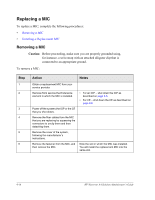
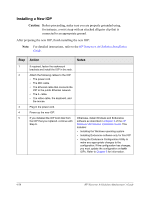
Installing a Replacement MIC Caution: Before proceeding, make sure you are properly grounded using, for instance, a wrist strap with an attached alligator clip that is connected to an appropriate ground. To install a replacement MIC: Step 1 2 3 4 5 6 7 8 9 10 Action Notes Carefully remove the replacement MIC from its anti-static packaging. Install the replacement MIC into the correct slot. Replace the cover. Attach the MIC fiber connections by clipping them into the cable receptacles. Power up the system. Make a flash diskette with which you will flash the MICs. Flash the MICs. Compare the revision levels to other MICs in your system. On the MIC, make sure that the local and remote connection fiber status lights are green. Using Endurance Manager: • Make sure that any components affected by this procedure are active or online. Reenable any faulted or disabled components (page 9-31). • Make sure that the system rejoins the Endurance server. Ensure that local and remote connections are cabled correctly. For information about cabling the MICs, refer to Table 2-1 in Chapter 2 of HP Netserver AA Solution Installation Guide. Prepare this from an Endurance distribution diskette or a subsequent hotfix if applicable. Refer to Making an MTC Diskette in Chapter 7 for detailed information about creating the flash diskette. Mtcflash - f results in the correct configuration. If all flash components are up to date, MTCFLASH does not reprogram the MIC. Verify that the revision level of the new MIC matches those of the other three MICS in the server. If the connection fiber status lights are not green, correct the condition and continue. For a description of the status lights, refer to MIC LEDs in Appendix A. Endurance Server Maintenance 9-17
-
 1
1 -
2
-
3
-
4
-
5
-
6
-
7
-
8
-
9
-
10
-
11
-
12
-
13
-
14
-
15
-
16
-
17
-
18
-
19
-
20
-
21
-
22
-
23
-
24
-
25
-
26
-
27
-
28
-
29
-
30
-
31
-
32
-
33
-
34
-
35
-
36
-
37
-
38
-
39
-
40
-
41
-
42
-
43
-
44
-
45
-
46
-
47
-
48
-
49
-
50
-
51
-
52
-
53
-
54
-
55
-
56
-
57
-
58
-
59
-
60
-
61
-
62
-
63
-
64
-
65
-
66
-
67
-
68
-
69
-
70
-
71
-
72
-
73
-
74
-
75
-
76
-
77
-
78
-
79
-
80
-
81
-
82
-
83
-
84
-
85
-
86
-
87
-
88
-
89
-
90
-
91
-
92
-
93
-
94
-
95
-
96
-
97
-
98
-
99
-
100
-
101
-
102
-
103
-
104
-
105
-
106
-
107
-
108
-
109
-
110
-
111
-
112
-
113
-
114
-
115
-
116
-
117
-
118
-
119
-
120
-
121
-
122
-
123
-
124
-
125
-
126
-
127
-
128
-
129
-
130
-
131
-
132
-
133
-
134
-
135
-
136
-
137
-
138
-
139
-
140
-
141
-
142
-
143
-
144
-
145
-
146
-
147
-
148
-
149
-
150
-
151
-
152
-
153
-
154
-
155
-
156
-
157
-
158
-
159
-
160
-
161
-
162
-
163
-
164
-
165
-
166
-
167
-
168
-
169
-
170
-
171
-
172
-
173
-
174
-
175
-
176
-
177
-
178
-
179
-
180
-
181
-
182
-
183
-
184
-
185
-
186
-
187
-
188
-
189
-
190
-
191
-
192
-
193
-
194
-
195
-
196
-
197
-
198
-
199
-
200
-
201
-
202
-
203
-
204
-
205
-
206
-
207
-
208
-
209
-
210
-
211
-
212
-
213
-
214
-
215
-
216
-
217
-
218
-
219
-
220
-
221
-
222
-
223
-
224
-
225
-
226
-
227
-
 228
228 -
 229
229 -
 230
230 -
 231
231 -
 232
232 -
 233
233 -
 234
234 -
 235
235 -
 236
236 -
 237
237 -
 238
238 -
239
-
240
-
241
-
242
-
243
-
244
-
245
-
246
-
247
-
248
-
249
-
250
-
251
-
252
-
253
-
254
-
255
-
256
-
257
-
258
-
259
-
260
-
261
-
262
-
263
-
264
-
265
-
266
-
267
-
268
-
269
-
270
-
271
-
272
 |
 |