HP PageWide Pro 577dw User Guide - Page 108
Set up fax, Connect fax to a telephone line, Con fax settings
 |
View all HP PageWide Pro 577dw manuals
Add to My Manuals
Save this manual to your list of manuals |
Page 108 highlights
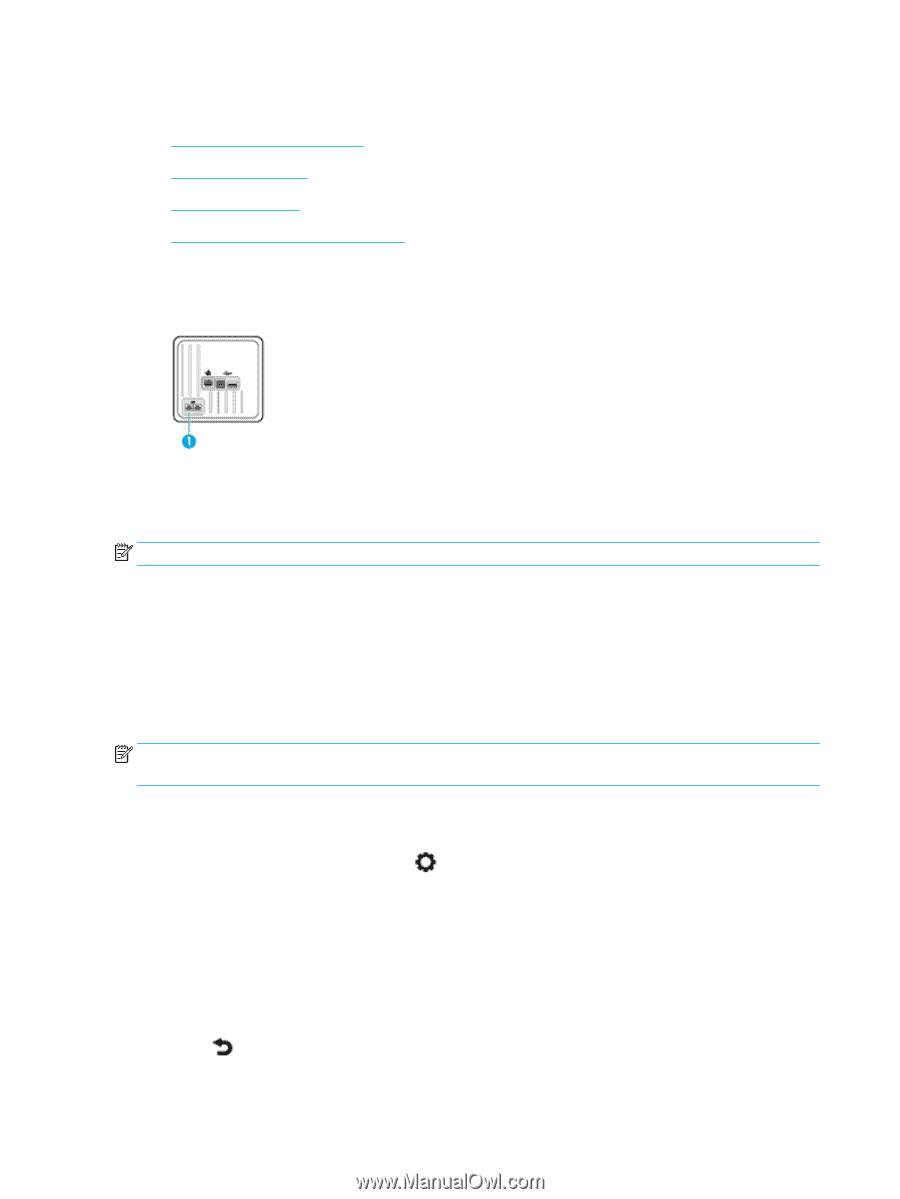
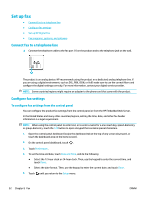
Set up fax ● Connect fax to a telephone line ● Configure fax settings ● Set up HP Digital Fax ● Fax programs, systems, and software Connect fax to a telephone line ▲ Connect the telephone cable to the fax port (1) on the product and to the telephone jack on the wall. The product is an analog device. HP recommends using the product on a dedicated analog telephone line. If you are using a digital environment, such as DSL, PBX, ISDN, or VoIP, make sure to use the correct filters and configure the digital settings correctly. For more information, contact your digital service provider. NOTE: Some countries/regions might require an adapter to the phone cord that came with the product. Configure fax settings To configure fax settings from the control panel You can configure the product fax settings from the control panel or from the HP Embedded Web Server. In the United States and many other countries/regions, setting the time, date, and other fax header information is a legal requirement. NOTE: When using the control panel to enter text, or to enter a name for a one-touch key, speed-dial entry, or group-dial entry, touch the 123 button to open a keypad that contains special characters. 1. Open the control panel dashboard (swipe the dashboard tab at the top of any screen downward, or touch the dashboard area on the home screen). 2. On the control panel dashboard, touch . 3. Touch Preferences . 4. To set the time and date, touch Date and Time, and do the following: ● Select the 12-hour clock or 24-hour clock. Then, use the keypad to enter the current time, and touch Done . ● Select the date format. Then, use the keypad to enter the current date, and touch Done . 5. Touch until you return to the Setup menu. 92 Chapter 8 Fax ENWW
-
 1
1 -
2
-
3
-
4
-
5
-
6
-
7
-
8
-
9
-
10
-
11
-
12
-
13
-
14
-
15
-
16
-
17
-
18
-
19
-
20
-
21
-
22
-
23
-
24
-
25
-
26
-
27
-
28
-
29
-
30
-
31
-
32
-
33
-
34
-
35
-
36
-
37
-
38
-
39
-
40
-
41
-
42
-
43
-
44
-
45
-
46
-
47
-
48
-
49
-
50
-
51
-
52
-
53
-
54
-
55
-
56
-
57
-
58
-
59
-
60
-
61
-
62
-
63
-
64
-
65
-
66
-
67
-
68
-
69
-
70
-
71
-
72
-
73
-
74
-
75
-
76
-
77
-
78
-
79
-
80
-
81
-
82
-
83
-
84
-
85
-
86
-
87
-
88
-
89
-
90
-
91
-
92
-
93
-
94
-
95
-
96
-
97
-
98
-
99
-
100
-
101
-
102
-
 103
103 -
 104
104 -
 105
105 -
 106
106 -
 107
107 -
 108
108 -
 109
109 -
 110
110 -
 111
111 -
 112
112 -
 113
113 -
114
-
115
-
116
-
117
-
118
-
119
-
120
-
121
-
122
-
123
-
124
-
125
-
126
-
127
-
128
-
129
-
130
-
131
-
132
-
133
-
134
-
135
-
136
-
137
-
138
-
139
-
140
-
141
-
142
-
143
-
144
-
145
-
146
-
147
-
148
-
149
-
150
-
151
-
152
-
153
-
154
-
155
-
156
-
157
-
158
-
159
-
160
-
161
-
162
-
163
-
164
-
165
-
166
-
167
-
168
-
169
-
170
-
171
-
172
-
173
-
174
-
175
-
176
-
177
-
178
-
179
-
180
-
181
-
182
-
183
-
184
-
185
-
186
-
187
-
188
-
189
-
190
-
191
-
192
-
193
-
194
-
195
-
196
-
197
-
198
-
199
-
200
-
201
-
202
-
203
-
204
-
205
 |
 |