HP PageWide Pro 577dw User Guide - Page 170
Solve problems, Windows XP, Windows Server 2003, Windows Vista, and Windows 7
 |
View all HP PageWide Pro 577dw manuals
Add to My Manuals
Save this manual to your list of manuals |
Page 170 highlights
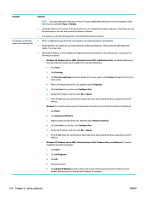
Problem The product is in Ready mode, but nothing prints Solution NOTE: Close any applications that are running. To close an application that has an icon in the task bar, rightclick the icon, and select Close or Disable. ● Check the amount of free space on the drive where you are installing the product software. If necessary, free up as much space as you can, and reinstall the product software. ● If necessary, run the Disk Defragmenter, and reinstall the product software. ● Print a configuration page from the control panel, and verify the product functionality. ● Verify that all of the cables are correctly seated and within specifications. This includes the USB and power cables. Try a new cable. ● Verify the IP Address on the Configuration Page matches the IP address for the software port. Use one of the following procedures: ◦ Windows XP, Windows Server 2003, Windows Server 2008, and Windows Vista, installed without using the fully featured installer (such as Add Printer Wizard in Windows): 1. Click Start. 2. Click Settings. 3. Click Printers and Faxes (using the default Start menu view) or click Printers (using the Classic Start menu view). 4. Right-click the product driver icon, and then select Properties . 5. Click the Ports tab, and then click Configure Port. 6. Verify the IP address, and then click OK or Cancel. 7. If the IP Addresses are not the same, delete the driver, and reinstall the driver using the correct IP address. ◦ Windows 7, installed without using the fully featured installer (such as Add Printer Wizard in Windows): 1. Click Start. 2. Click Devices and Printers. 3. Right-click the product driver icon, and then select Printer properties. 4. Click the Ports tab, and then click Configure Port. 5. Verify the IP address, and then click OK or Cancel. 6. If the IP Addresses are not the same, delete the driver, and reinstall the driver using the correct IP address. ◦ Windows XP, Windows Server 2003, Windows Server 2008, Windows Vista, and Windows 7, installed using the fully featured installer: 1. Click Start. 2. Click All Programs. 3. Click HP. 4. Click your product. 5. Click Update IP Address to open a utility that reports the known ("previous") IP address for the product and allows you to change the IP address, if necessary. 154 Chapter 9 Solve problems ENWW
-
 1
1 -
2
-
3
-
4
-
5
-
6
-
7
-
8
-
9
-
10
-
11
-
12
-
13
-
14
-
15
-
16
-
17
-
18
-
19
-
20
-
21
-
22
-
23
-
24
-
25
-
26
-
27
-
28
-
29
-
30
-
31
-
32
-
33
-
34
-
35
-
36
-
37
-
38
-
39
-
40
-
41
-
42
-
43
-
44
-
45
-
46
-
47
-
48
-
49
-
50
-
51
-
52
-
53
-
54
-
55
-
56
-
57
-
58
-
59
-
60
-
61
-
62
-
63
-
64
-
65
-
66
-
67
-
68
-
69
-
70
-
71
-
72
-
73
-
74
-
75
-
76
-
77
-
78
-
79
-
80
-
81
-
82
-
83
-
84
-
85
-
86
-
87
-
88
-
89
-
90
-
91
-
92
-
93
-
94
-
95
-
96
-
97
-
98
-
99
-
100
-
101
-
102
-
103
-
104
-
105
-
106
-
107
-
108
-
109
-
110
-
111
-
112
-
113
-
114
-
115
-
116
-
117
-
118
-
119
-
120
-
121
-
122
-
123
-
124
-
125
-
126
-
127
-
128
-
129
-
130
-
131
-
132
-
133
-
134
-
135
-
136
-
137
-
138
-
139
-
140
-
141
-
142
-
143
-
144
-
145
-
146
-
147
-
148
-
149
-
150
-
151
-
152
-
153
-
154
-
155
-
156
-
157
-
158
-
159
-
160
-
161
-
162
-
163
-
164
-
 165
165 -
 166
166 -
 167
167 -
 168
168 -
 169
169 -
 170
170 -
 171
171 -
 172
172 -
 173
173 -
 174
174 -
 175
175 -
176
-
177
-
178
-
179
-
180
-
181
-
182
-
183
-
184
-
185
-
186
-
187
-
188
-
189
-
190
-
191
-
192
-
193
-
194
-
195
-
196
-
197
-
198
-
199
-
200
-
201
-
202
-
203
-
204
-
205
 |
 |