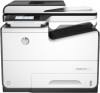
HP PageWide Pro 577dw User Guide - Page 39
Set or change the product password, Manually con TCP/IP parameters from the control panel
 |
View all HP PageWide Pro 577dw manuals
Add to My Manuals
Save this manual to your list of manuals |
Page 39 highlights
1. Obtain the product IP (on the control panel dashboard, touch ). 2. Type the product IP address into the address bar of a web browser to open the HP Embedded Web Server. 3. Click the Network tab to obtain network information. You can change settings as needed. Set or change the product password Use the HP Embedded Web Server to set a password or change an existing password for a product on a network so unauthorized users cannot change the product settings. 1. Obtain the product IP (on the control panel dashboard, touch ). 2. Type the product IP address into the address bar of a web browser. Click the Settings tab, click Security, and then click the Password Settings link. NOTE: If a password has previously been set, you are prompted to type the password. Type "admin" for User Name along with the password, and then click Apply. 3. Type the new password in the Password field and in the Confirm Password field. 4. At the bottom of the window, click Apply to save the password. Manually configure TCP/IP parameters from the control panel Use the control panel menus to manually set an IPv4 address, subnet mask, and default gateway. 1. Open the control panel dashboard (swipe the dashboard tab at the top of any screen downward, or touch the dashboard area on the home screen). 2. On the control panel dashboard, touch . 3. Touch Network Setup, and then touch Ethernet Settings. 4. Touch Advanced Settings, and then touch IP Settings. 5. Touch Manual, and then touch IP Address. 6. Using the numeric keypad, do the following: ● Enter the IP address, and touch Done . ● Enter the subnet mask, and touch Done . ● Enter the default gateway, and touch Done . 7. Touch Apply. Link speed and duplex settings NOTE: This information applies only to Ethernet (wired) networks. It does not apply to wireless networks. The link speed and communication mode of the print server must match the network hub. For most situations, leave the product in automatic mode. Incorrect changes to the link speed and duplex settings might prevent the product from communicating with other network devices. If you need to make changes, use the printer control panel. ENWW Manage network settings 23
-
 1
1 -
2
-
3
-
4
-
5
-
6
-
7
-
8
-
9
-
10
-
11
-
12
-
13
-
14
-
15
-
16
-
17
-
18
-
19
-
20
-
21
-
22
-
23
-
24
-
25
-
26
-
27
-
28
-
29
-
30
-
31
-
32
-
33
-
 34
34 -
 35
35 -
 36
36 -
 37
37 -
 38
38 -
 39
39 -
 40
40 -
 41
41 -
 42
42 -
 43
43 -
 44
44 -
45
-
46
-
47
-
48
-
49
-
50
-
51
-
52
-
53
-
54
-
55
-
56
-
57
-
58
-
59
-
60
-
61
-
62
-
63
-
64
-
65
-
66
-
67
-
68
-
69
-
70
-
71
-
72
-
73
-
74
-
75
-
76
-
77
-
78
-
79
-
80
-
81
-
82
-
83
-
84
-
85
-
86
-
87
-
88
-
89
-
90
-
91
-
92
-
93
-
94
-
95
-
96
-
97
-
98
-
99
-
100
-
101
-
102
-
103
-
104
-
105
-
106
-
107
-
108
-
109
-
110
-
111
-
112
-
113
-
114
-
115
-
116
-
117
-
118
-
119
-
120
-
121
-
122
-
123
-
124
-
125
-
126
-
127
-
128
-
129
-
130
-
131
-
132
-
133
-
134
-
135
-
136
-
137
-
138
-
139
-
140
-
141
-
142
-
143
-
144
-
145
-
146
-
147
-
148
-
149
-
150
-
151
-
152
-
153
-
154
-
155
-
156
-
157
-
158
-
159
-
160
-
161
-
162
-
163
-
164
-
165
-
166
-
167
-
168
-
169
-
170
-
171
-
172
-
173
-
174
-
175
-
176
-
177
-
178
-
179
-
180
-
181
-
182
-
183
-
184
-
185
-
186
-
187
-
188
-
189
-
190
-
191
-
192
-
193
-
194
-
195
-
196
-
197
-
198
-
199
-
200
-
201
-
202
-
203
-
204
-
205
 |
 |