HP Photosmart C5500 User Guide - Page 28
Manage your Bluetooth settings, Connect Your Device Now - windows 7
 |
View all HP Photosmart C5500 manuals
Add to My Manuals
Save this manual to your list of manuals |
Page 28 highlights
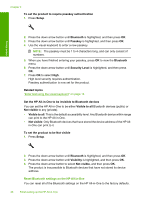
Finish setup To install and print using the Microsoft stack 1. Make sure that you have installed the product software on the computer. NOTE: The purpose of installing the software is to make sure the printer driver is available for the Bluetooth® connection. Therefore, if you have already installed the software, you do not need to reinstall it. If you want both a USB and a Bluetooth® connection to the product, install the USB connection first. For more information, see the Start Here guide. However, if you do not want a USB connection, select Directly to the computer on the Connection Type screen. Also, on the Connect Your Device Now screen, select the check box next to If you are unable to connect your device now... at the bottom of the screen. 2. Attach an HP Bluetooth Adapter to the front USB port of the product. 3. If you are using an external Bluetooth® adapter for your computer, make sure your computer is started and then attach the Bluetooth® adapter to a USB port on the computer. If you have Windows Vista or Windows XP with Service Pack 2, the Bluetooth® drivers are installed automatically. If you are prompted to select a Bluetooth® profile, select HCRP. If your computer has Bluetooth® built in, just make sure the computer is started. 4. On the Windows taskbar, click Start, and then click Printers and Faxes (or click Control Panel, and then Printers). 5. Double-click the Add Printer icon (or click Add a printer). 6. Click Next, and then select A Bluetooth Printer. 7. Follow the onscreen instructions to finish the installation. 8. Print as you would to any printer. To install and print using the Widcomm stack 1. Make sure that you have installed the product software on the computer. NOTE: The purpose of installing the software is to make sure the printer driver is available for the Bluetooth® connection. Therefore, if you have already installed the software, you do not need to reinstall it. If you want both a USB and a Bluetooth® connection to the product, install the USB connection first. For more information, see the Start Here guide. However, if you do not want a USB connection, select Directly to the computer on the Connection Type screen. Also, on the Connect Your Device Now screen, select the check box next to If you are unable to connect your device now... at the bottom of the screen. 2. Attach an HP Bluetooth Adapter to the front USB port. 3. Click the My Bluetooth Places icon on the desktop or in the taskbar. 4. Click View devices in range. 5. Once the available devices are discovered, double-click the name of the product to finish the installation. 6. Print as you would to any printer. Manage your Bluetooth settings You can manage Bluetooth settings for the HP All-in-One through the HP All-in-One control panel. Connect to a Bluetooth® device 25
-
 1
1 -
2
-
3
-
4
-
5
-
6
-
7
-
8
-
9
-
10
-
11
-
12
-
13
-
14
-
15
-
16
-
17
-
18
-
19
-
20
-
21
-
22
-
 23
23 -
 24
24 -
 25
25 -
 26
26 -
 27
27 -
 28
28 -
 29
29 -
 30
30 -
 31
31 -
 32
32 -
 33
33 -
34
-
35
-
36
-
37
-
38
-
39
-
40
-
41
-
42
-
43
-
44
-
45
-
46
-
47
-
48
-
49
-
50
-
51
-
52
-
53
-
54
-
55
-
56
-
57
-
58
-
59
-
60
-
61
-
62
-
63
-
64
-
65
-
66
-
67
-
68
-
69
-
70
-
71
-
72
-
73
-
74
-
75
-
76
-
77
-
78
-
79
-
80
-
81
-
82
-
83
-
84
-
85
-
86
-
87
-
88
-
89
-
90
-
91
-
92
-
93
-
94
-
95
-
96
-
97
-
98
-
99
-
100
-
101
-
102
-
103
-
104
-
105
-
106
-
107
-
108
-
109
-
110
-
111
-
112
-
113
-
114
-
115
-
116
-
117
-
118
-
119
-
120
-
121
-
122
-
123
-
124
-
125
-
126
-
127
-
128
-
129
-
130
-
131
-
132
-
133
-
134
-
135
-
136
-
137
-
138
-
139
-
140
-
141
-
142
-
143
-
144
-
145
-
146
-
147
-
148
-
149
-
150
-
151
-
152
-
153
-
154
-
155
-
156
-
157
-
158
-
159
-
160
-
161
-
162
-
163
-
164
-
165
-
166
-
167
-
168
-
169
-
170
-
171
-
172
-
173
-
174
-
175
-
176
-
177
-
178
-
179
-
180
-
181
-
182
-
183
-
184
-
185
-
186
-
187
-
188
-
189
-
190
-
191
-
192
-
193
-
194
-
195
-
196
-
197
-
198
-
199
-
200
-
201
-
202
-
203
-
204
-
205
-
206
-
207
-
208
-
209
-
210
-
211
-
212
-
213
-
214
-
215
-
216
-
217
-
218
-
219
-
220
-
221
-
222
-
223
-
224
-
225
-
226
-
227
-
228
-
229
-
230
-
231
-
232
-
233
-
234
-
235
-
236
-
237
-
238
-
239
-
240
-
241
-
242
-
243
-
244
-
245
-
246
-
247
-
248
-
249
-
250
-
251
-
252
-
253
-
254
-
255
-
256
-
257
-
258
-
259
-
260
-
261
-
262
-
263
-
264
-
265
-
266
-
267
-
268
-
269
-
270
-
271
-
272
-
273
-
274
-
275
-
276
-
277
-
278
-
279
-
280
-
281
-
282
-
283
-
284
-
285
-
286
-
287
-
288
-
289
-
290
-
291
-
292
 |
 |
